
When it comes to hanging curtains, a few inches can make a bigger difference than most people expect.
Move the rod higher, and the room feels taller. Extend it wider, and the window suddenly looks larger.
That’s why hanging curtains isn’t just about putting up a rod and calling it done.
The placement matters, the curtain size matters, measurements matter, and even the type of wall you’re working with matters.
Whether you’re drilling into the wall or looking for a no-drill option, this blog covers the steps that help curtains look like they belong there.
Project Details
- Working Time: 45–60 minutes
- Total Time: 1 hour (no drying or curing required for drilled installs)
- Difficulty Level: Beginner
- Estimated Cost: $15–$65 USD / £12–£50 GBP (hardware only; panels sold separately)
- Number of People Needed: 2 recommended; one holds the rod level, one marks
- Best Time to Do This: Any season; avoid high-humidity days if patching walls nearby
- Number of Sessions: 1 session
- Can You Stop Mid-Project? Yes, a safe stopping point after Step 1, once bracket positions are marked, and before drilling
- Steps Requiring Waiting: None for standard installs. If using fast-set wall filler to repair old holes first, allow 2 hours of dry time before drilling
What to Know Before Hanging Curtains
Curtains do four things at once: control light, add privacy, improve insulation, and shape how a room reads visually.
Get the placement wrong, and all four suffer.
Panels hung too low and too narrow to chop the window down to size.
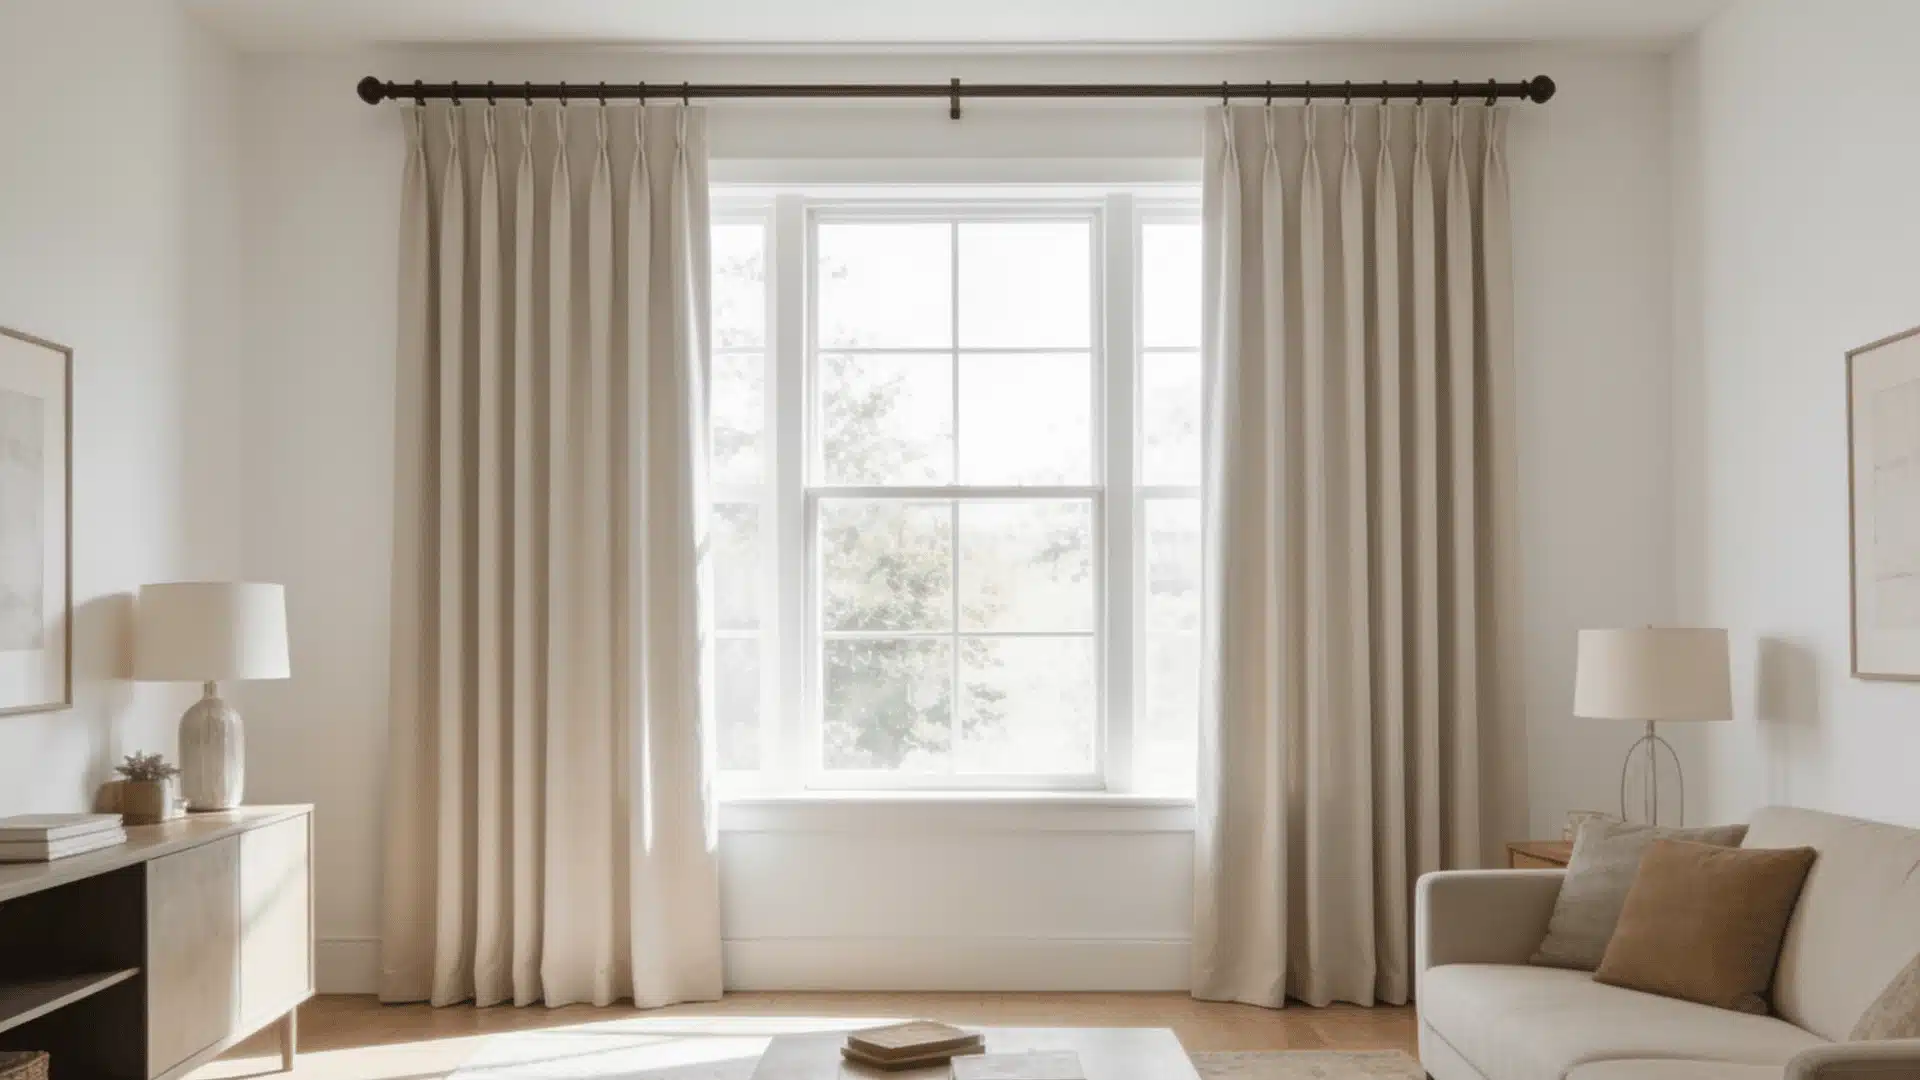
Panels at the right height close to the ceiling, extending well past the frame, make the same window look twice as large.
Before you pick up a drill or reach for adhesive strips, two measurements determine everything: rod width and panel length.
Both come from the window itself. Get them first.
Measure Before You Buy or Hang
Measuring Window Width
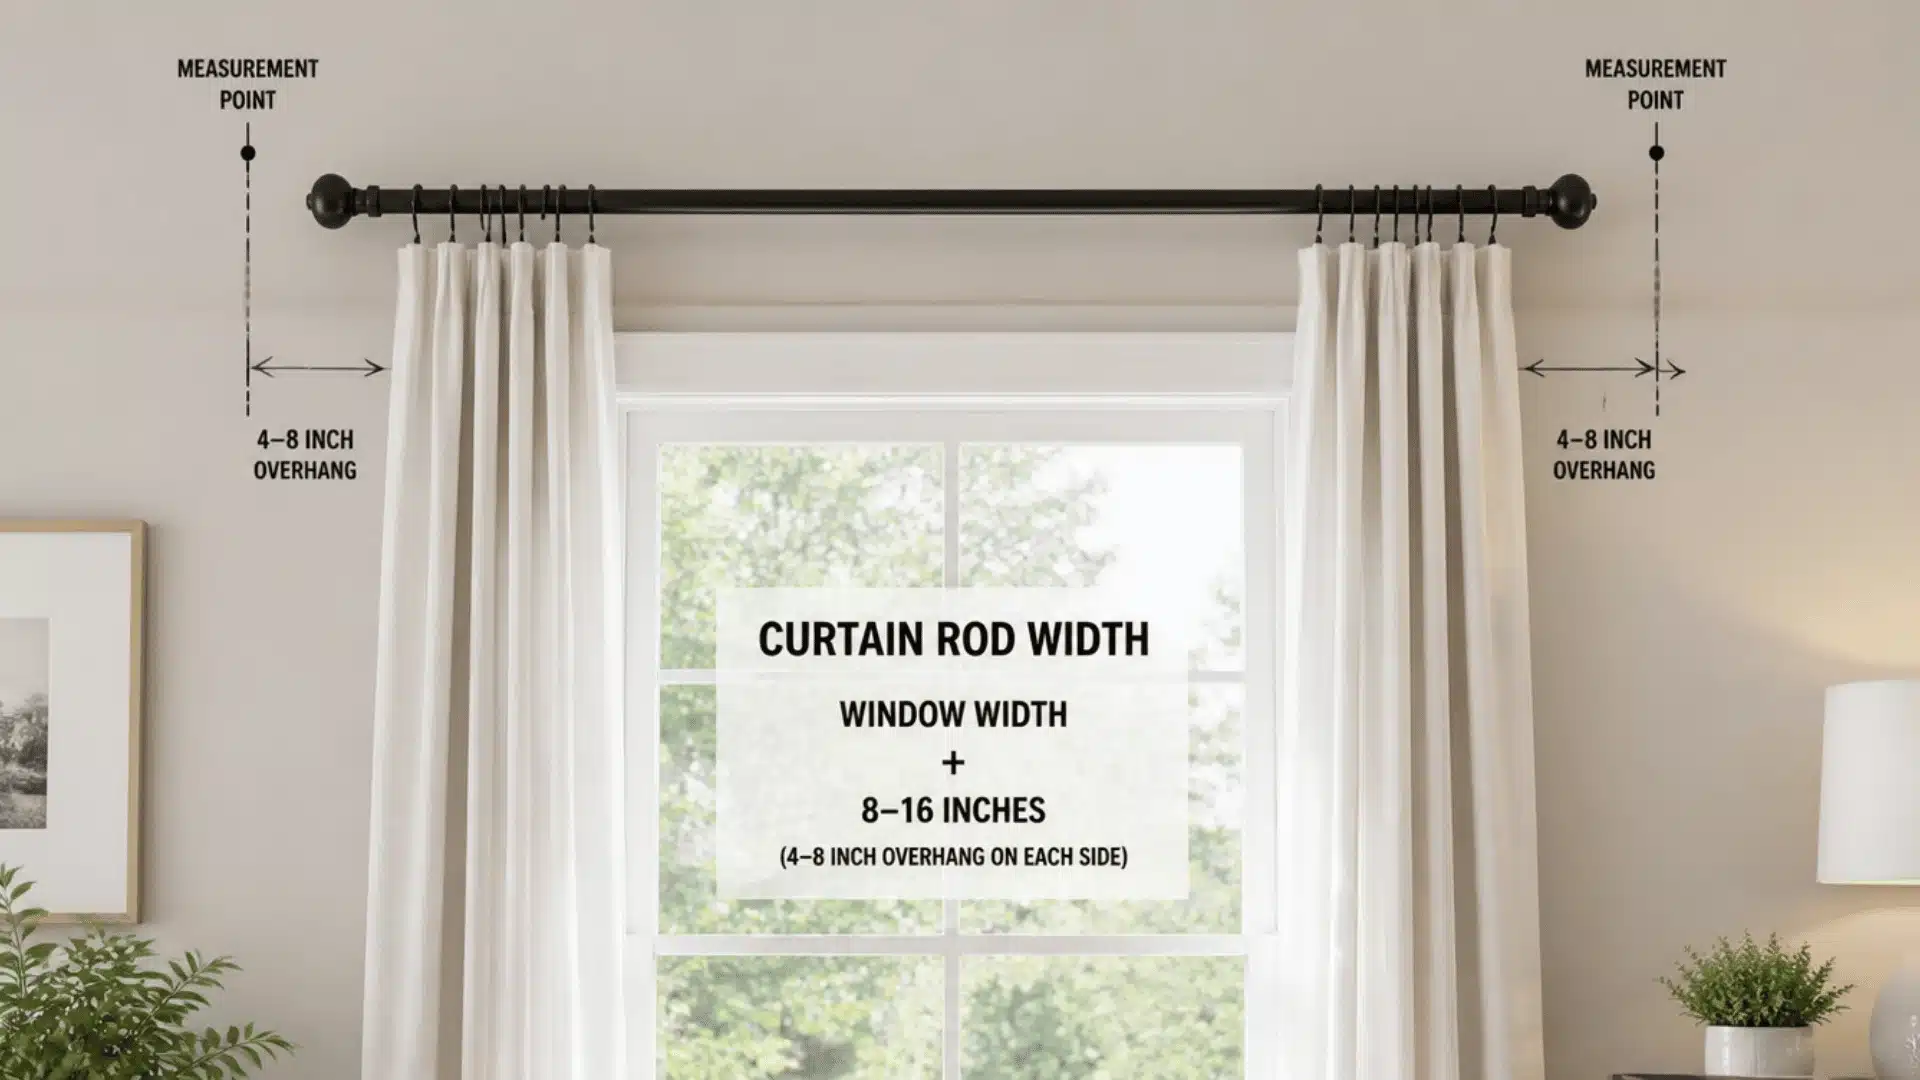
Measure the frame from outer edge to outer edge, then add the overhang: 6 inches per side for windows under 48 inches wide, 8–12 inches per side for wider ones.
A 36-inch window needs a rod at least 48 inches wide. A 60-inch window needs at least 76 inches plus a center support bracket.
For fullness, panels should total 1.5–2 times the rod width. Sheers need at least 2 times. For a flat, modern finish, 1.25 times is enough.
Measuring Curtain Length
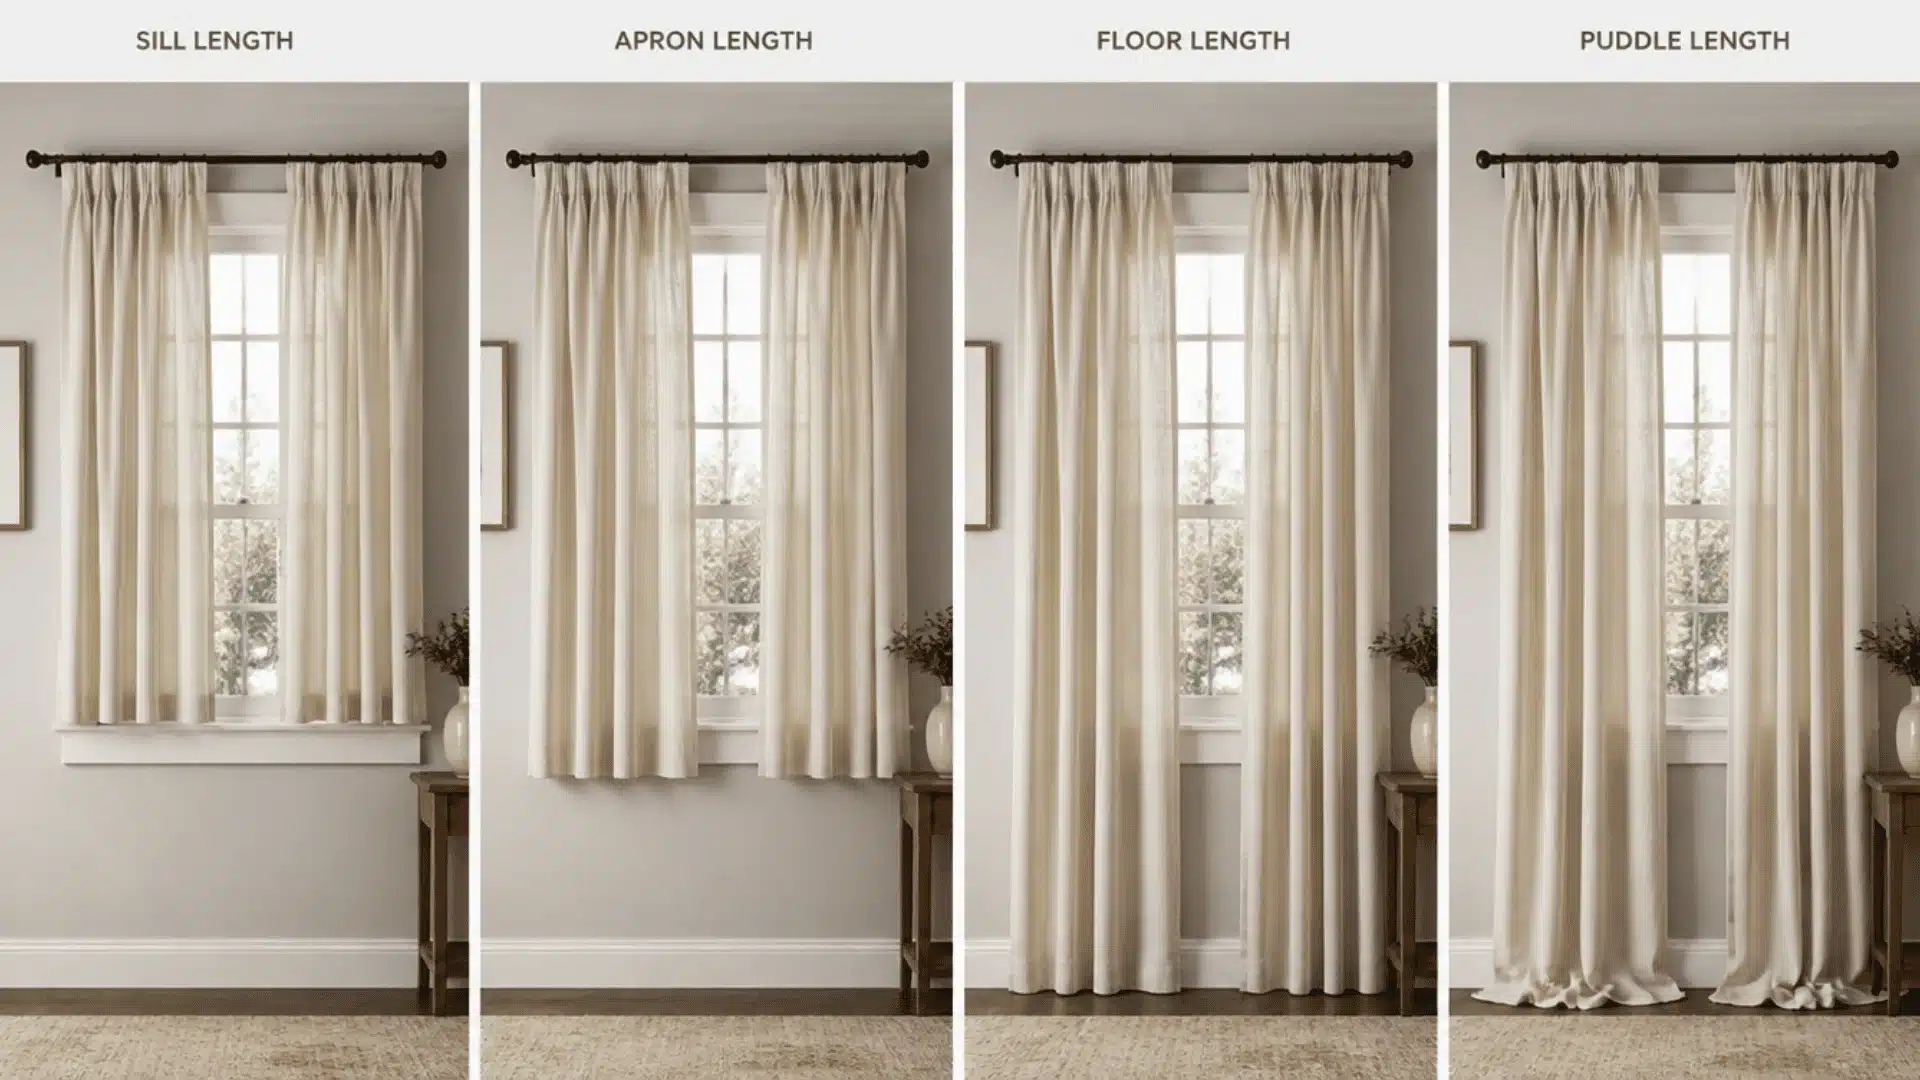
Measure from where the rod will sit, not from the window frame down to your chosen endpoint. Mark the rod position on the wall first, then measure.
Measuring from the frame instead of the rod is the most common reason panels come up short.
- Sill length: Hem falls within 1/2 inch of the sill. Best for kitchens, bathrooms, and windows above radiators.
- Apron length: Hem falls 4–6 inches below the sill. Works for casual rooms; reads intentional, not short.
- Floor length: Hem sits 1/2 inch above the floor. The most common choice for living rooms and bedrooms.
- Puddle length: Hem pools 2–6 inches on the floor. A formal choice high-maintenance in high-traffic areas.
Tools and Supplies You Need
For Drill-Mounted Installation
Essential
- Curtain rod (sized to window width plus total overhang)
- Curtain rod brackets (usually included with the rod)
- Drill with 3/16-inch bit for drywall; 1/8-inch bit for studs
- Level – a 24-inch torpedo level or longer
- Tape measure
- Pencil
- Phillips #2 screwdriver
- Wall anchors rated for a minimum of 20 lbs per bracket for drywall without stud access
Recommended
- Stud finder, substitute: knock along the wall and listen for a solid sound versus a hollow sound
- Painter’s tape for marking bracket positions; substitute: small sticky notes
- Laser level, substitute: spirit level with two matching measurements from the window frame
Optional
- Curtain clip rings (if panels have no rod pocket or grommet)
- Center support bracket for rods spanning more than 60 inches
For No-Drill Installation
Essential
- Adhesive curtain rod brackets rated for your curtain weight, OR
- Tension rod sized to fit inside or across your window recess, OR
- Command hooks rated for a minimum of 4 lbs per hook
Recommended
- Isopropyl alcohol wipes to clean the wall surface before applying adhesive; substitute: damp cloth, fully dried before application
- Painter’s tape to mark positions before committing adhesive; substitute: small pencil marks
Hardware Based on Wall Type and Curtain Weight
Wall type changes everything. Standard plastic wall anchors work in drywall for panels up to 15 lbs per bracket.
Toggle bolts handle heavier loads up to 50 lbs in drywall without stud access.
Masonry walls need masonry drill bits (5mm) and rawl plugs, not plastic anchors. For plaster walls in older homes, use toggle bolts; plaster crumbles around standard anchors under load.
Not sure what’s behind your wall? Knock and listen: drywall sounds hollow; plaster sounds denser and slightly duller.
Deciding Where the Curtain Rod Should go
Recommended Height Above the Window
The standard placement is 4–6 inches above the top of the window frame. For an 8-foot ceiling, this puts the rod roughly halfway between the frame and the ceiling, balanced without feeling forced.
For a taller, more architectural look, hang the rod 1–2 inches below the ceiling line. Ceiling-height curtains make standard-height rooms read significantly taller.
This approach works best when panels are floor-length; it looks odd with sill-length panels.
Recommended Width Beyond the Window Frame
Extend brackets 6 inches beyond the frame on each side for windows up to 48 inches wide. Go 8–12 inches per side for larger windows.
This lets panels stack fully off the glass when open.
It keeps the window exposed and the room brighter.
Brackets placed too close to the frame mean fabric permanently covers part of the glass even when curtains are open.
How to Hang Curtains With a Drill?
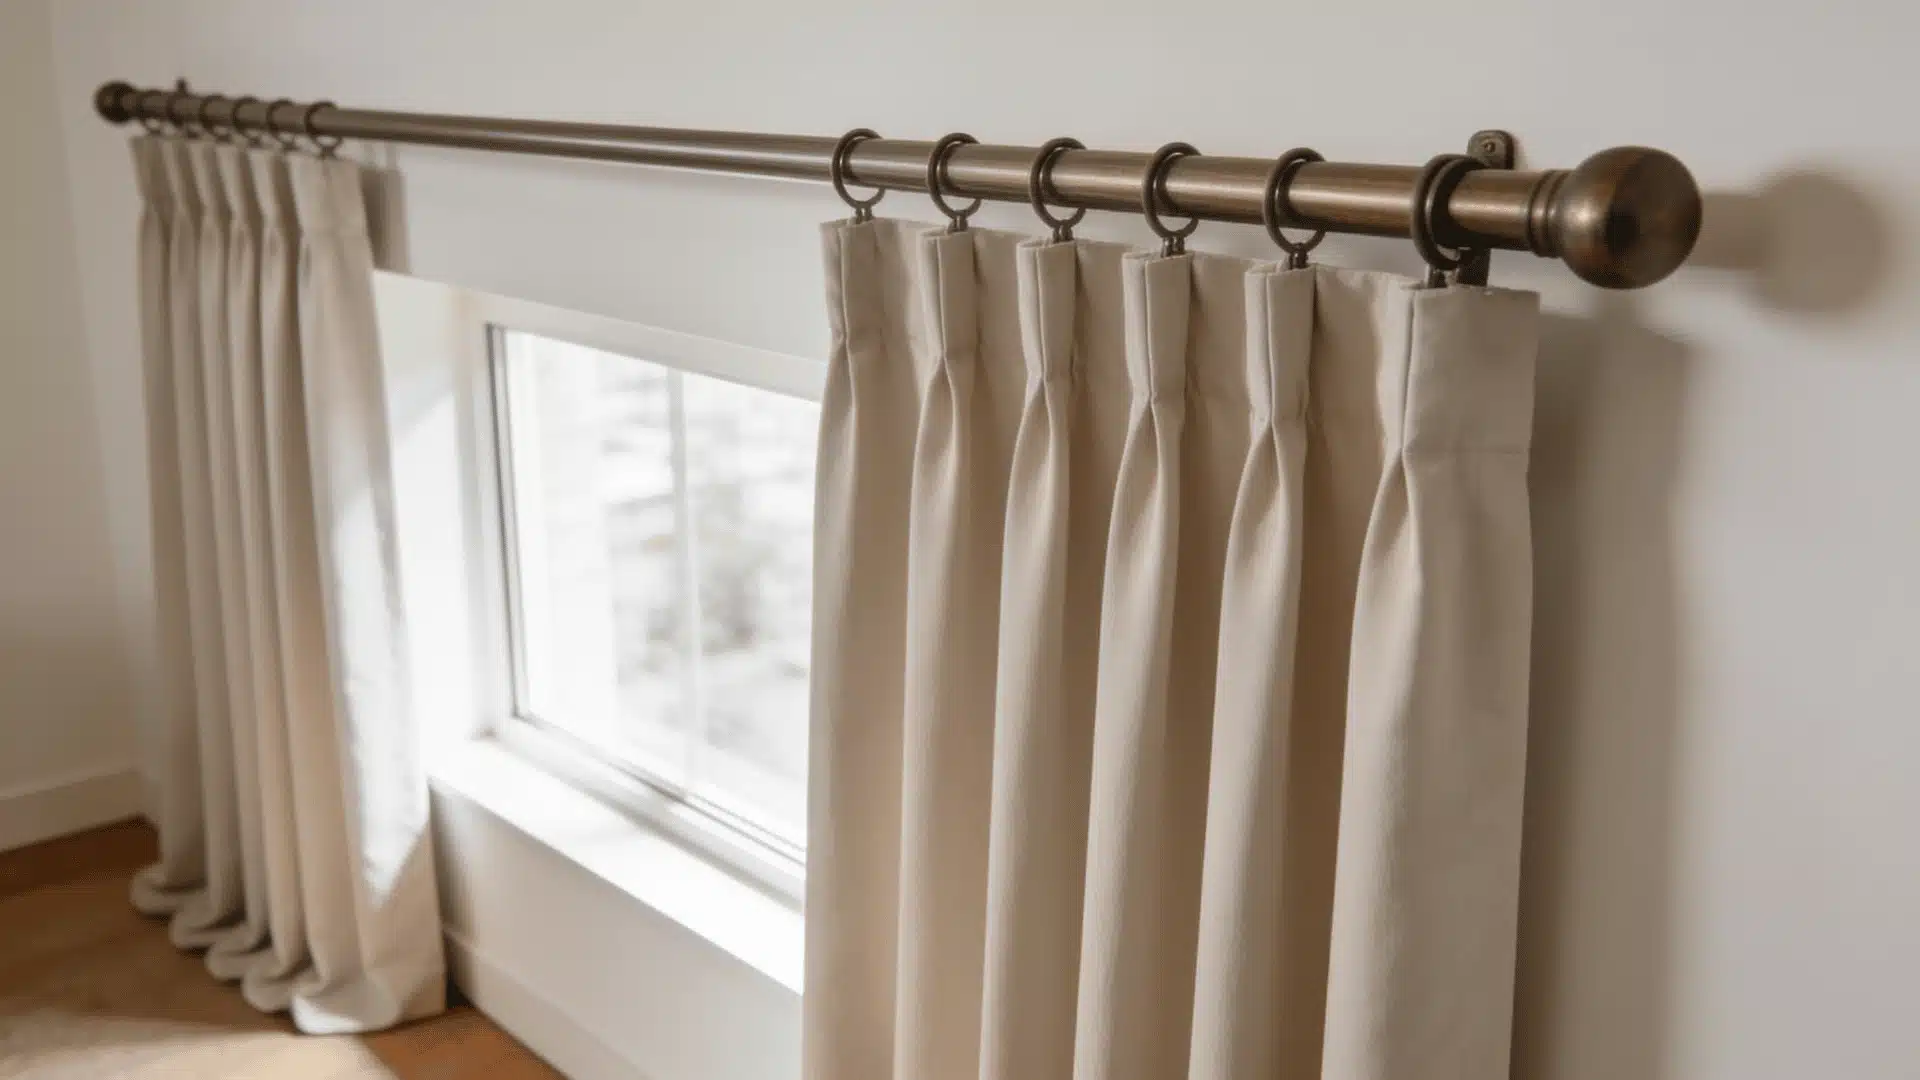
Mark the Bracket Locations
Start at the top of the window frame. Measure straight up 4 inches for a standard look and 6 inches for a slightly taller effect. Mark that height on both sides of the window with a pencil.
Now measure outward from each side of the frame to your chosen overhang (6–12 inches). Mark those points at the same height as your first marks.
Hold a level horizontally between both bracket marks. If one is off, move the mark, not the level.
Always measure up from the window frame, not down from the ceiling.
Ceilings vary by up to 1/2 inch across a single wall in older homes; the window frame is your fixed reference point.
Hold each bracket against its marked position and use a pencil to mark through the screw holes – 2–4 pencil dots per bracket depending on bracket style.
Install Wall Anchors if Needed
Run a stud finder across the wall, starting 6 inches past your outer bracket mark and moving inward.
A solid reading means there’s a stud. Mark the stud edge. If a stud falls within 1 inch of your bracket mark: drill directly into it with a 1/8-inch pilot bit. No anchor needed. A stud screw holds far more than any wall anchor.
If no stud is available: drill anchor holes with a 3/16-inch bit, insert plastic wall anchors flush with the surface, then drive bracket screws into them.
For curtains heavier than 15 lbs per bracket, use toggle bolts instead of plastic anchors.
If the drill spins freely and the wall feels soft, you’ve hit the paper face of drywall without catching the gypsum core.
Back the screw out and move 1/2 inch left or right. If it keeps happening, switch to toggle bolts; they open behind the wall and hold without needing the gypsum core.
Secure the Curtain Rod Brackets
Hold each bracket flat against the wall.
Drive screws in slowly and stop when the bracket sits flush with no wobble. Do not overtighten into anchors; you will strip them.
Once screws are seated, push each bracket firmly downward. If it shifts, the anchor hasn’t set. Remove it, let the hole dry for 24 hours, and re-anchor.
Check that both brackets sit at the same depth from the wall face.
Mismatched depths angle the rod forward on one side, and it will sit crooked when viewed from below.
Hang the Curtains on the Rod
Thread the panels onto the rod before mounting it. Once the rod is up and level, taking it back down to add a forgotten panel costs time and risks pulling a bracket loose.
Rod-pocket panels: Feed the rod through the pocket from one end. Ease fabric along without bunching it. Hard at one end, or the pocket seam will strain and split.
Grommet panels: Alternate which direction each grommet faces, front, back, front, back. This creates even, natural folds when closed.
Clip rings: Space clips no more than 6 inches apart across the panel width. Wider gaps cause panels to sag in the middle and gap at the edges.
Make Final Adjustments
Rest the rod in both brackets and hold a level along its top edge. Most brackets have a small side set screw that adjusts rod height by up to 1/4 inch. Use it to correct any last-minute tilt.
Tighten all set screws once the level is confirmed.
Check that panels fall to your intended hem height consistently across the full width.
Steam panels lightly with a garment steamer held 2 inches from the fabric.
Let them hang for 24 hours before marking a final hem; fabric drops slightly as it relaxes off the fold.
Test that panels open and close without catching on the brackets. If the rod is stiff to slide, run a dry bar of soap lightly along the rod surface.
It works on both metal and wooden rods and leaves no residue on the fabric.
How to Hang Curtains Without Drilling Holes?
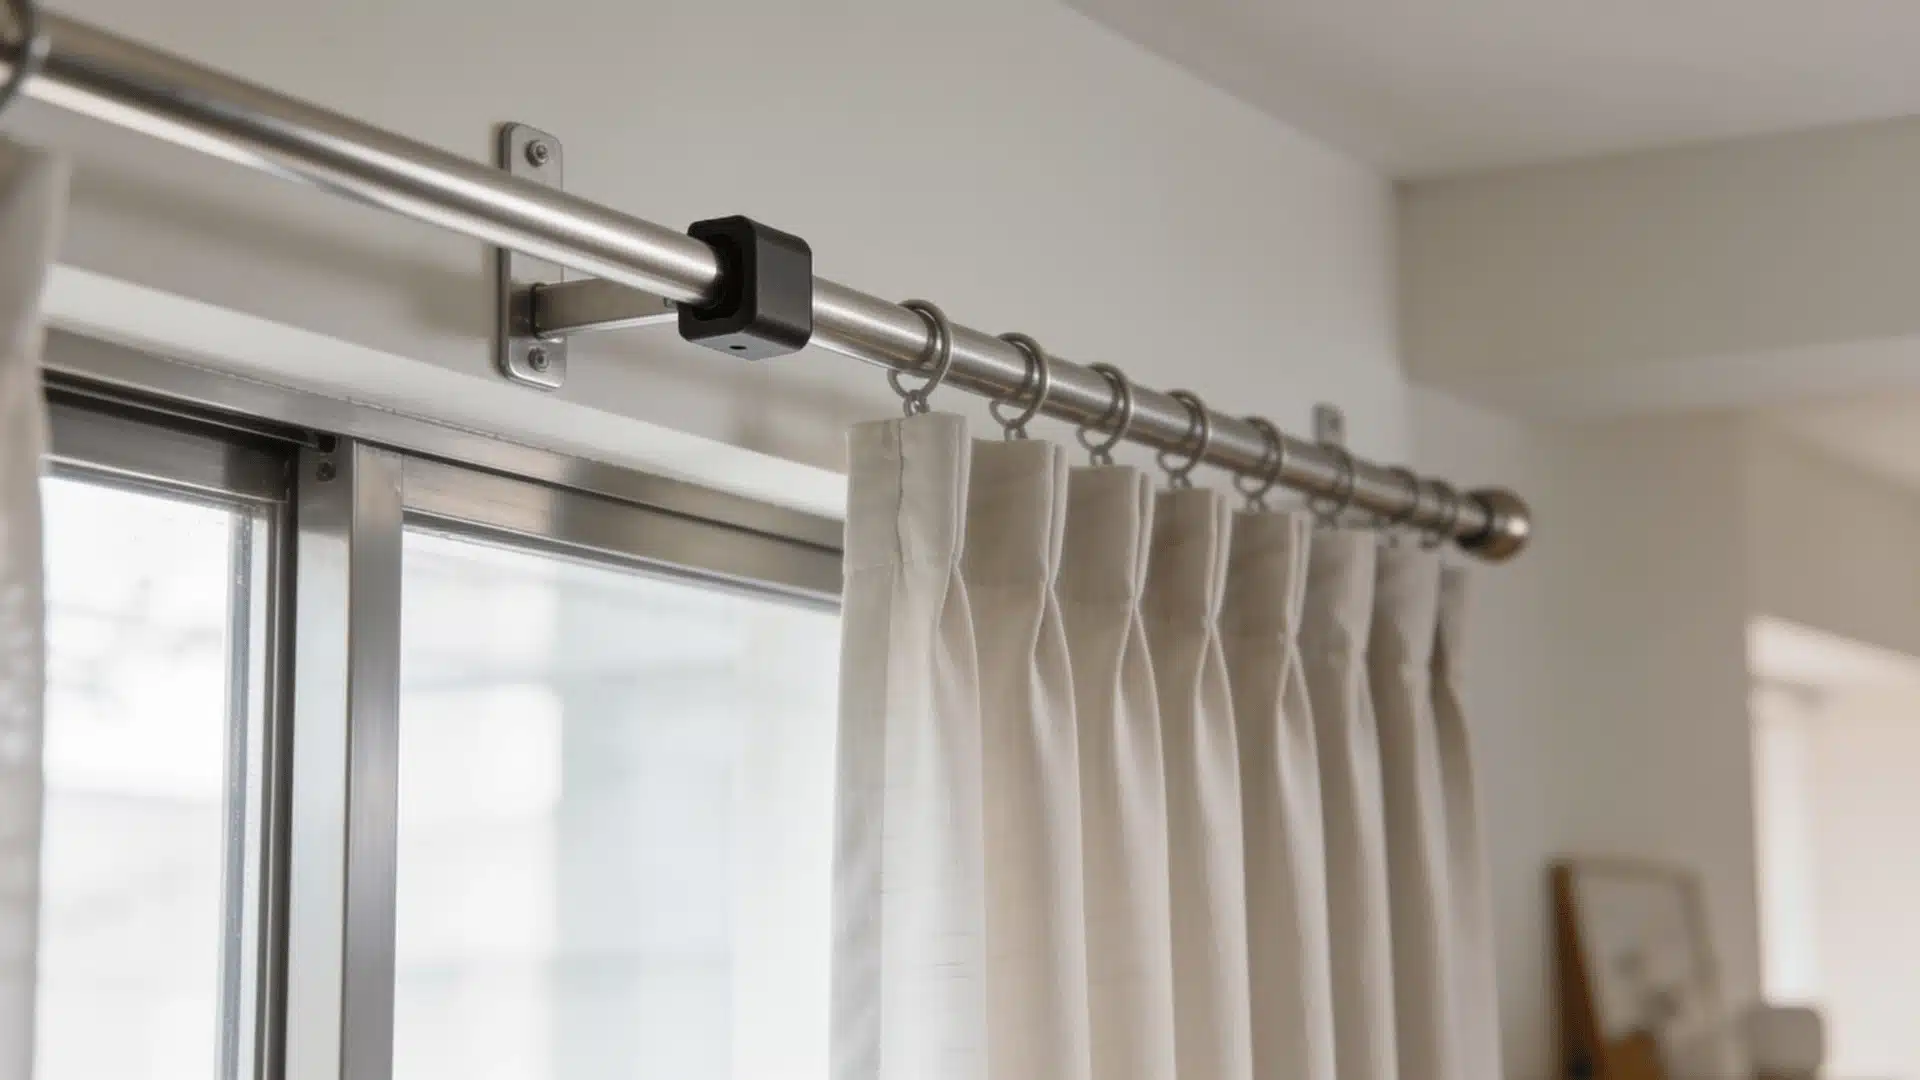
Using Adhesive Curtain Rod Brackets
Adhesive brackets bond to smooth, sealed surfaces: painted drywall, tile, glass, and metal. They do not hold on textured walls, bare brick, unpainted plaster, or any surface with a chalky or powdery paint finish.
Check the weight rating before buying. Most adhesive curtain brackets hold 6–15 lbs total.
That covers unlined cotton and sheer panels but not blackout or thermal-lined curtains, which commonly weigh 12–25 lbs per panel pair.
Clean the surface with isopropyl alcohol and let it dry for at least 60 seconds. Press the bracket firmly for 30 seconds. Then wait a full 24 hours before hanging any weight.
Applying weight the same day is the primary reason adhesive brackets fail. Not the product. The timing.
Using Tension Rods
Tension rods press outward against two opposing walls inside a window recess and hold themselves in place. No hardware required.
They work well for café-style curtains, shears, and any window with a recess at least 2 inches deep.
They are not suitable for floor-length panels or heavy fabric.
Size the rod to the exact recess width a rod that needs more than 1 inch of compression to fit will lose tension over time and drop.
A rod that fits too loosely will drop immediately.
Using Command Hooks
Two Command Large Strip hooks per bracket, spaced evenly and mounted at the same height, can support a lightweight curtain rod.
Position hooks using a level and painter’s tape before removing the adhesive backing. Press for 30 seconds and wait 1 hour before hanging.
This method suits lightweight shears and unlined cotton only. It is not rated for anything heavier.
Using Magnetic Curtain Rods
Magnetic rods attach to steel or iron frames using built-in magnets.
They work on steel-framed windows, metal doors, and some older casement windows. They will not hold on to aluminum frames or uPVC.
No mounting, no adhesive. Place the rod at your chosen height, check the level, and hang the panels. Total setup: under 3 minutes.
Most magnetic rods handle up to 10 lbs of panel weight.
Pictures of Different Ways to Hang Curtains
1. Clip Ring Curtains
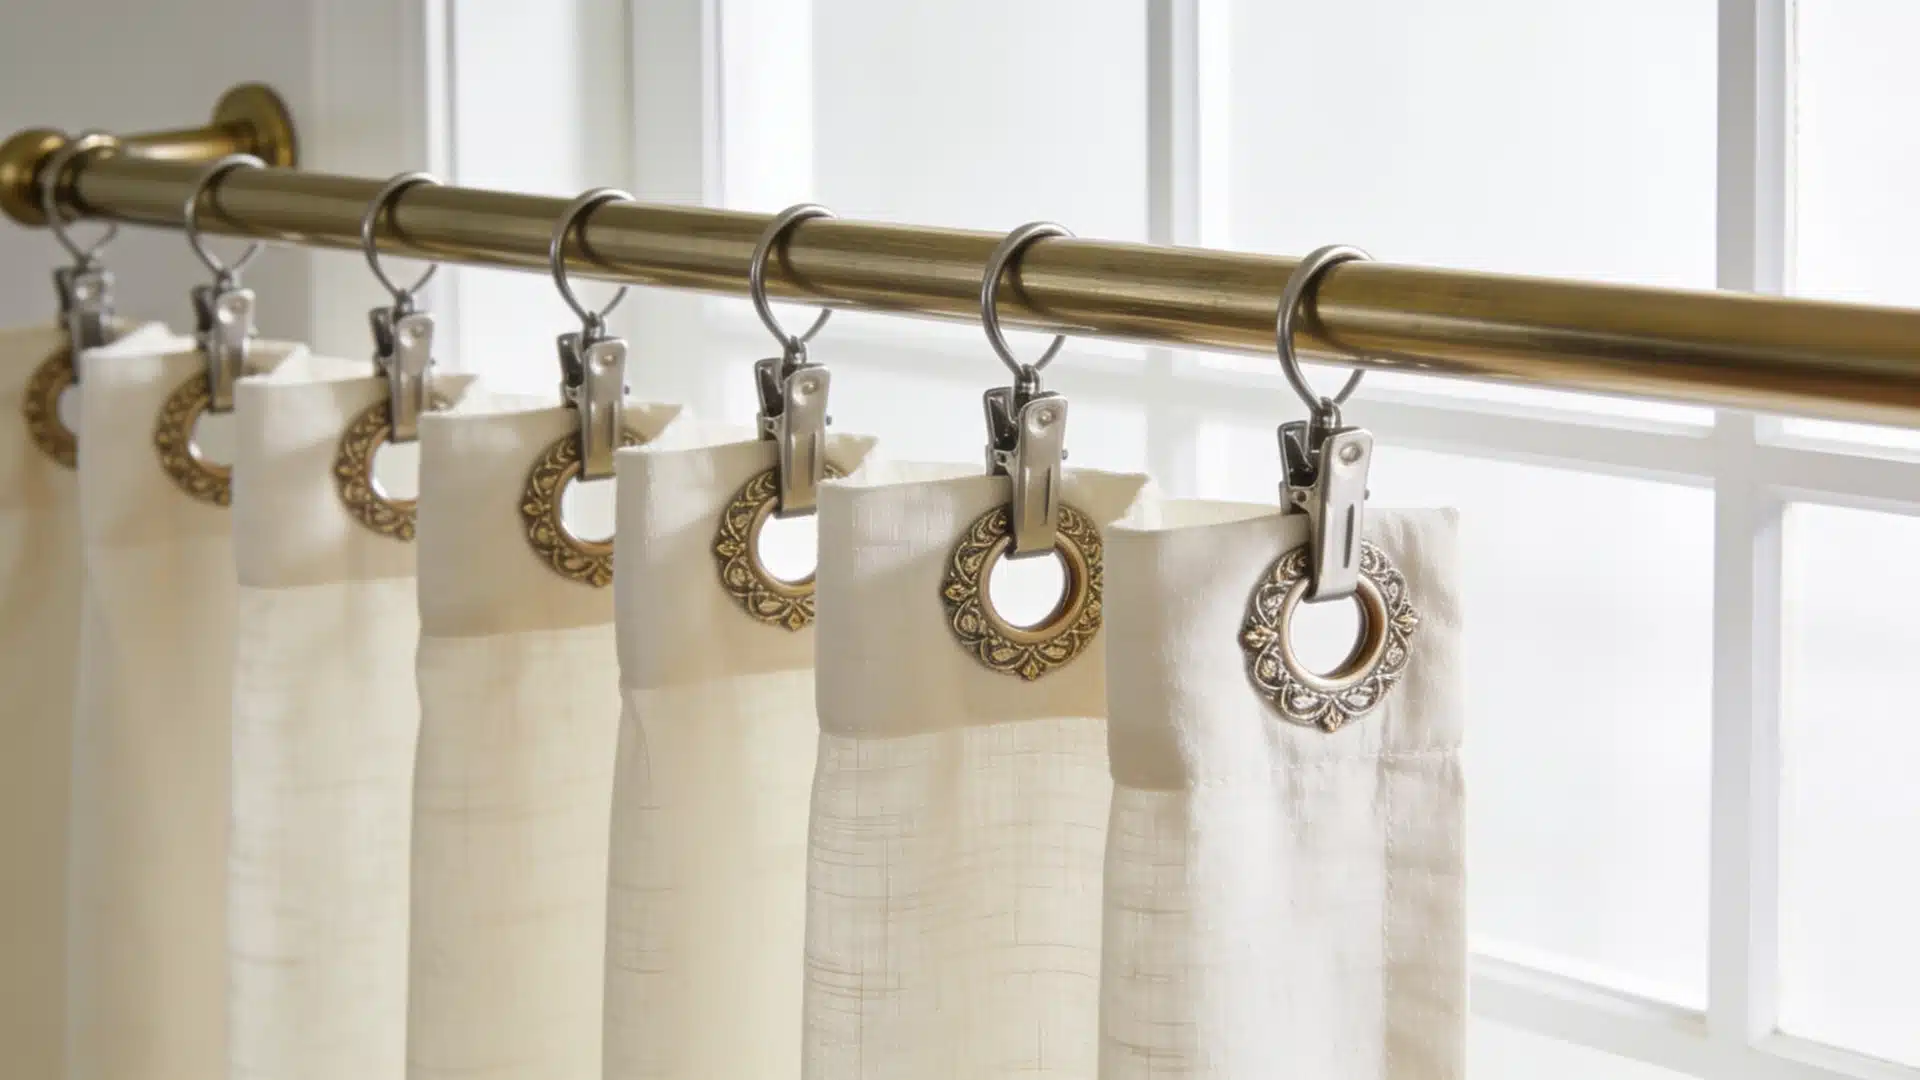
Metal clips attach to the top edge of any panel and hang from rings on the rod.
Space clips no more than 6 inches apart. A good option for panels not designed with a specific hanging style.
2. Pinch Pleat Curtains
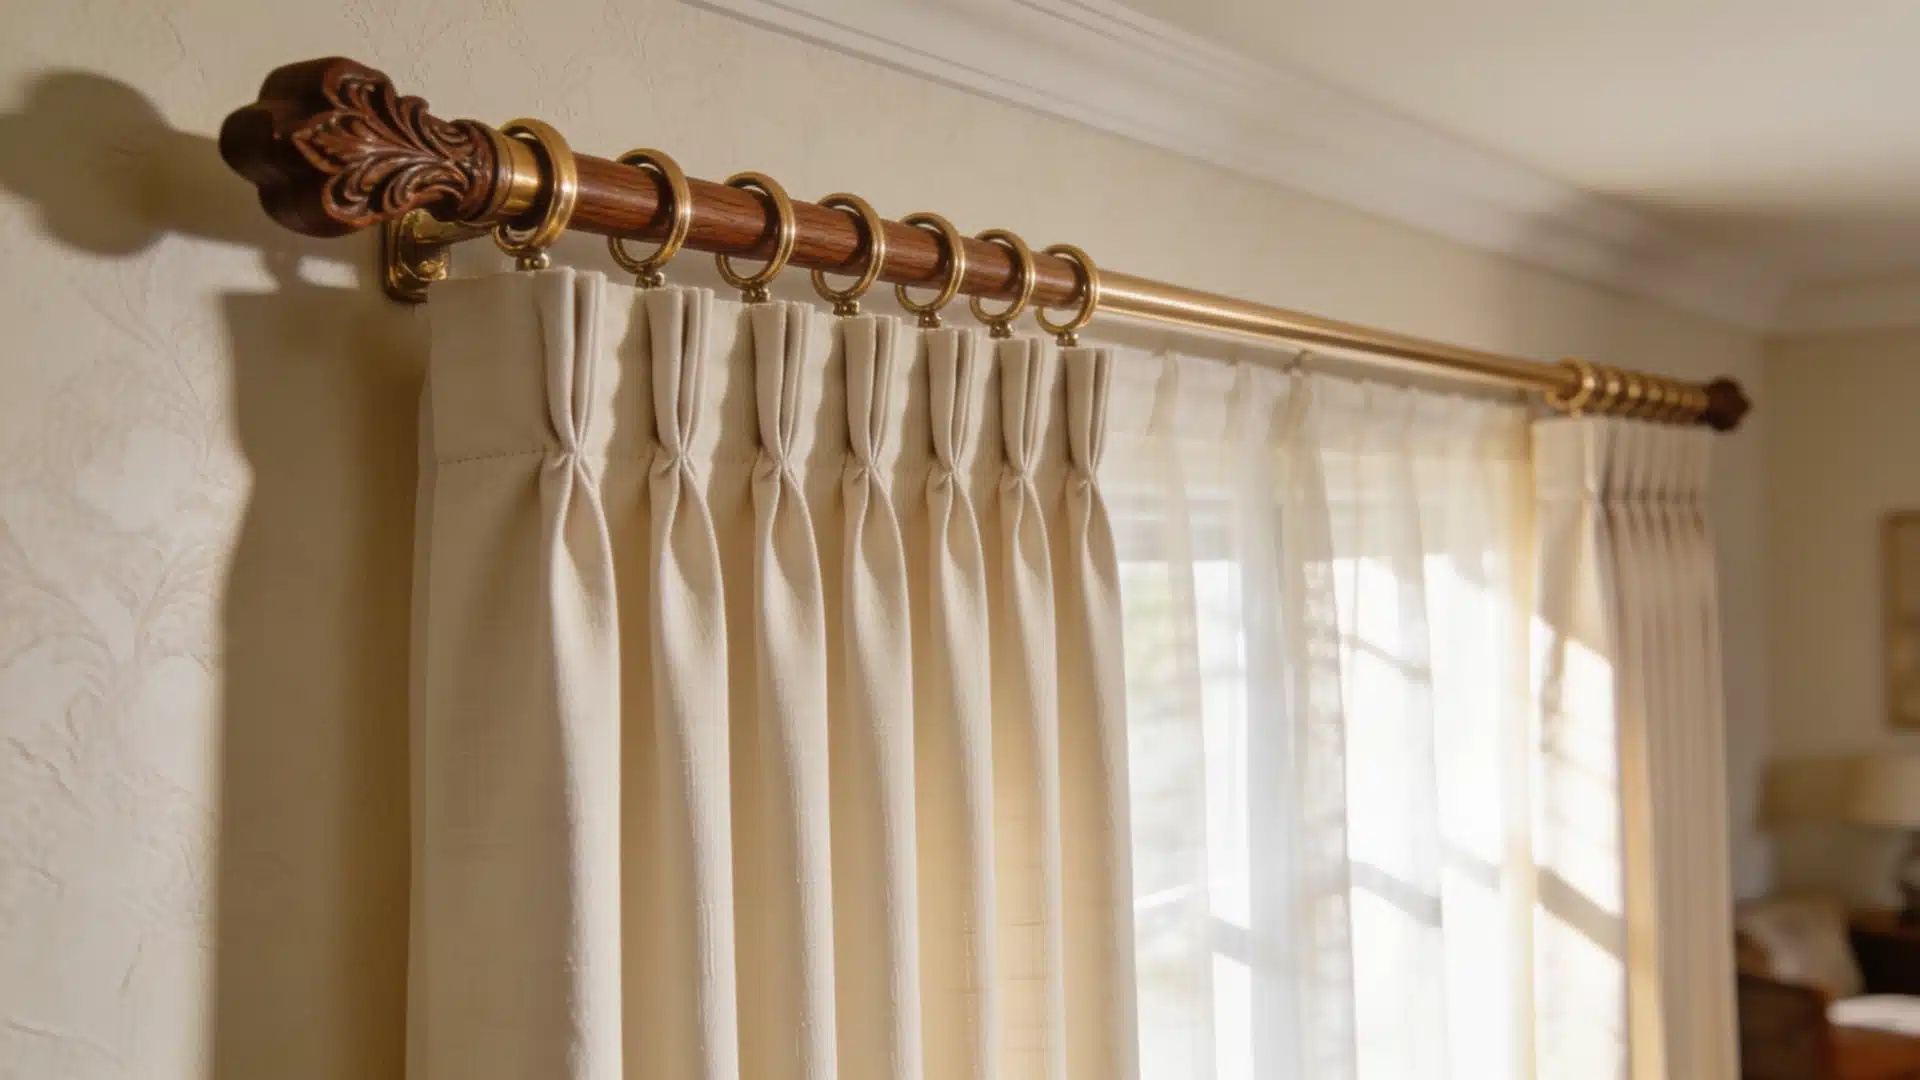
Panels are gathered into evenly spaced pinched folds at the top, then hooked onto curtain rings or a track. Gives a formal, tailored look.
Needs a hook-compatible rod or track system.
3. Eyelet Curtains
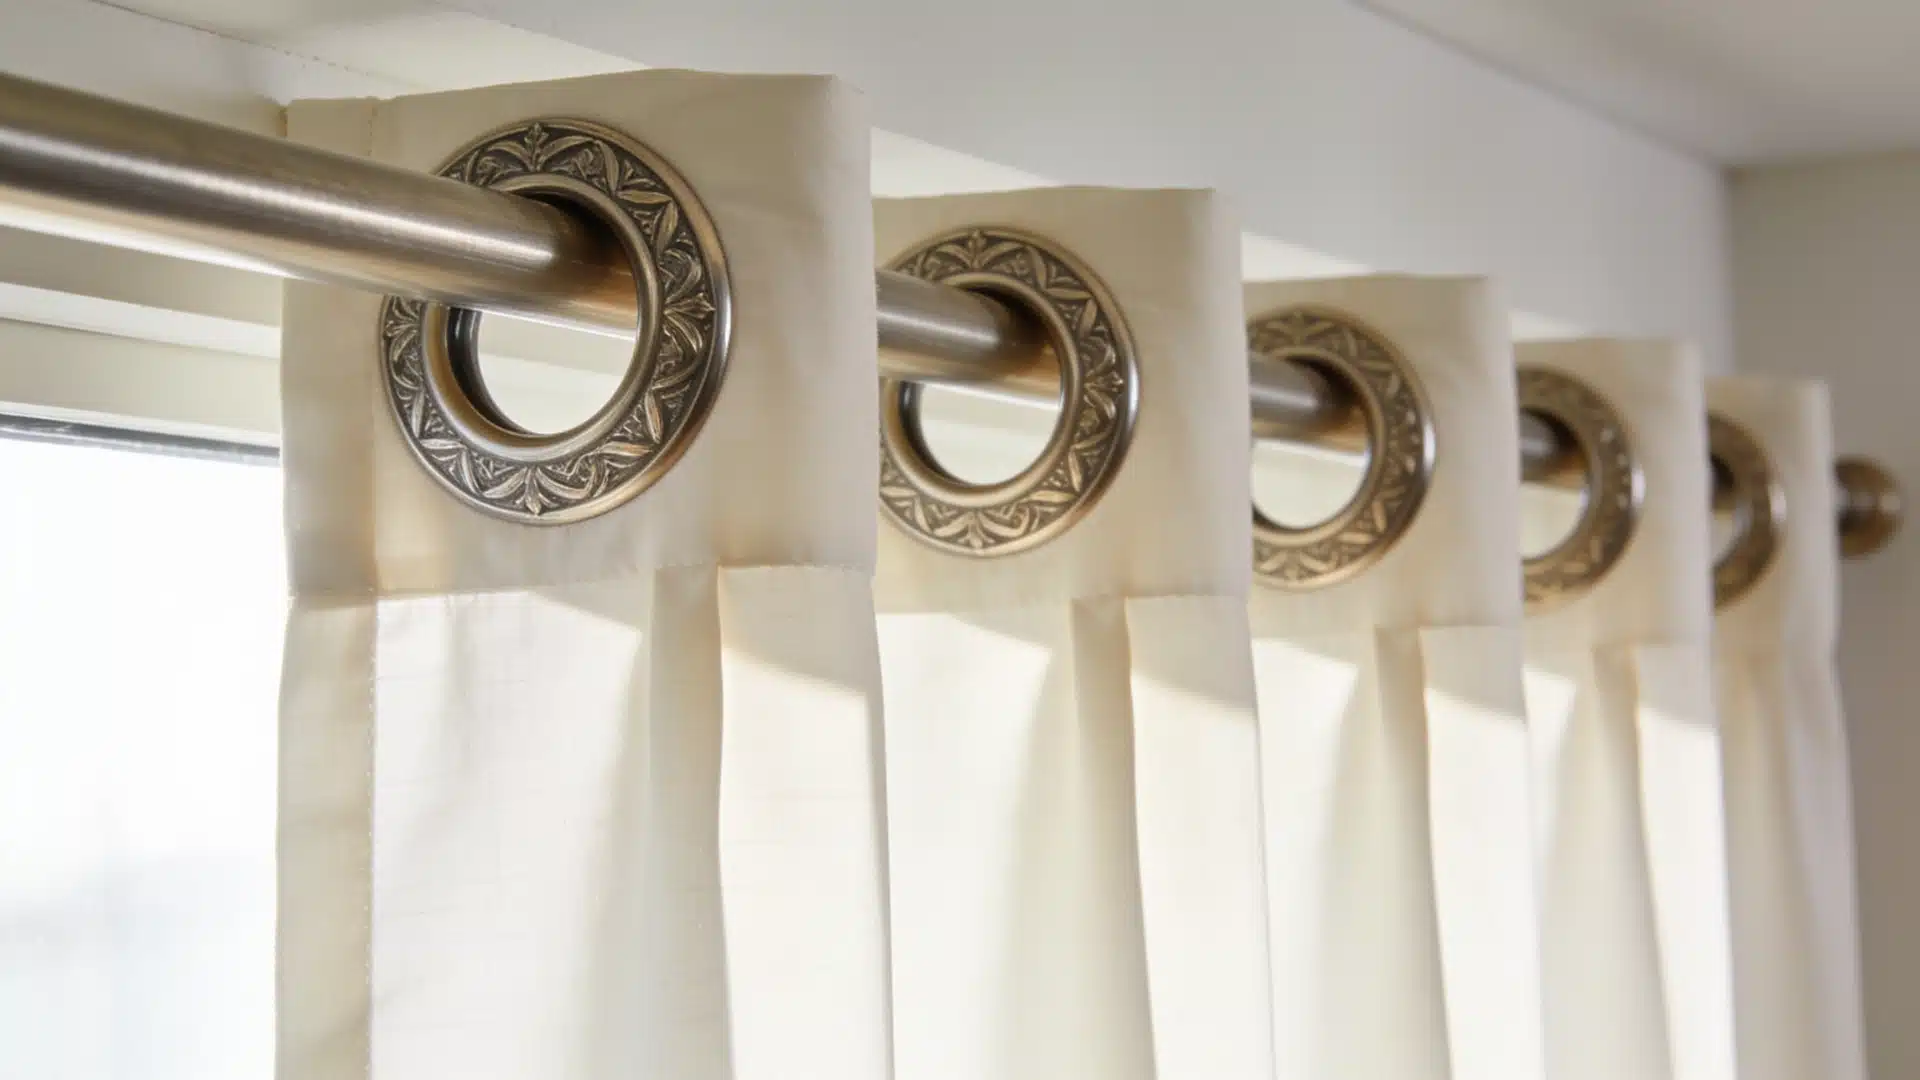
Similar to grommets but typically larger and more decorative. The rod passes directly through the eyelets.
Common in UK homes, the same principle as grommet curtains with a slightly different finish.
4. Curtains on a Track System
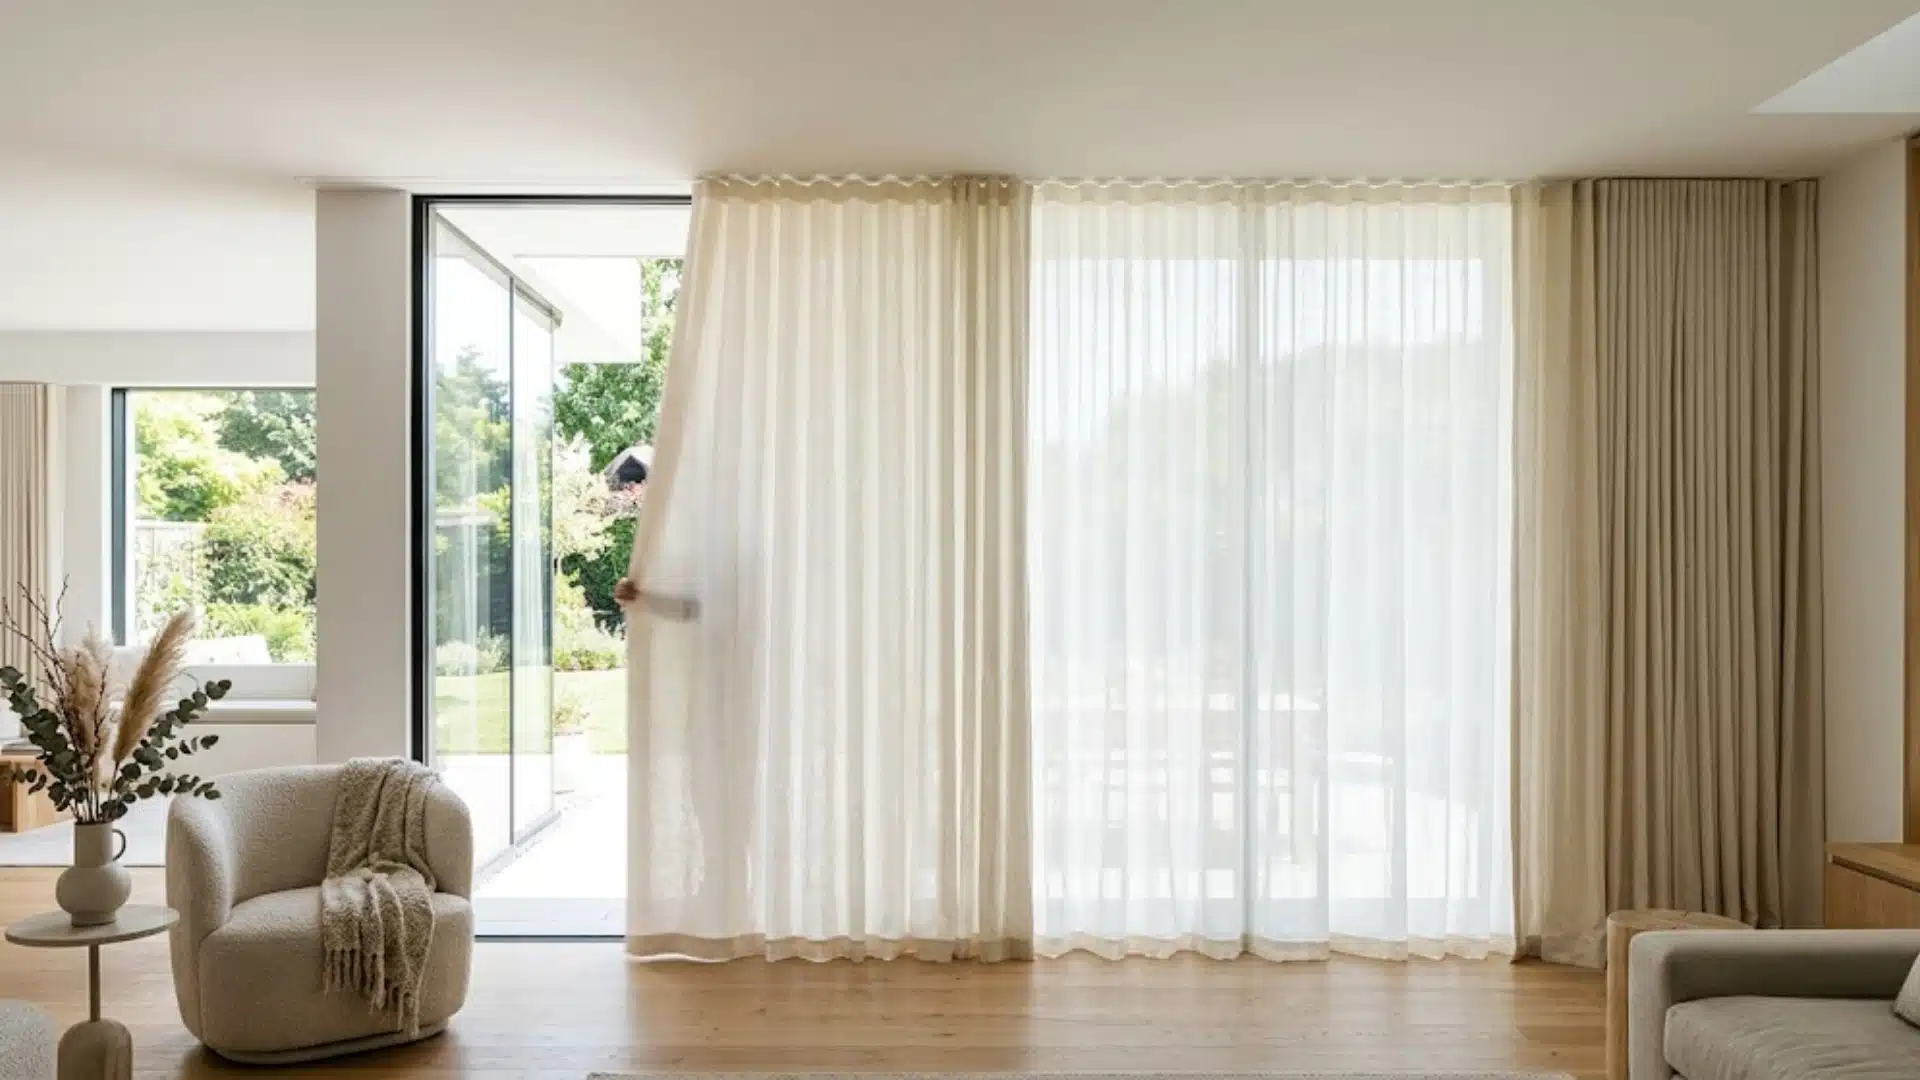
Panels clip or hook onto a ceiling-mounted or wall-mounted track instead of a rod.
The track stays hidden above the panel. Common in bay windows and rooms where a visible rod doesn’t suit the space
5. Sheer Curtains on a Double Rod
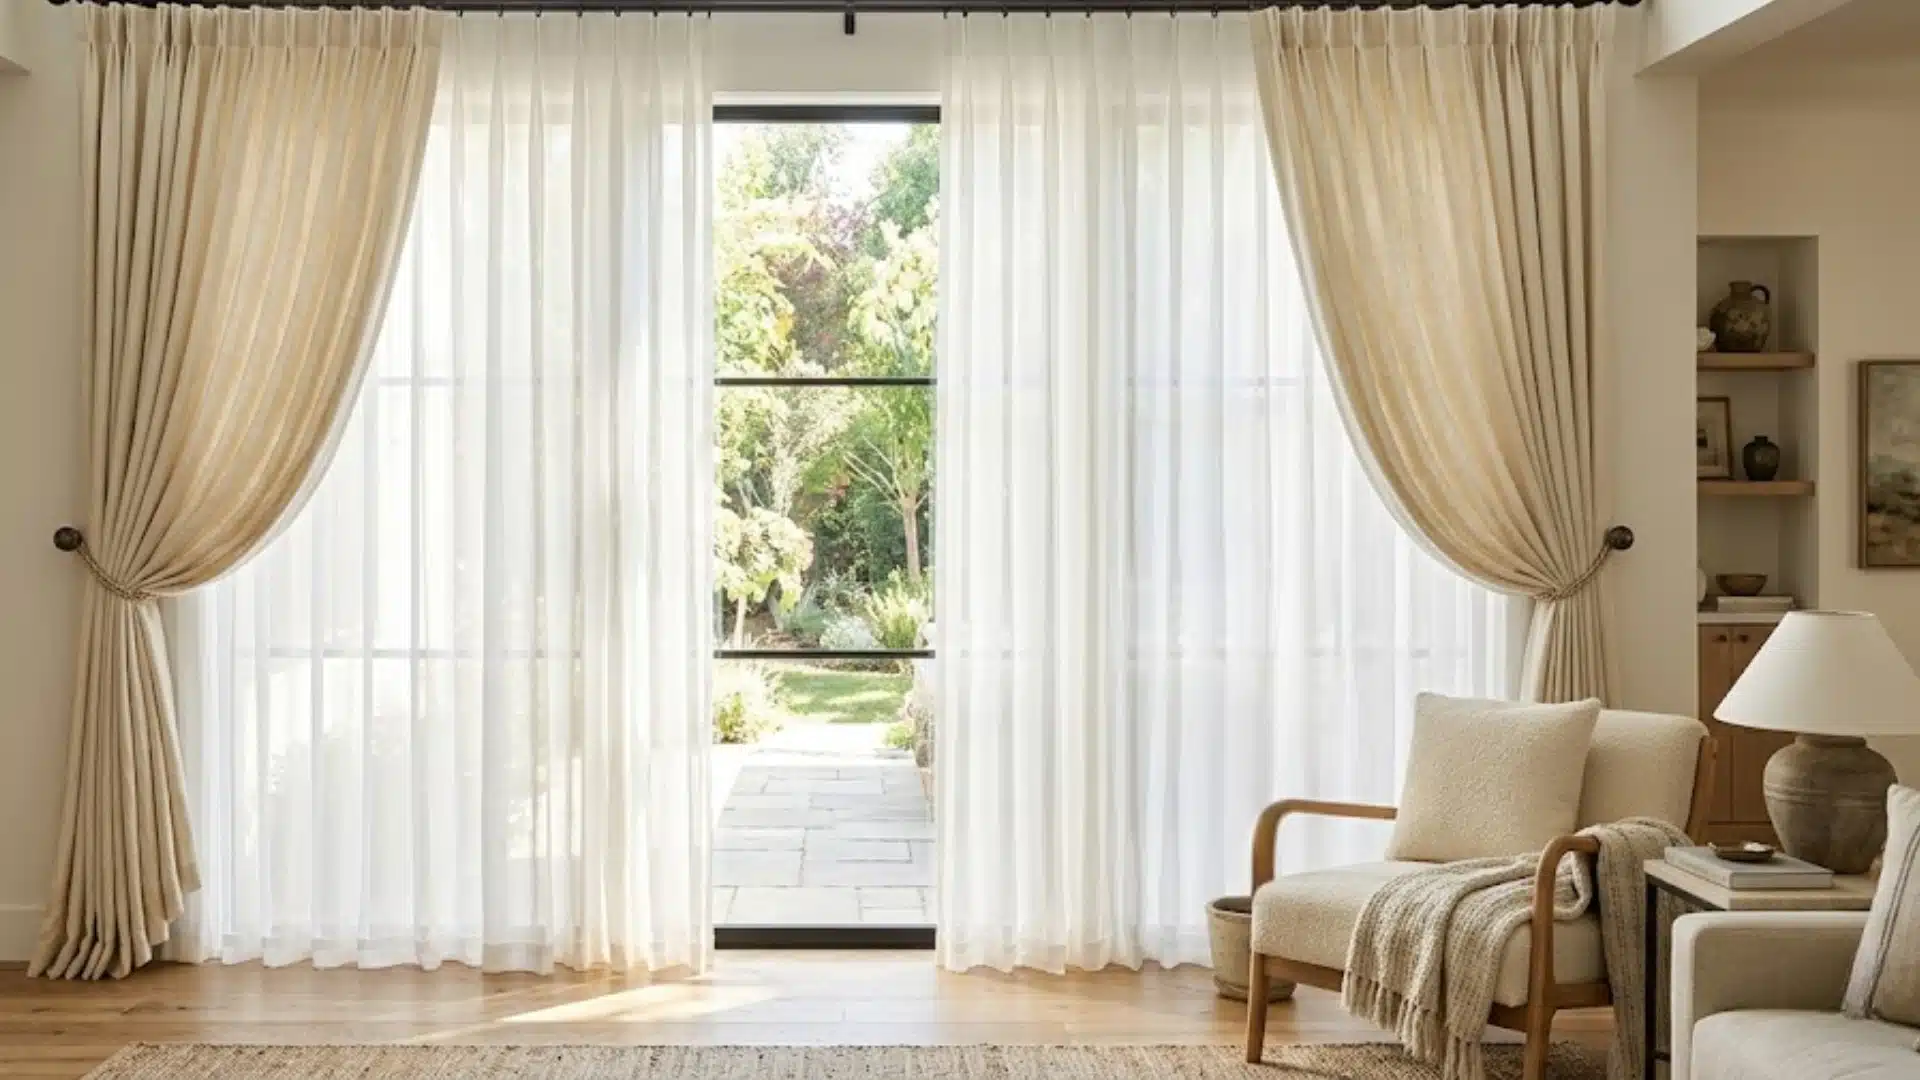
A double rod bracket holds two rods at once sheers on the inner rod and heavier panels on the outer.
Both hang independently so you can control light and privacy separately without two separate installations.
6. Tension Rod Curtains Inside the Recess
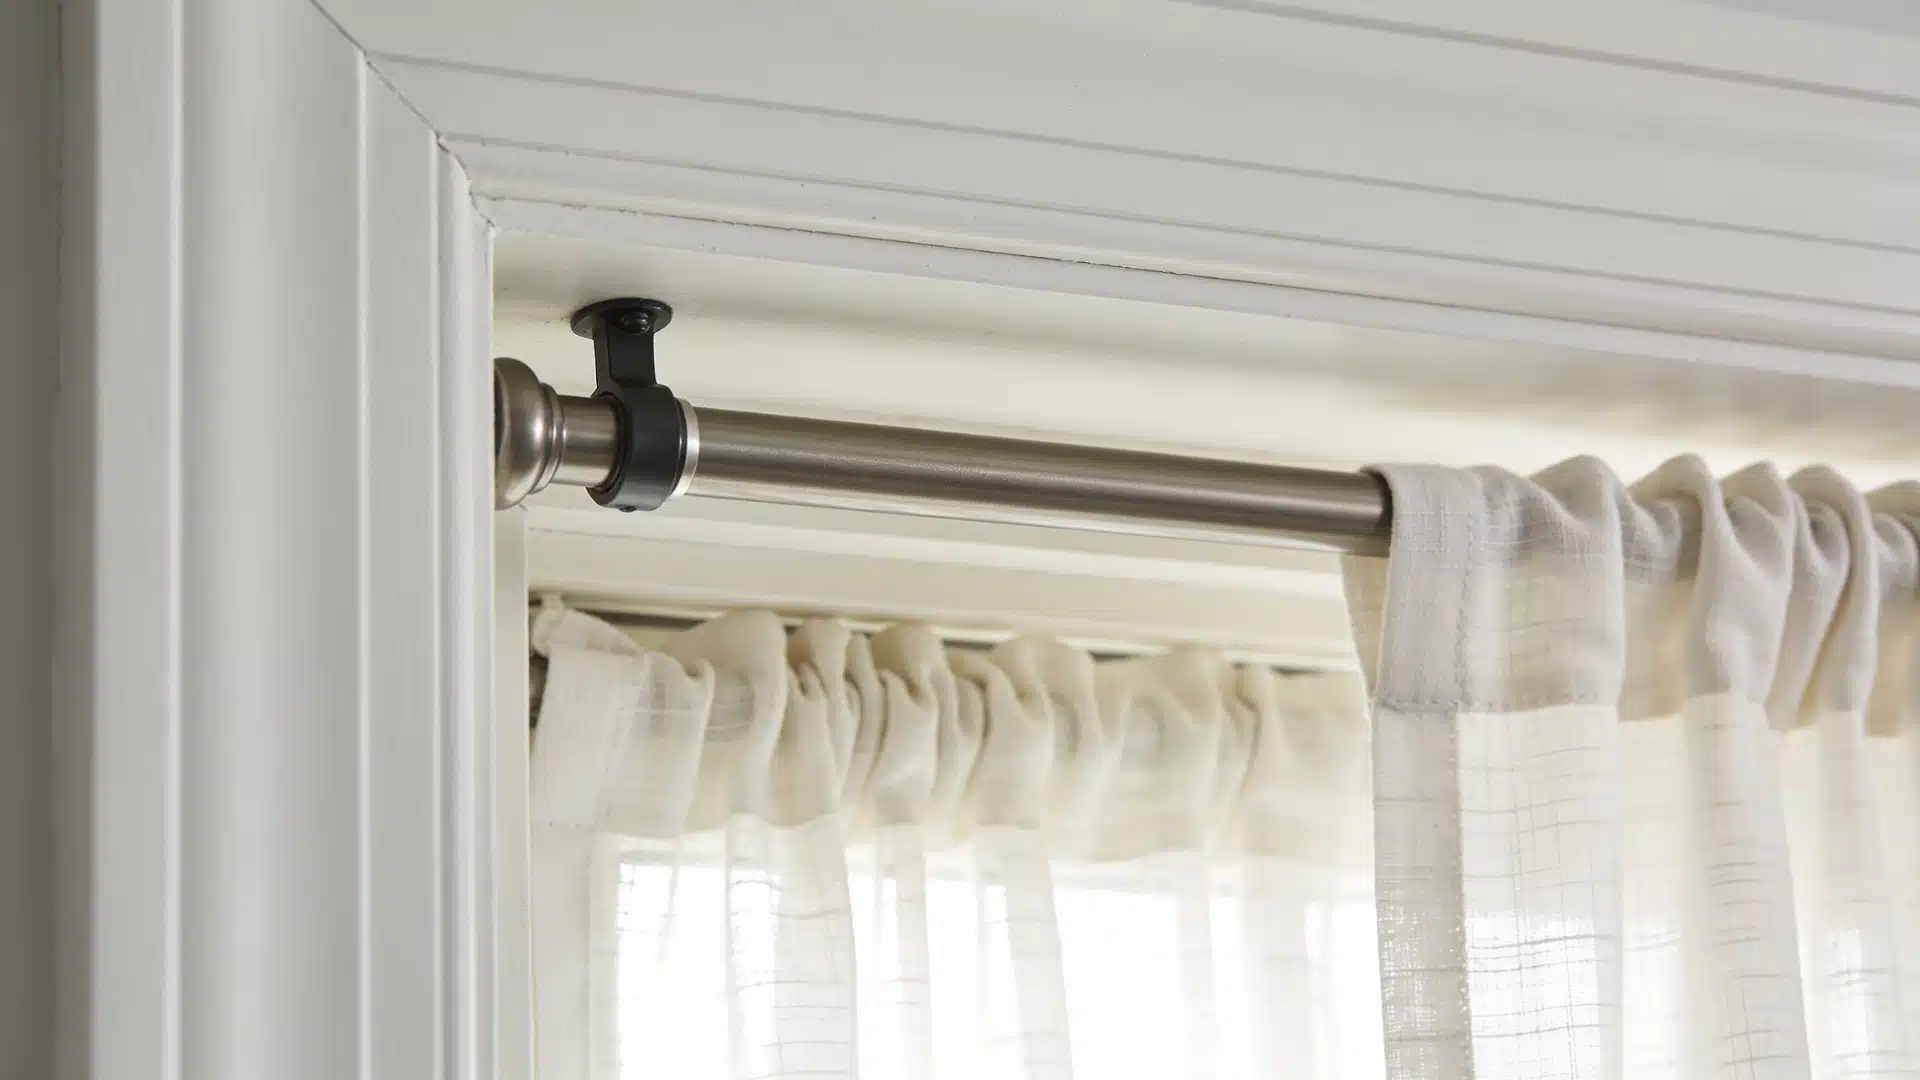
The rod sits inside the window recess, pressing outward against both walls with no brackets or screws.
Works for café-style panels, sheers, and bathroom windows. Nothing touches the wall, nothing needs filling when you move out.
Conclusion
Measure from the rod position, not the window frame.
Extend the rod well past the frame on both sides. Match your wall anchors to your wall type. Drywall, plaster, and masonry all need different fixings.
Do those three things, and the panels will hang straight, stay up, and make your windows look better than before.
Both drilled and no-drill installs deliver solid results when the measurements are right.
The hardware does the rest.
Frequently Asked Questions
1. Can Curtains be Hung Without a Rod?
Yes – adhesive hook systems, tension rods, and magnetic rods all work without a traditional curtain rod. None suit heavy-lined panels.
2. What is the Best Height for Hanging Curtains?
Hang the rod 4–6 inches above the window frame as a standard rule. For a taller look, position it 1–2 inches below the ceiling line.
3. How Much Wider Should a Curtain Rod be than the Window?
Add 12–24 inches total to the window width – 6–12 inches of overhang on each side. This keeps panels off the glass when open.