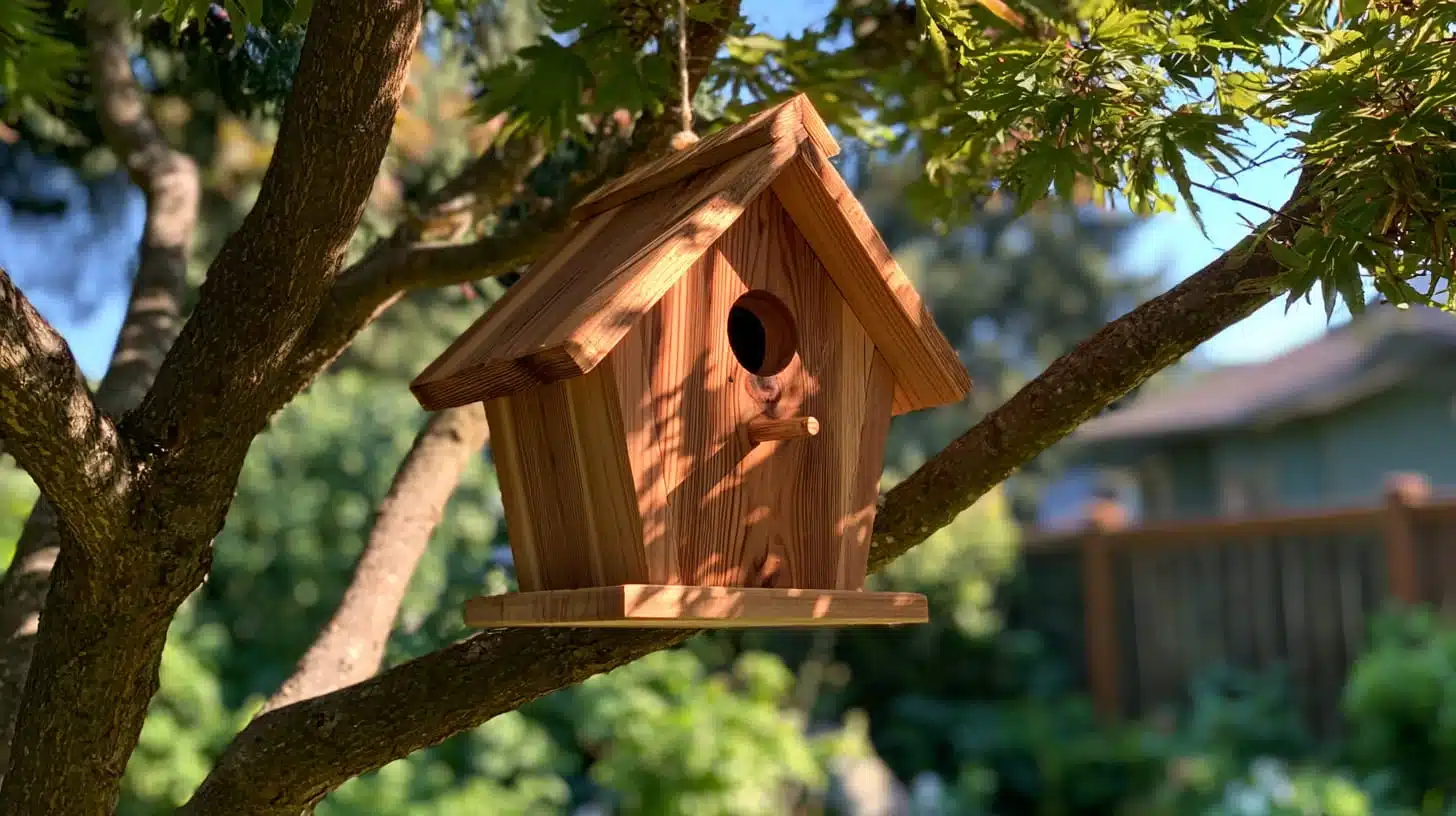

And for a birdhouse, we only need a cedar board and basic tools to build it that holds up for years.
To build a basic DIY birdhouse, you need to start by cutting six pieces from a 1×6 cedar board for the front, back, two sides, floor, and roof.
Then drill a 1⅛” to 1½” entrance hole in the front panel.
Gather them with 1¼” galvanized screws and exterior wood glue, and it’ll be done within hours- simple!
Now let’s get into more details!
You Need These Before You Start
These tools and materials are for a specific-sized birdhouse, and if you need a different size, choose and change the measurements accordingly.
Tools
- Tape measure
- Pencil
- Handsaw or circular saw
- Power drill
- 1⅛” spade bit (for chickadees and house wrens)
- 1½” spade bit (for eastern bluebirds); substitute: use the 1⅛” bit only if you are not building for bluebirds
- 120-grit sandpaper
- 220-grit sandpaper
- 2× bar clamps; substitute: masking tape plus a helper to hold pieces steady during gluing
- Safety glasses
- Work gloves
Materials
- 1×6 cedar board, 6 feet long
- 1¼” galvanized deck screws, 20 count
- Exterior wood glue
- 2” zinc-coated eye hook
- Heavy-duty hanging wire, 18 inches
- Exterior wood sealant or paint
Cut List
All six pieces cut from one 1×6 cedar board (actual width: 5½”):
- Back panel: 5½” × 10½”
- Front panel: 5½” × 8½”
- Two side panels: 5½” × 8″ each
- Floor: 5½” × 4″
- Roof: 5½” × 8″
Total board length needed: approximately 47 inches from your 6-foot (72″) board. Mark every piece with a pencil before cutting anything.
How to Build a DIY Birdhouse?
Working Time: 2 hours | Total Time: 3-4 hours| Difficulty Level: Beginner Estimated Cost: $15-$25 USD|Number of People Needed: 1
Now that you’ve gathered everything, here are some basic, easy-to-understand steps for making a birdhouse. So, follow along!
Step 1: Mark and Cut All Six Pieces First
Measure and mark all six pieces onto your cedar board before making a single cut. Use a tape measure, pencil, and combination square to mark clean, square lines.
Cut each piece with a handsaw or circular saw, keeping cuts square and perpendicular to the board edge.
Cut the back panel first, as it’s the longest piece, and measure from one end for the cleanest sequence down the board.
Label each piece as you go to avoid confusion later, such as back, front, left side, right side, floor, and roof.
Step 2: Sand All Faces Before You Drill or Assemble
Sand every piece with 120-grit sandpaper before drilling or assembling anything. Rough interior surfaces cause problems later.
Young birds climb toward the entrance before they fledge, and splinters inside the box slow them down.
So, focus on interior faces first.
Step 3: Drill the Entrance Hole in the Front Panel
Mark the entrance hole center, 6 inches up from the bottom edge of the front panel. Center it on the 5½” width,2¾” in from either side edge.
Fit your spade bit and set the drill to low speed, and drill at a perfect perpendicular angle to the panel surface.
Entrance hole size varies by target species:
- Chickadees: 1⅛”
- House wrens: 1¼”
- Eastern bluebirds: 1½”
Step 4: Drill Ventilation and Drainage Holes
Drill four ¼” holes near the top corners of each side panel.
These are ventilation holes; they prevent the interior from overheating on warm days. Drill four ¼” holes in the corners of the floor piece for drainage.
You need both sets of holes; it’s mandatory!
Step 5: Assemble the Back and Side Panels
Apply a thin, even line of exterior wood glue along both vertical edges of the back panel.
Press each side panel flush against a back panel edge. Then, flush at the top and flush at the bottom. Clamp both in place.
Pre-drill pilot holes before driving any screws.
Drive two 1¼” galvanized screws through each side panel and into the back panel edge.
Allow the glue to tack for 15 minutes before moving on.
Step 6: Fit and Secure the Floor
Now slide the floor piece into the bottom of the three-sided box.
Apply a thin bead of wood glue along the interior bottom edges, then press the floor down firmly, and drive one screw through each side panel and into the floor edge.
So, you need two screws total.
Leave a ⅛” gap between the front floor edge and where the front panel will sit, which allows water to drain.
Step 7: Attach the Front Panel
Apply wood glue to the front edges of both side panels.
Press the front panel into place, flush on both sides, bottom edge flush with the floor. Check that the entrance hole faces forward.
Drive two screws through each side panel into the front panel edges.
Remove, re-glue, clamp flush, and re-screw before the glue sets.
Step 8: Mount the Roof Panel
Set the roof piece on top of the assembled box. Position it with a ½” overhang at the front edge to shed rain away from the entrance hole.
Apply wood glue to the top edges of the front and back panels.
Drive two screws through the roof and into the top edge of the front panel.
Leave the back roof edge screws-only, no glue.
Step 9: Add the Hanging Hardware
Screw a 2” zinc-coated eye hook into the center of the roof, 1 inch from the back edge.
Thread 18 inches of heavy-duty hanging wire through the hook and twist the ends tight to secure.
Drive a 3” deck screw through the back panel overhang, and the extra 2 inches of height above the box body acts as a mounting flange.
Step 10: Apply Exterior Sealant
Cedar requires no sealant.
But if you used pine, apply two coats of water-based exterior wood sealant to all outside surfaces. Allow 24 hours to fully dry before hanging.
Do not apply sealant to the interior of the box or around the entrance hole. Birds are sensitive to fumes inside enclosed spaces.
DIY Hanging Birdhouse Ideas
If your garden has a spare fence post or open ground for a pole mount, a hanging birdhouse will be a great fit. It can be done from a tree branch, a pergola beam, or overhead on a covered patio as well.
1. Rope-Hung Cedar Box
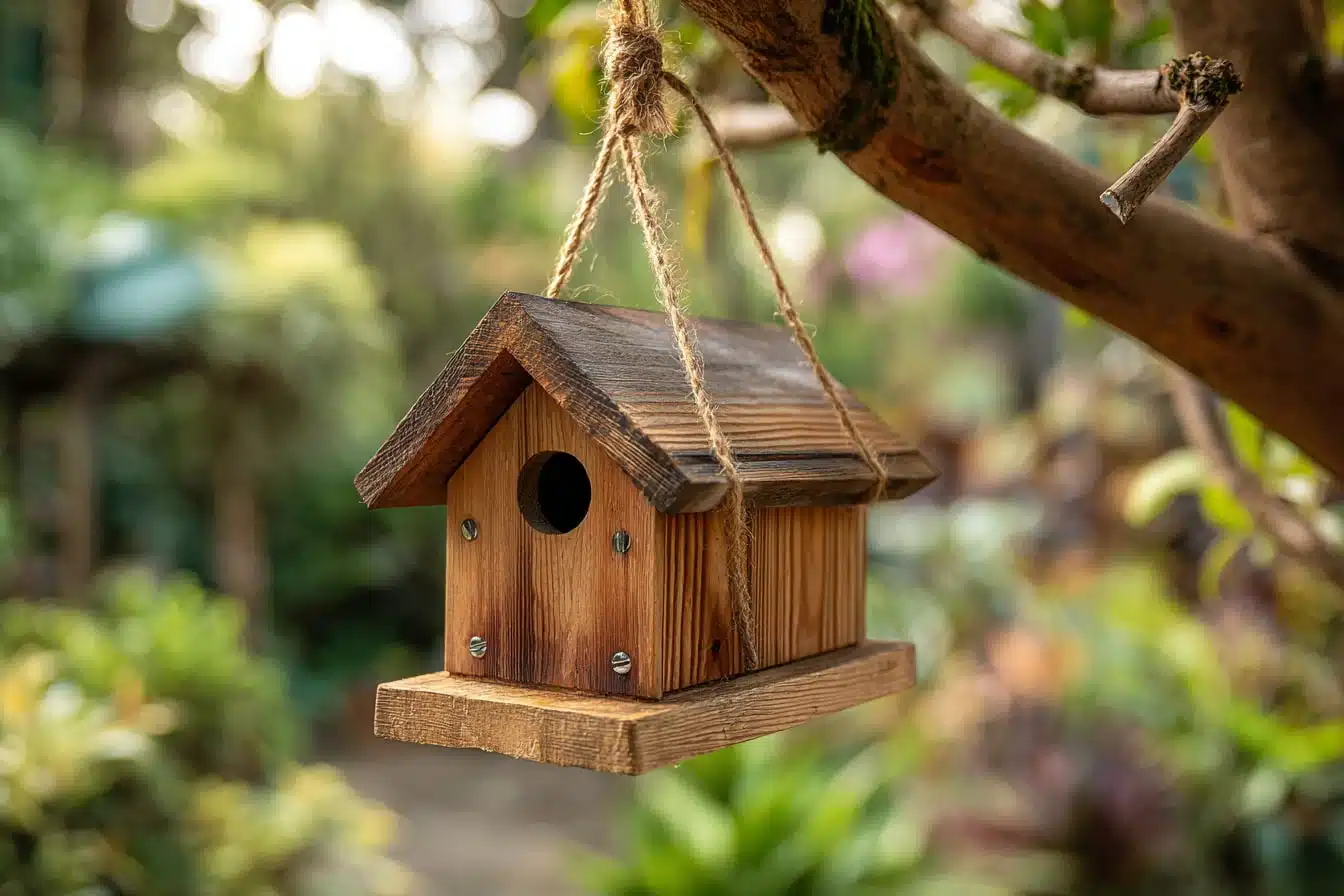
This is the standard cedar build with one small change at the top.
Instead of an eye hook and wire, you knot a length of natural sisal rope through a drilled hole in the center of the roof.
Use rope that is at least ½” thick, so it holds its strength through wet seasons without fraying.
Natural sisal suits the look of a cedar box well and handles outdoor conditions.
2. Hanging Gourd Birdhouse
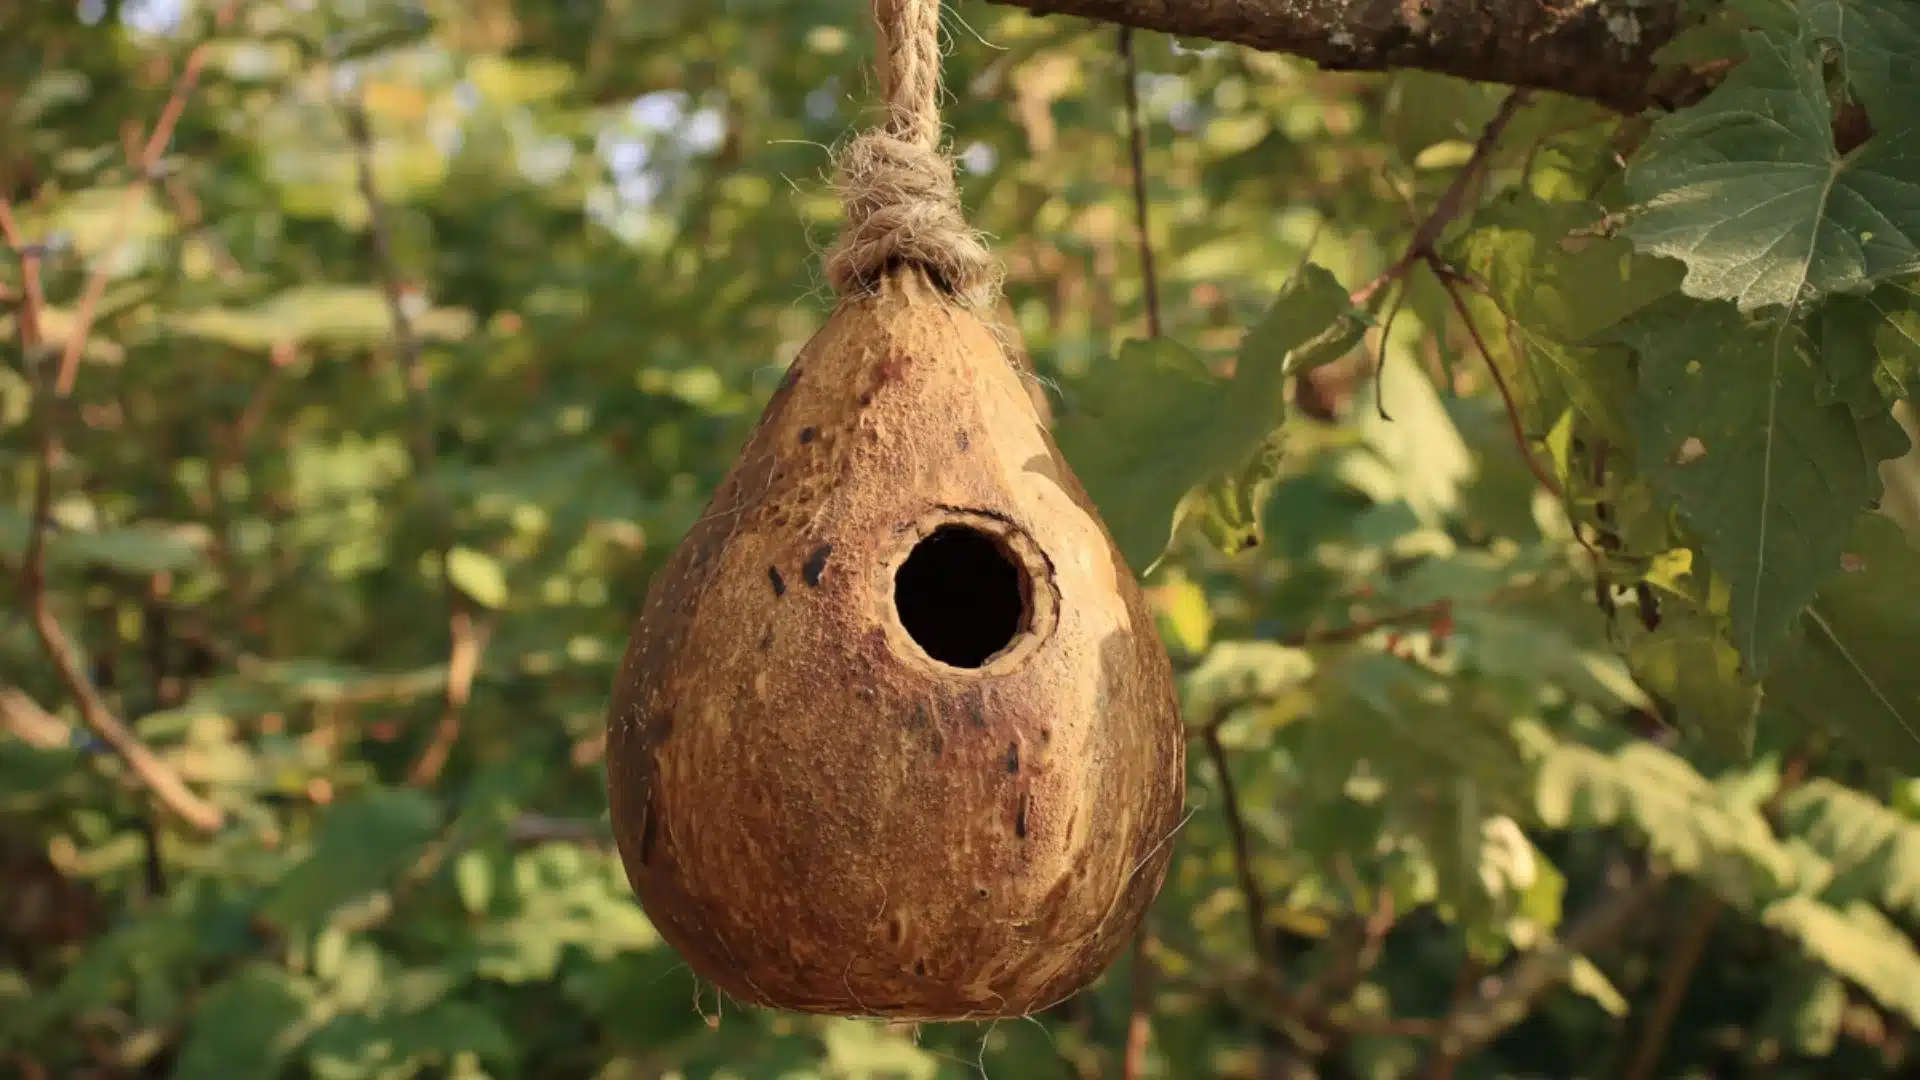
If you have extra bottle gourds, omg you’re not ready for this idea!
Dry one out fully, drill an entrance hole in the side and a few drainage holes at the base, and hang it from a crossbar or branch.
Birds go to gourds quickly because they closely resemble natural tree cavities.
3. Chain-Hung Painted Box
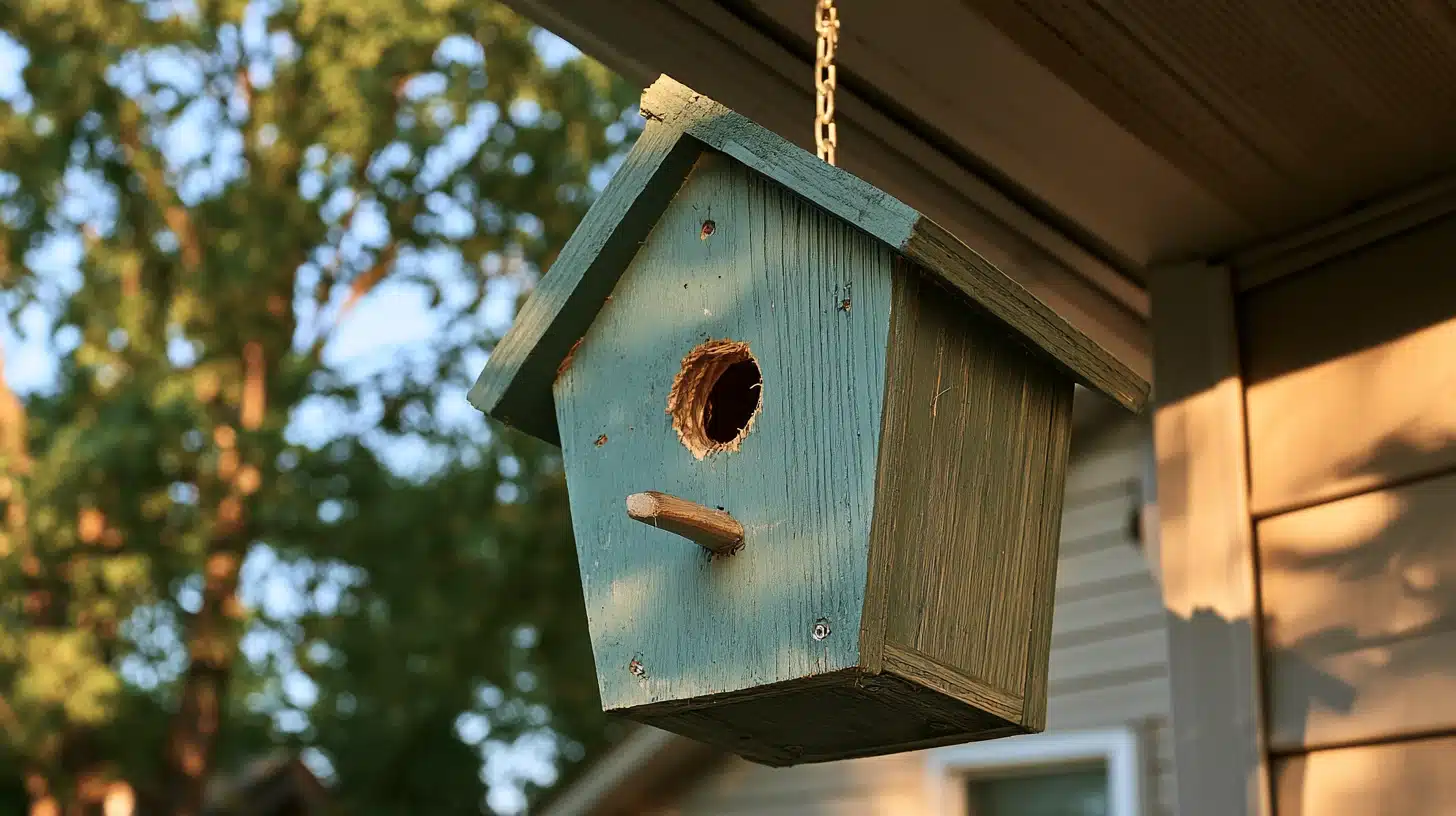
Build a basic plywood box, paint the outside a light, muted color, and hang it from a covered patio with a short length of zinc-coated chain fixed to the roof.
The chain makes it easy to lift down for cleaning at the end of nesting season.
4. Macramé-Wrapped Hanging Birdhouse
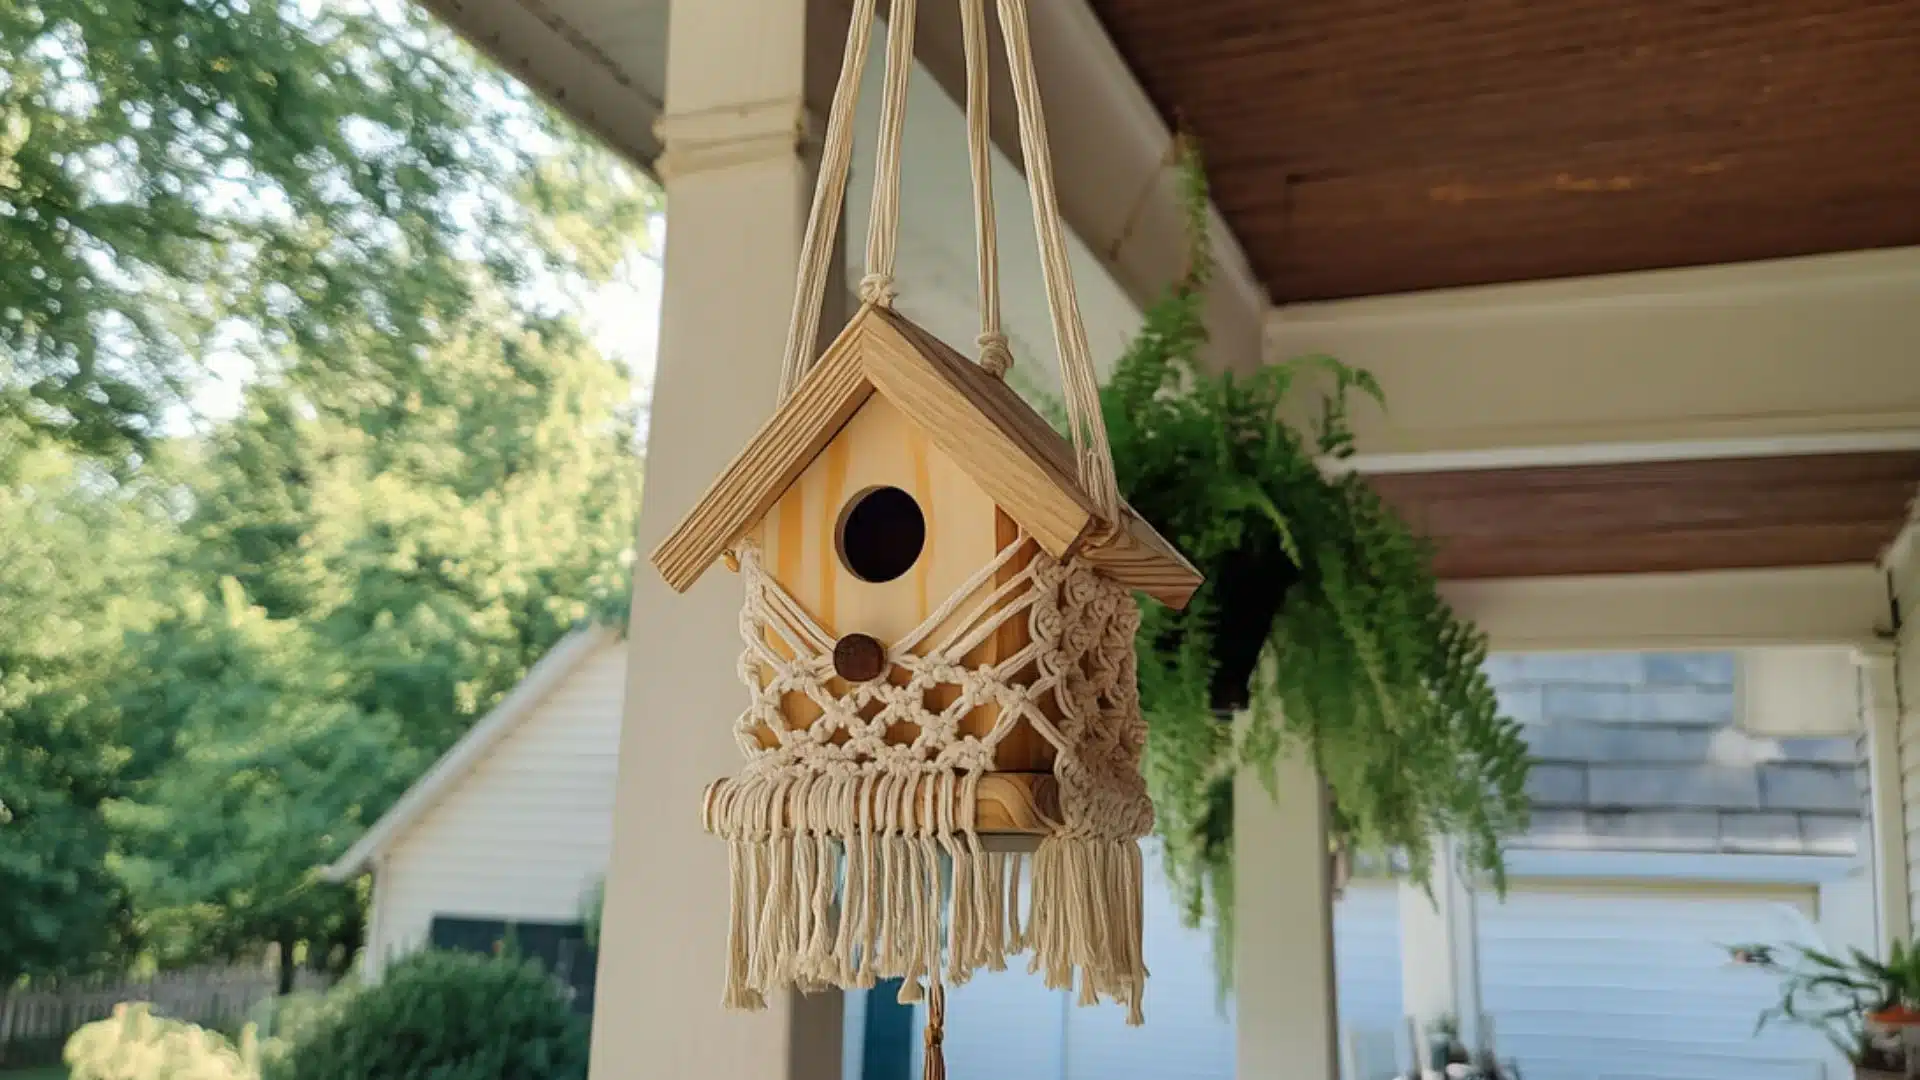
You build a standard cedar box and then knot a macramé cradle around it to hang it. The knotted cradle holds the box firmly in place and even looks great on a pergola or covered porch.
The box itself is fully functional, and you can swap the cradle out whenever you need a new look.
5. Driftwood Hanging Birdhouse
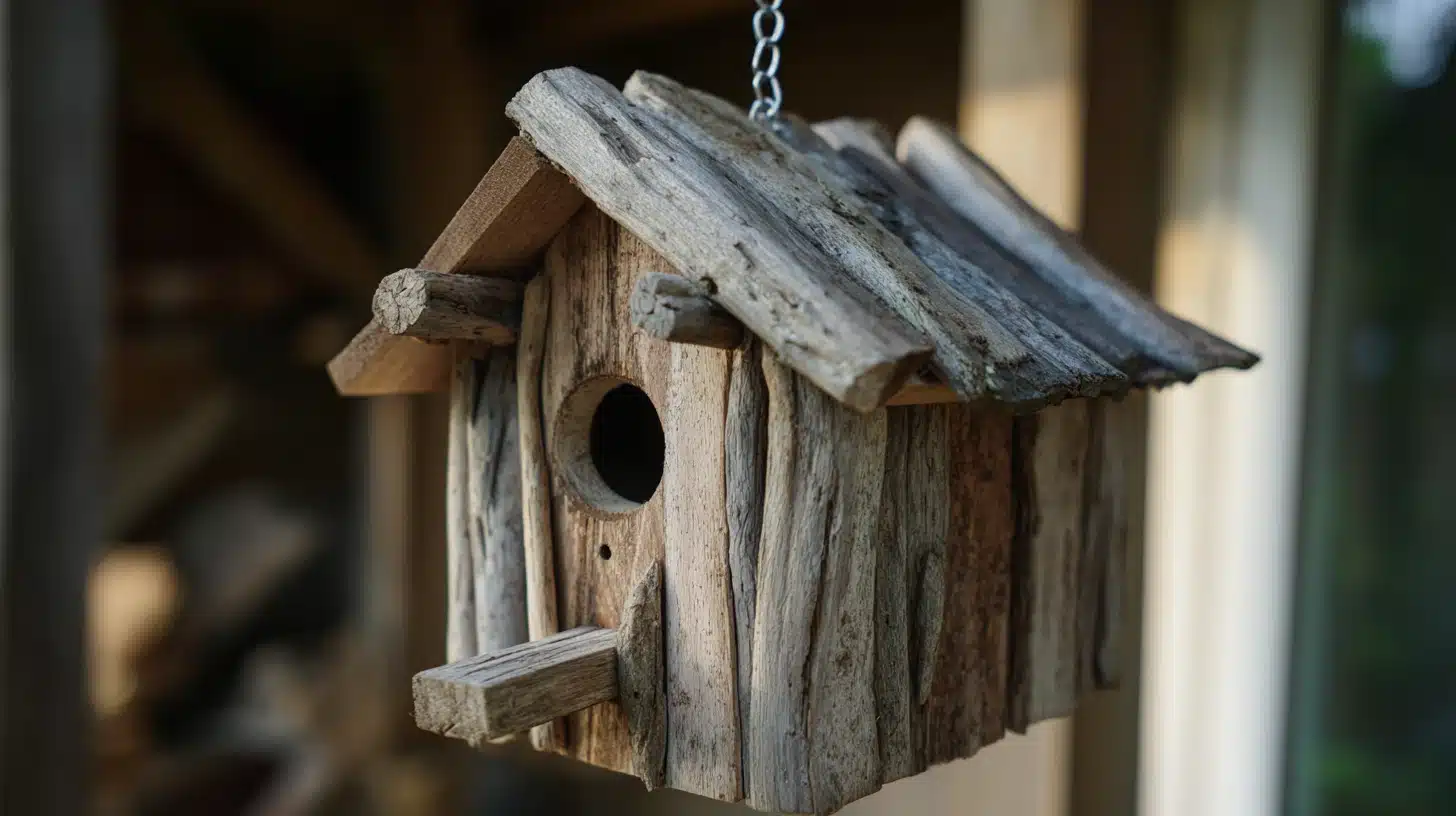
Head to the beach or a riverbank and collect a few pieces of dried driftwood in similar thicknesses.
You clad them over a simple plywood box frame using exterior wood glue and small nails, then fix a twisted wire hanger to the roof.
Clean and Modern DIY Birdhouse Plans
Modern birdhouse builds are all about keeping things clean and simple. If you prefer straight lines over decorative details, you’ll want to try these.
6. Geometric Plywood Birdhouse
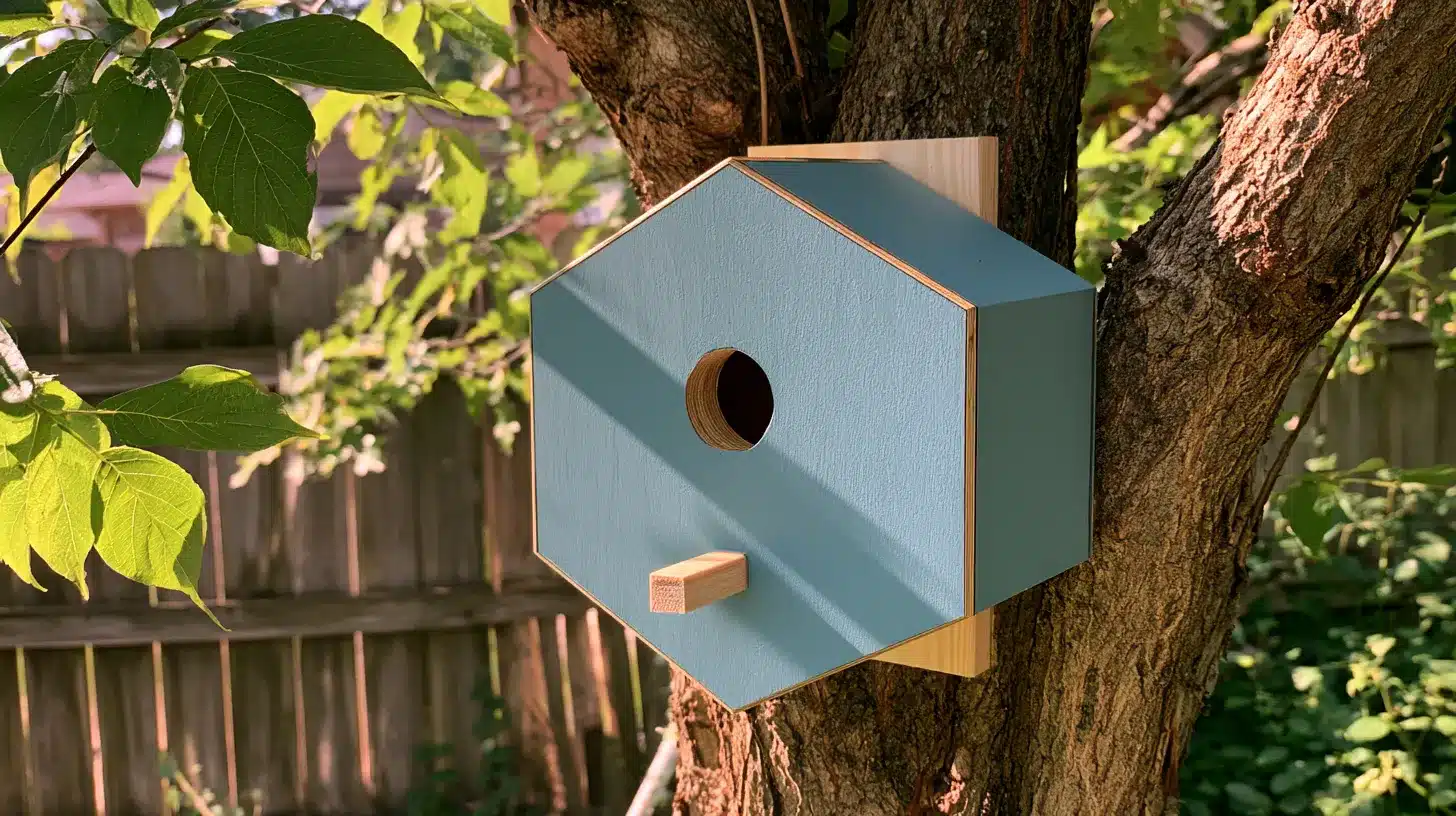
You cut a hexagonal or triangular box shape from ¾” plywood.
And you get an eye-catching box that looks effortlessly cool. Give it a light coat of exterior paint in a muted tone, and it finishes off nicely.
7. Flat-Roof Cedar Box
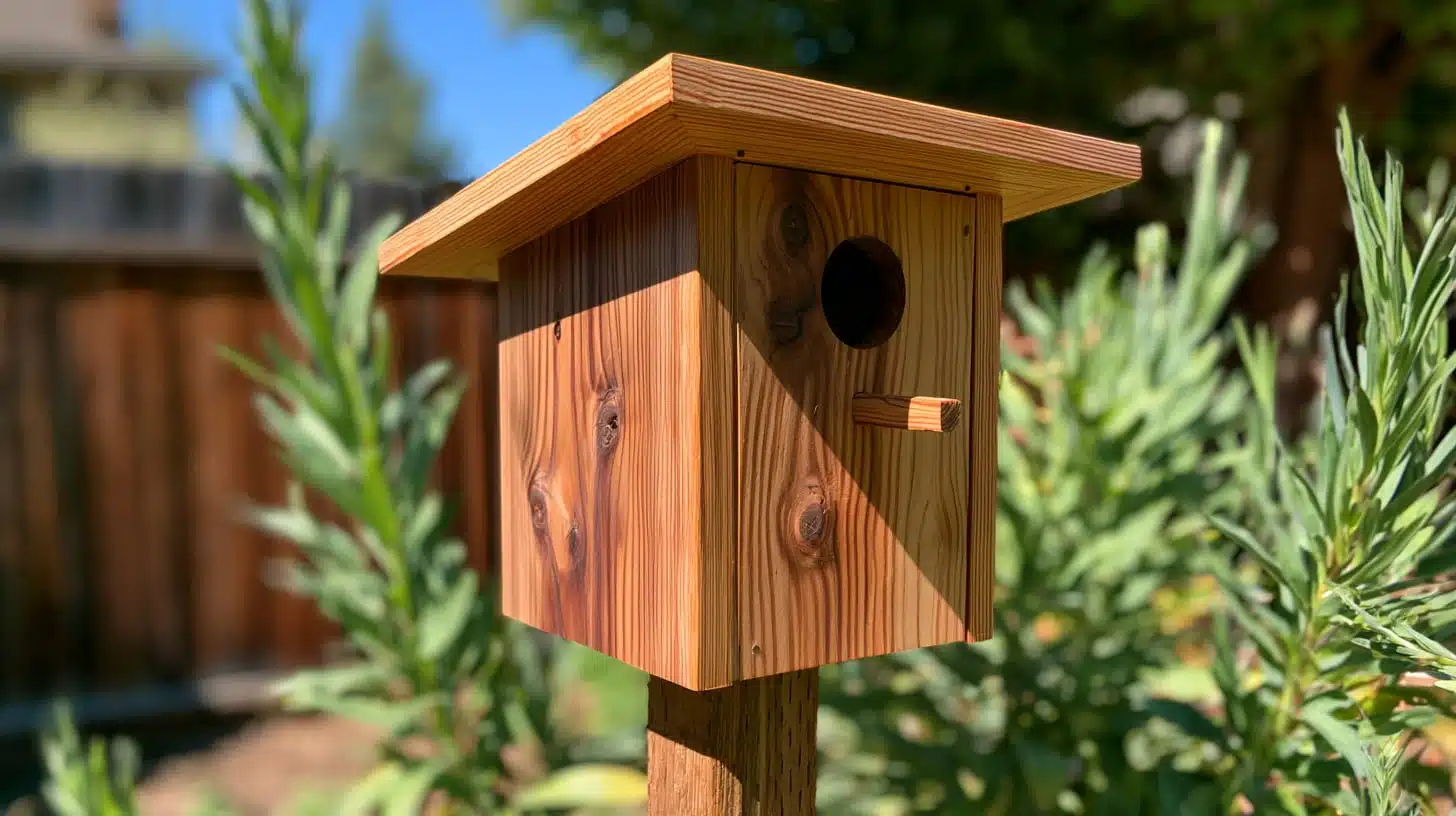
You use the exact same cedar cut list but swap the angled roof for a straight horizontal panel. And now you have a sleek, cleaner-looking birdhouse that suits your modern outdoor space really well.
8. Metal-Accented Cedar Birdhouse
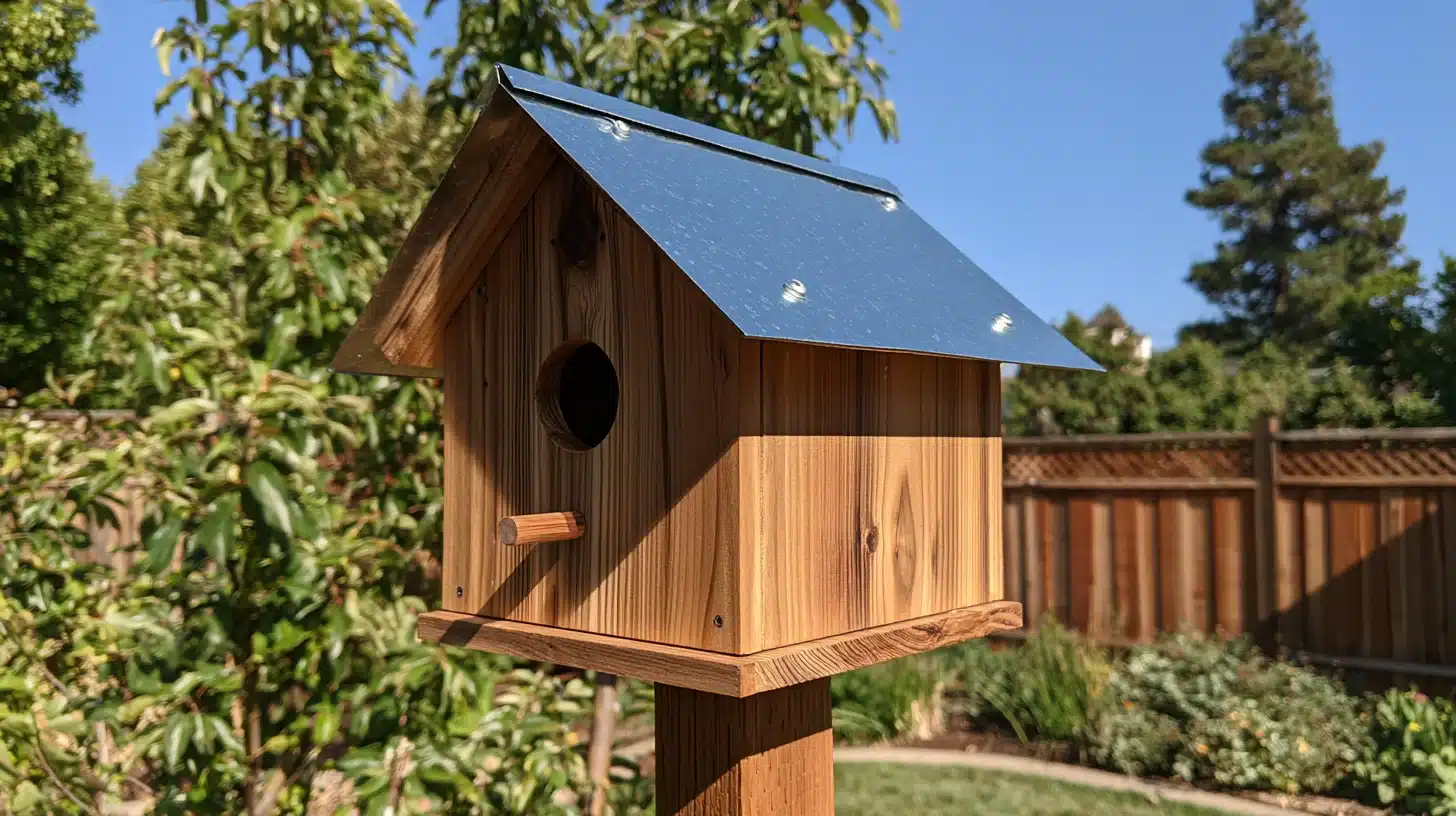
Build your standard cedar box and fix a thin sheet metal panel over the top as a roof.
It adds modern contrast against the warm cedar wood while improving rain resistance at the same time. Zinc-coated sheet metal is easy to find at any hardware store.
9. Angled Roof Plywood Birdhouse
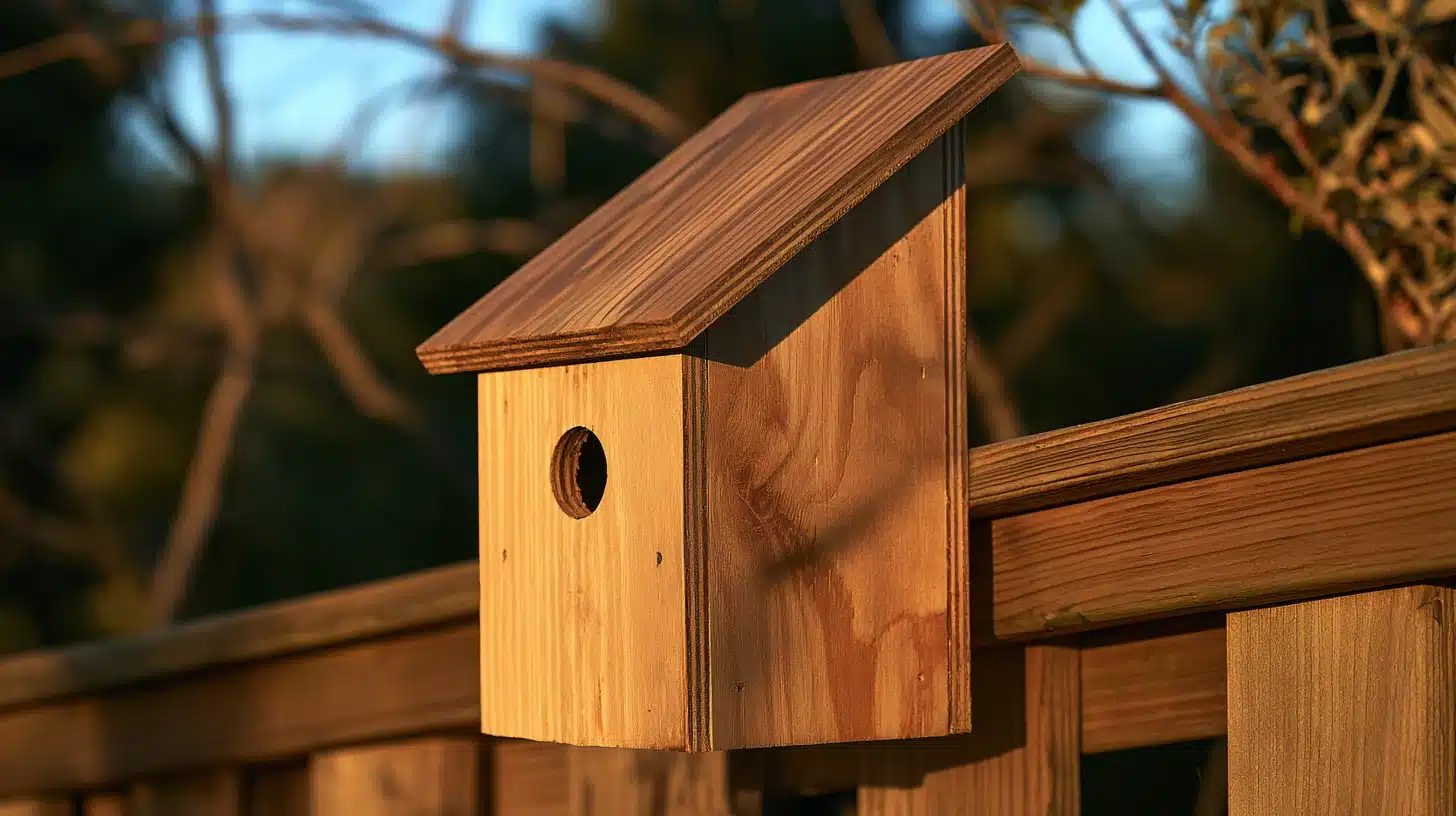
A single steep angle cut across the top gives a sharp architectural look.
The slope sheds rain away from the entrance hole better than a flat top; cut the angle before assembly, then finish with a coat of exterior paint.
10. Two-Tone Painted Cedar Box Birdhouse
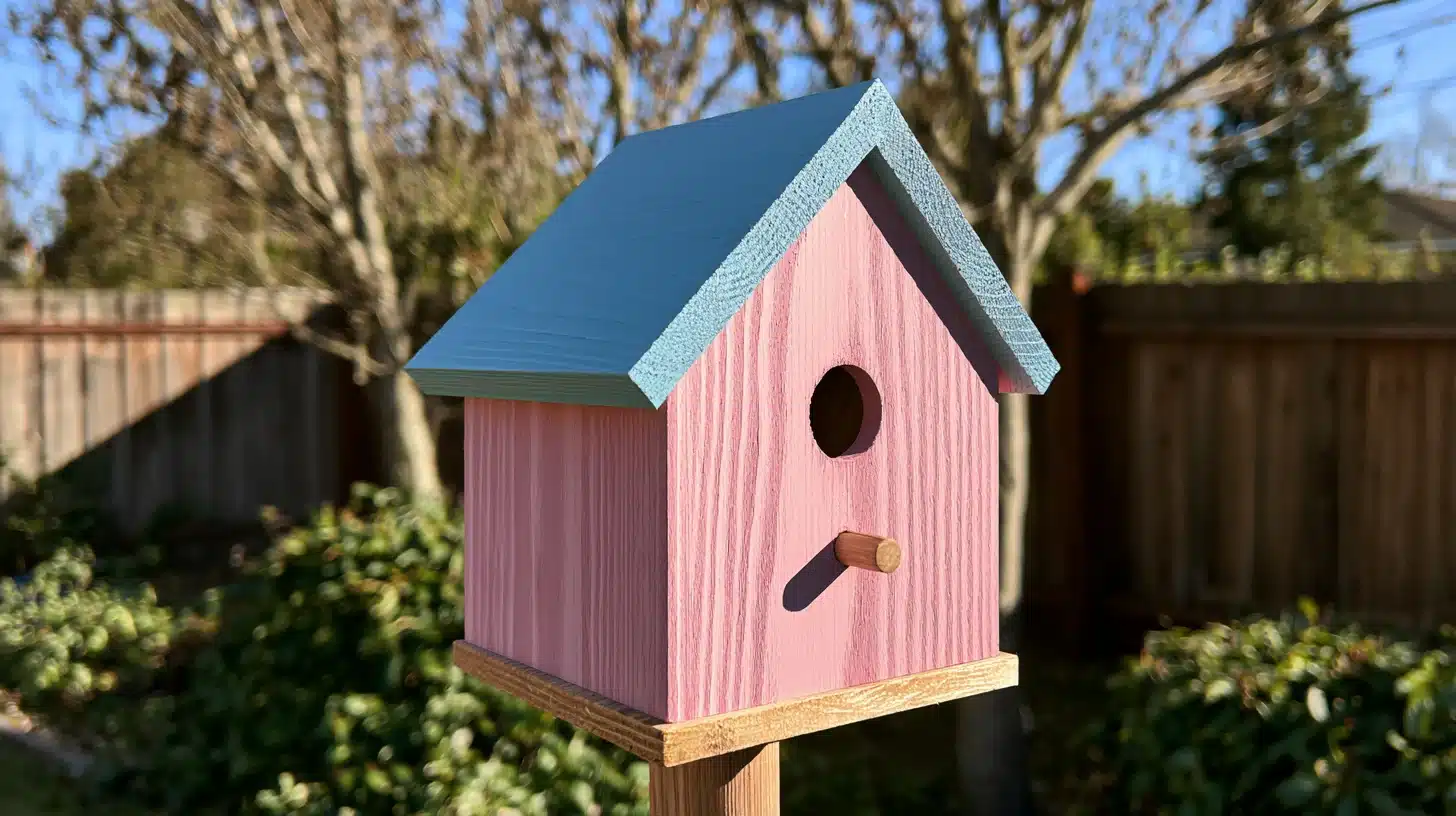
Two colors on one birdhouse is easier to pull off. Paint the body in one light muted tone and the roof in a slightly contrasting shade.
Keep both colors light so the interior does not overheat on warm days.
11. Copper-Roofed Cedar Birdhouse
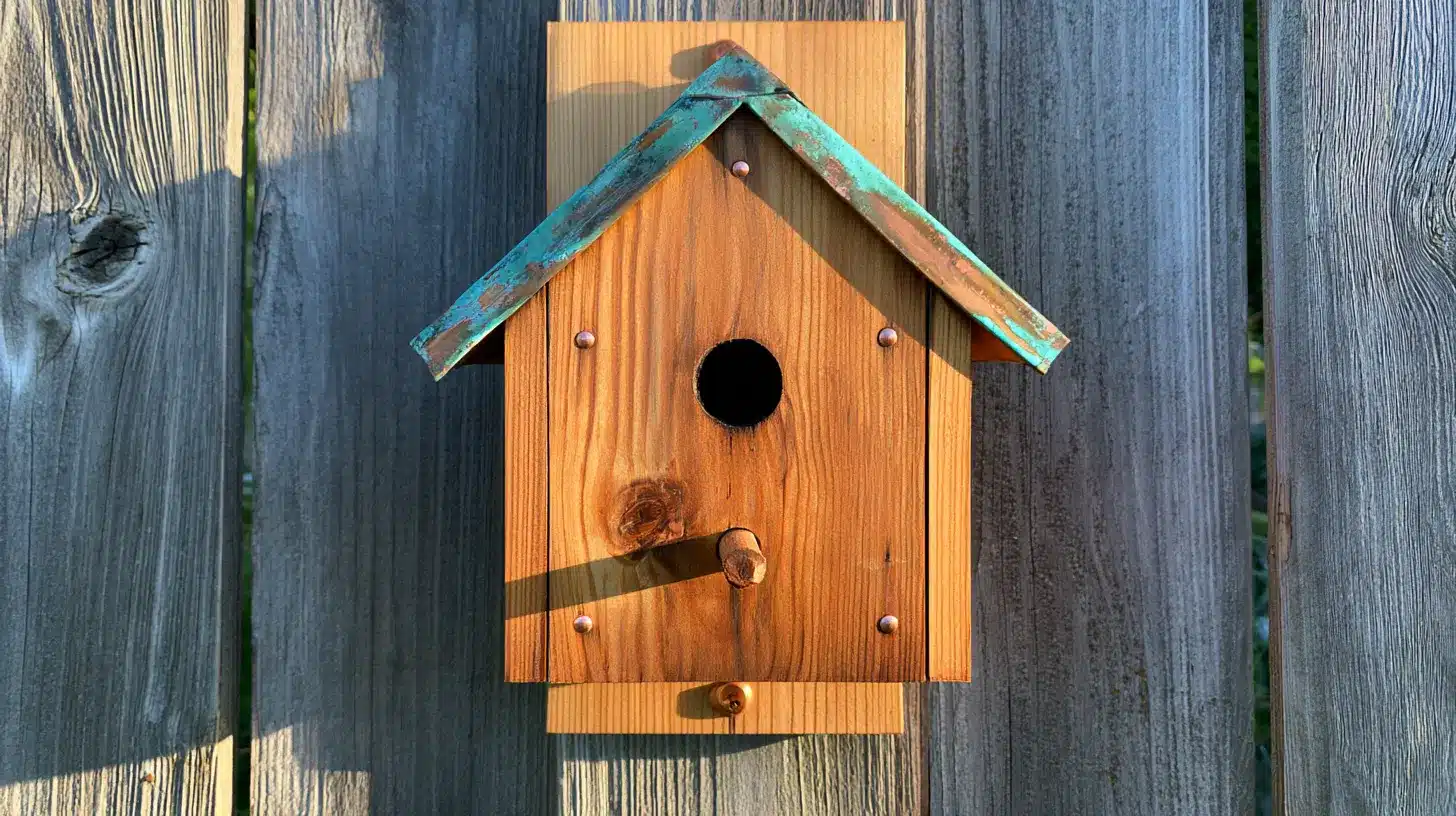
Fix a thin copper sheet over the cedar roof using small copper tacks and leave it to weather outdoors naturally.
Within a season or two, the copper develops a soft green patina that looks striking against the cedar wood. And it takes only about 20 minutes to fit.
12. Vertical Slatted Cedar Birdhouse
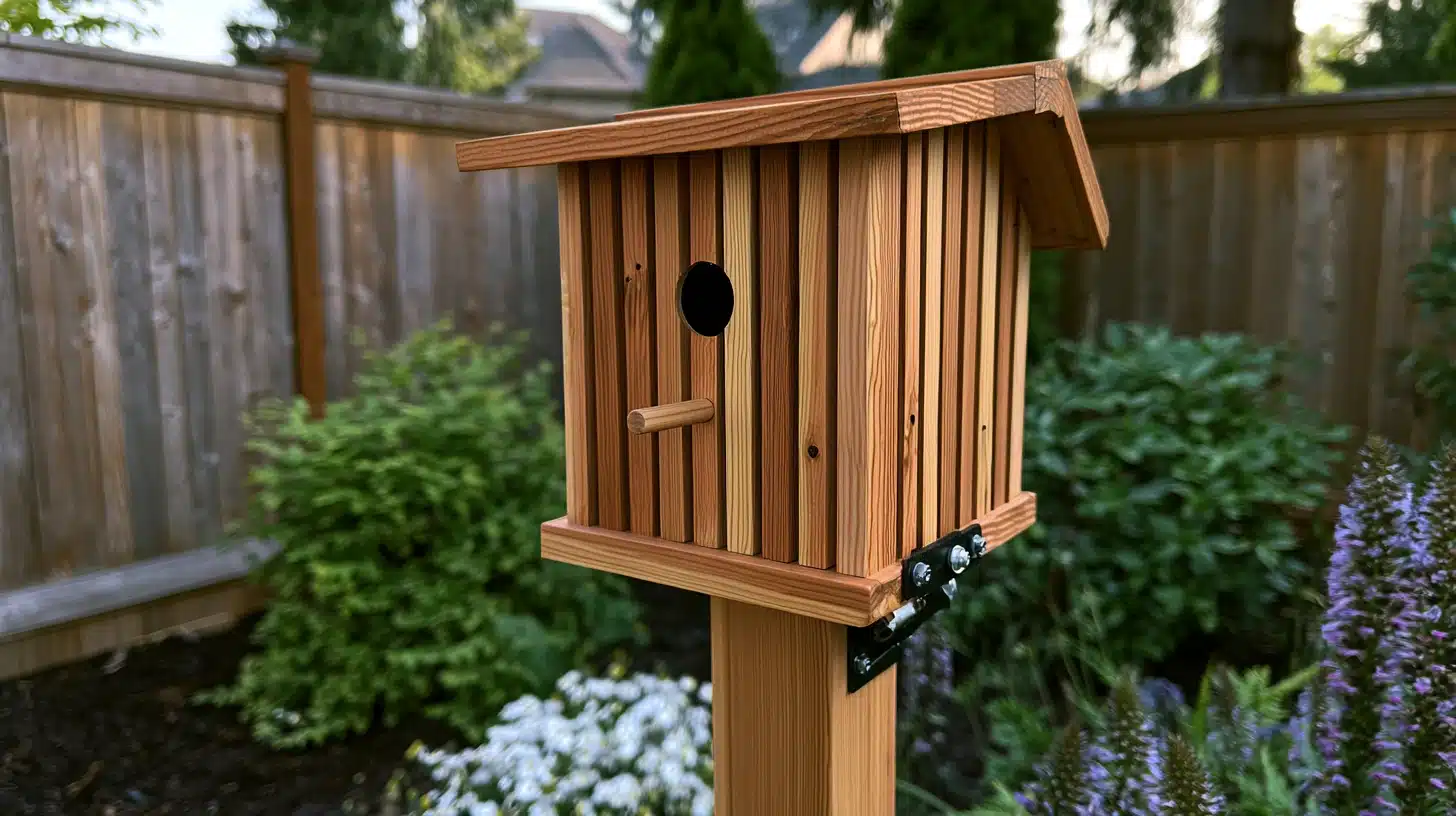
Instead of solid side panels, this uses thin cedar strips fixed vertically over a plywood frame with small gaps between each slat.
Those gaps provide natural ventilation, so you do not need separate vent holes.
Rustic DIY Birdhouse Ideas Made From Natural Wood
These ideas lean into natural materials and imperfect textures, giving that worn-in look that paint cannot even pretend to match.
13. Hollowed Log Birdhouse
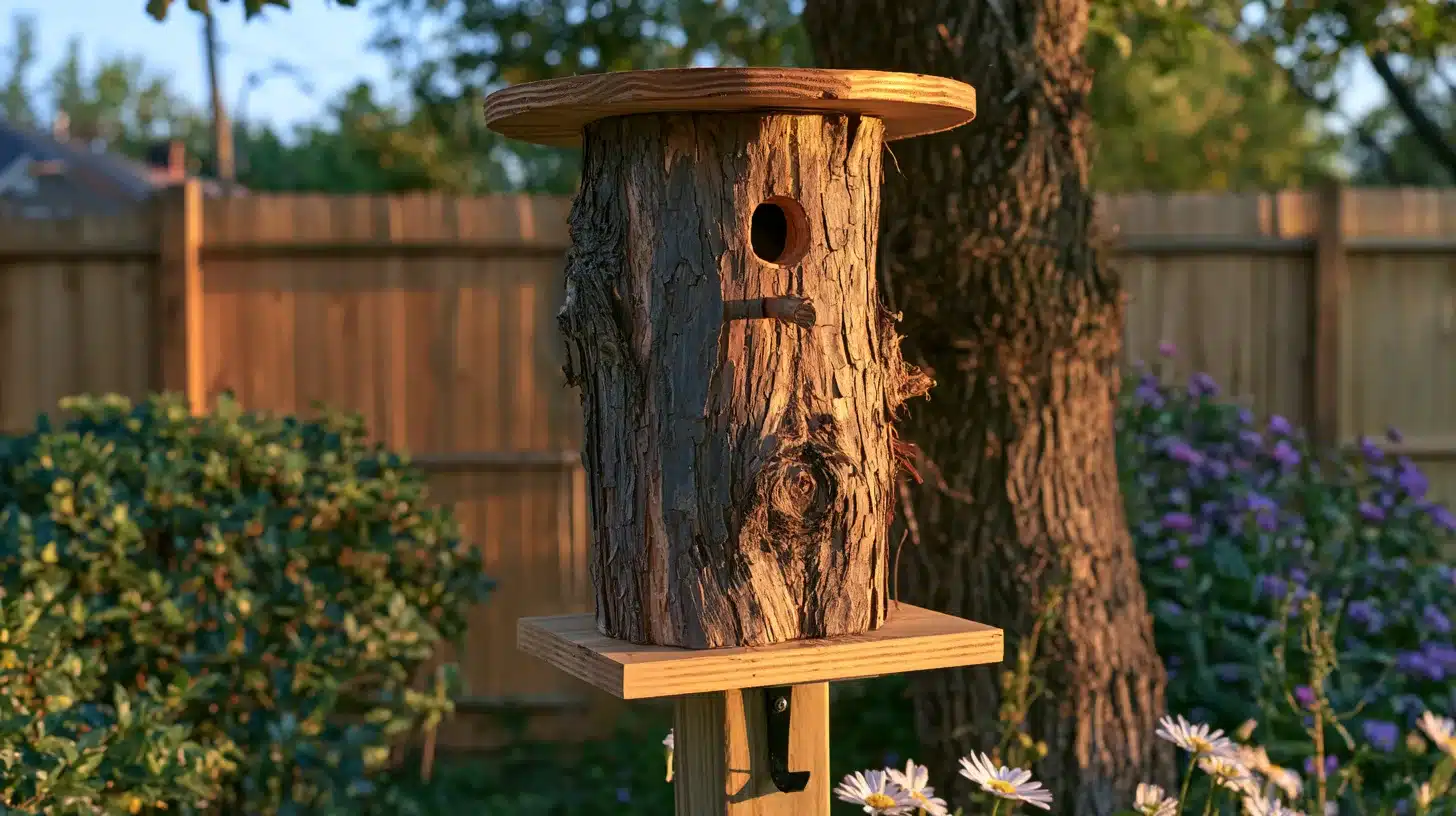
This one is about as natural as a birdhouse can get.
You find a dried log section around 4 to 6 inches in diameter, hollow out the center if it is not already hollow, drill your entrance hole, and give it a flat base.
Birds take to hollowed logs really well because it is basically what they would nest in anyway.
14. Birch Bark Birdhouse
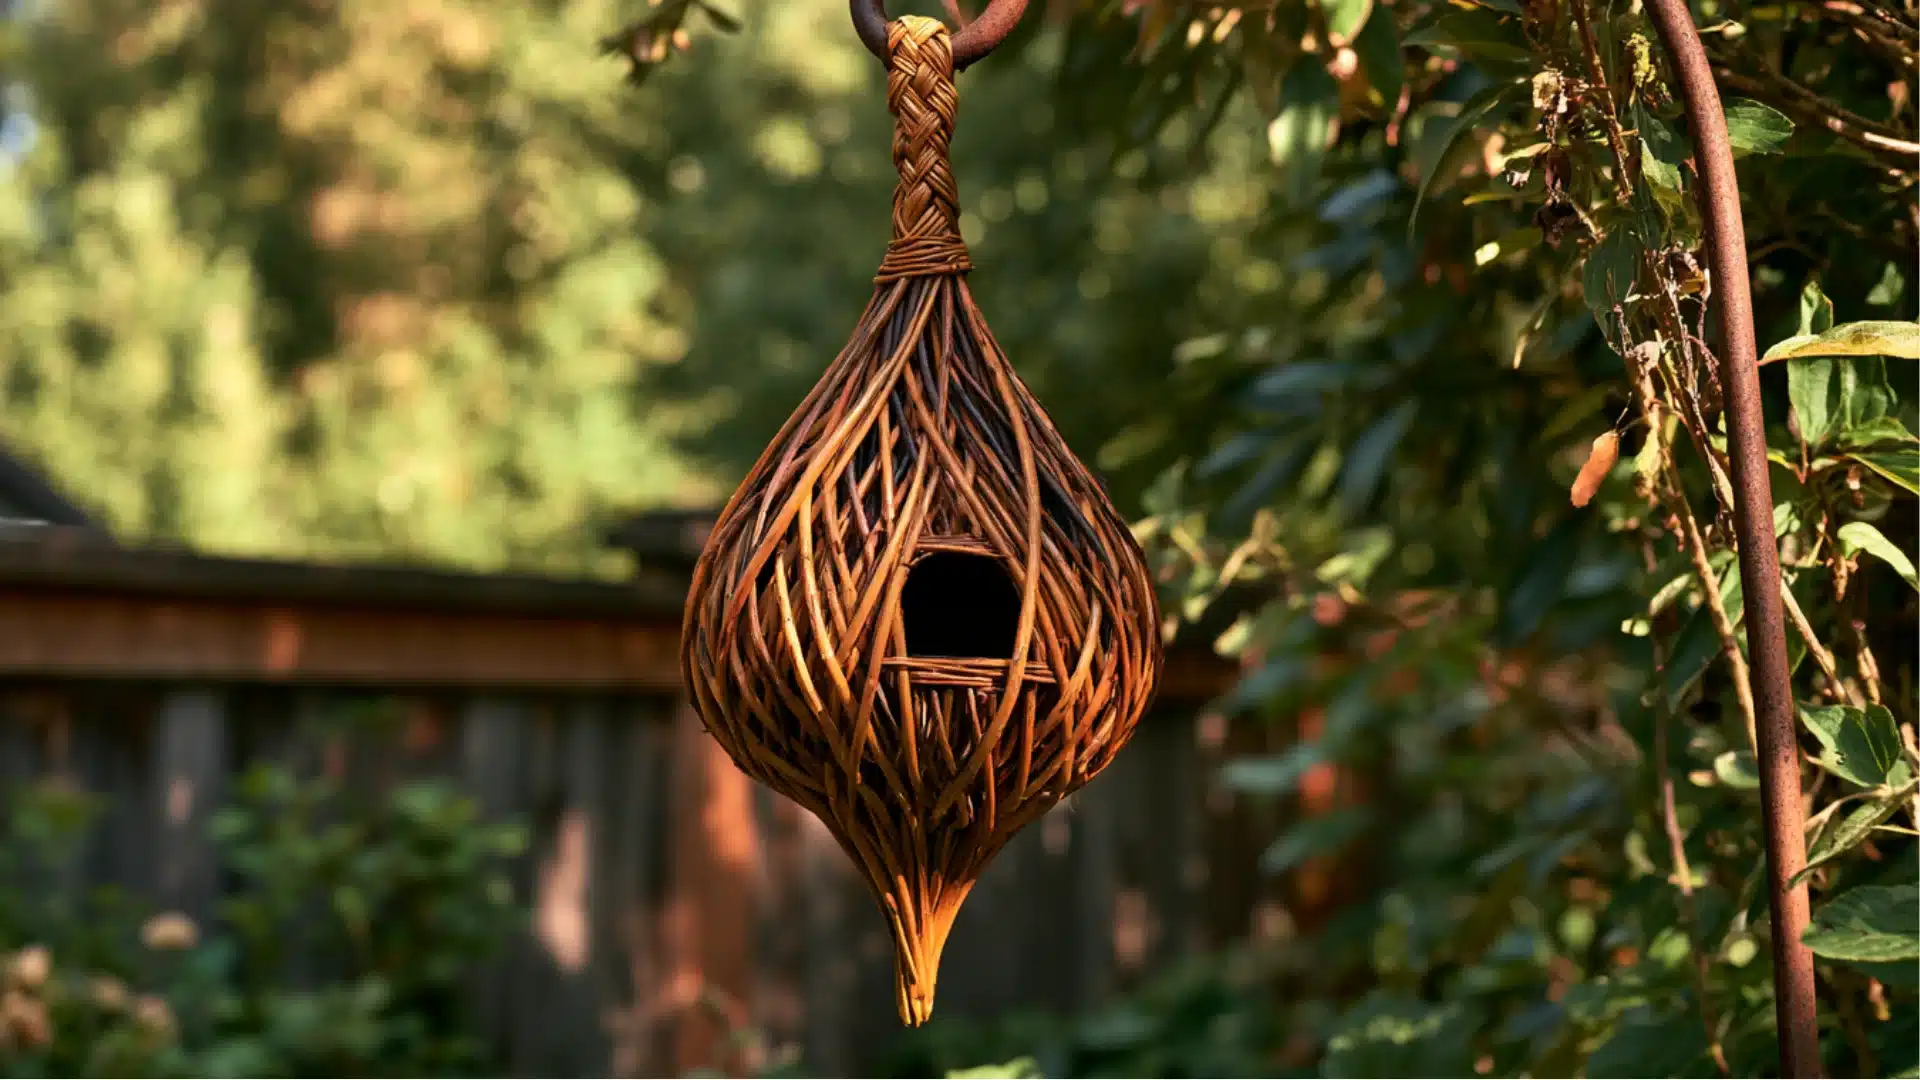
Peel strips of dried birch bark and fix them over a standard cedar box frame using exterior wood glue.
The white and silver tones of the bark give the finished box a look that feels completely natural in any garden with trees nearby.
15. Reclaimed Barn Wood Birdhouse
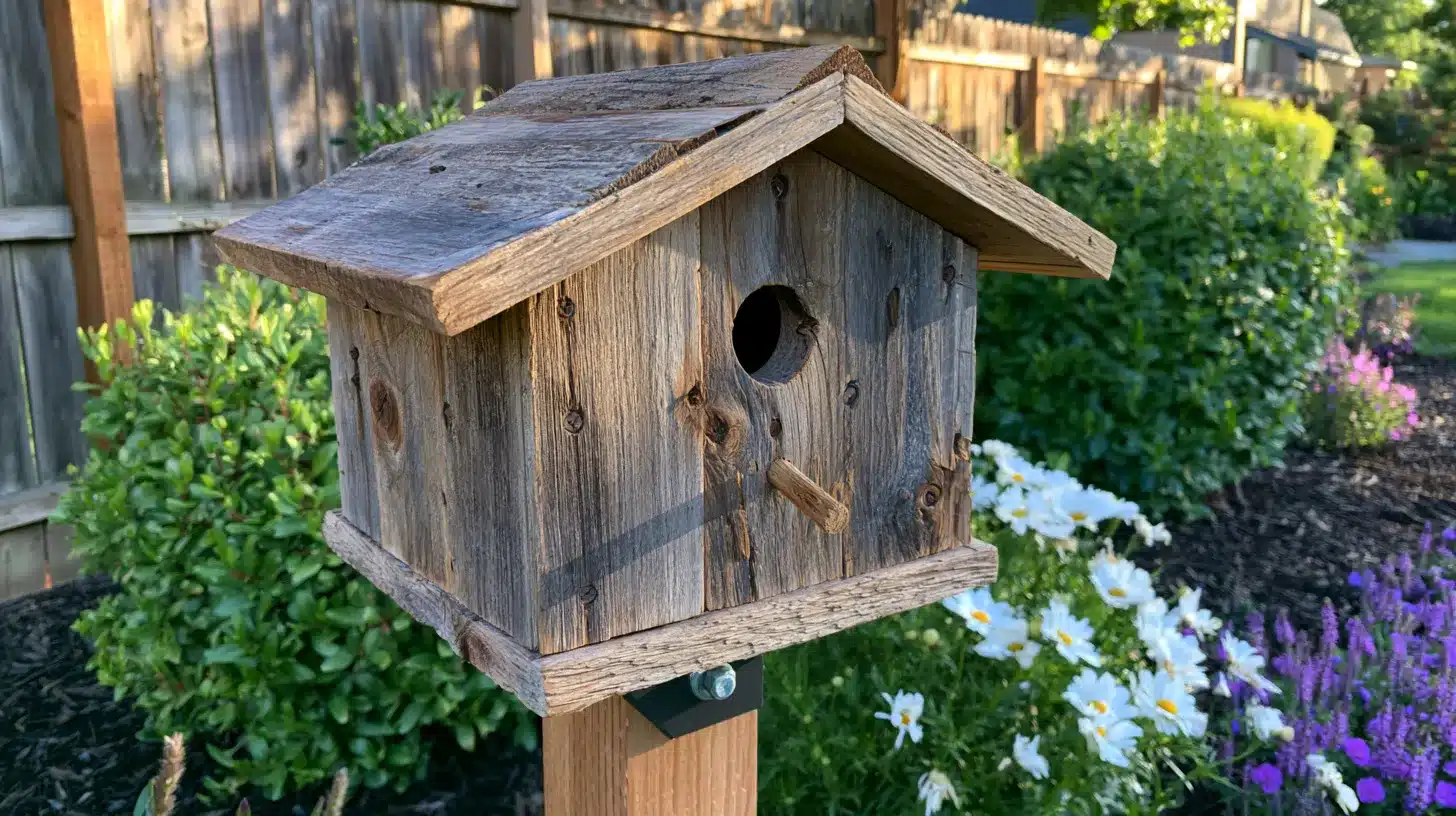
Weathered wood has a character and feel that new timber cannot match.
Use the same cut list as the classic cedar build but swap in old barn wood for the panels.
Check each piece for rot and reinforce every joint with screws since reclaimed wood can be unpredictable. The box looks like it has been there for years.
16. Stone-Base Mounted Birdhouse
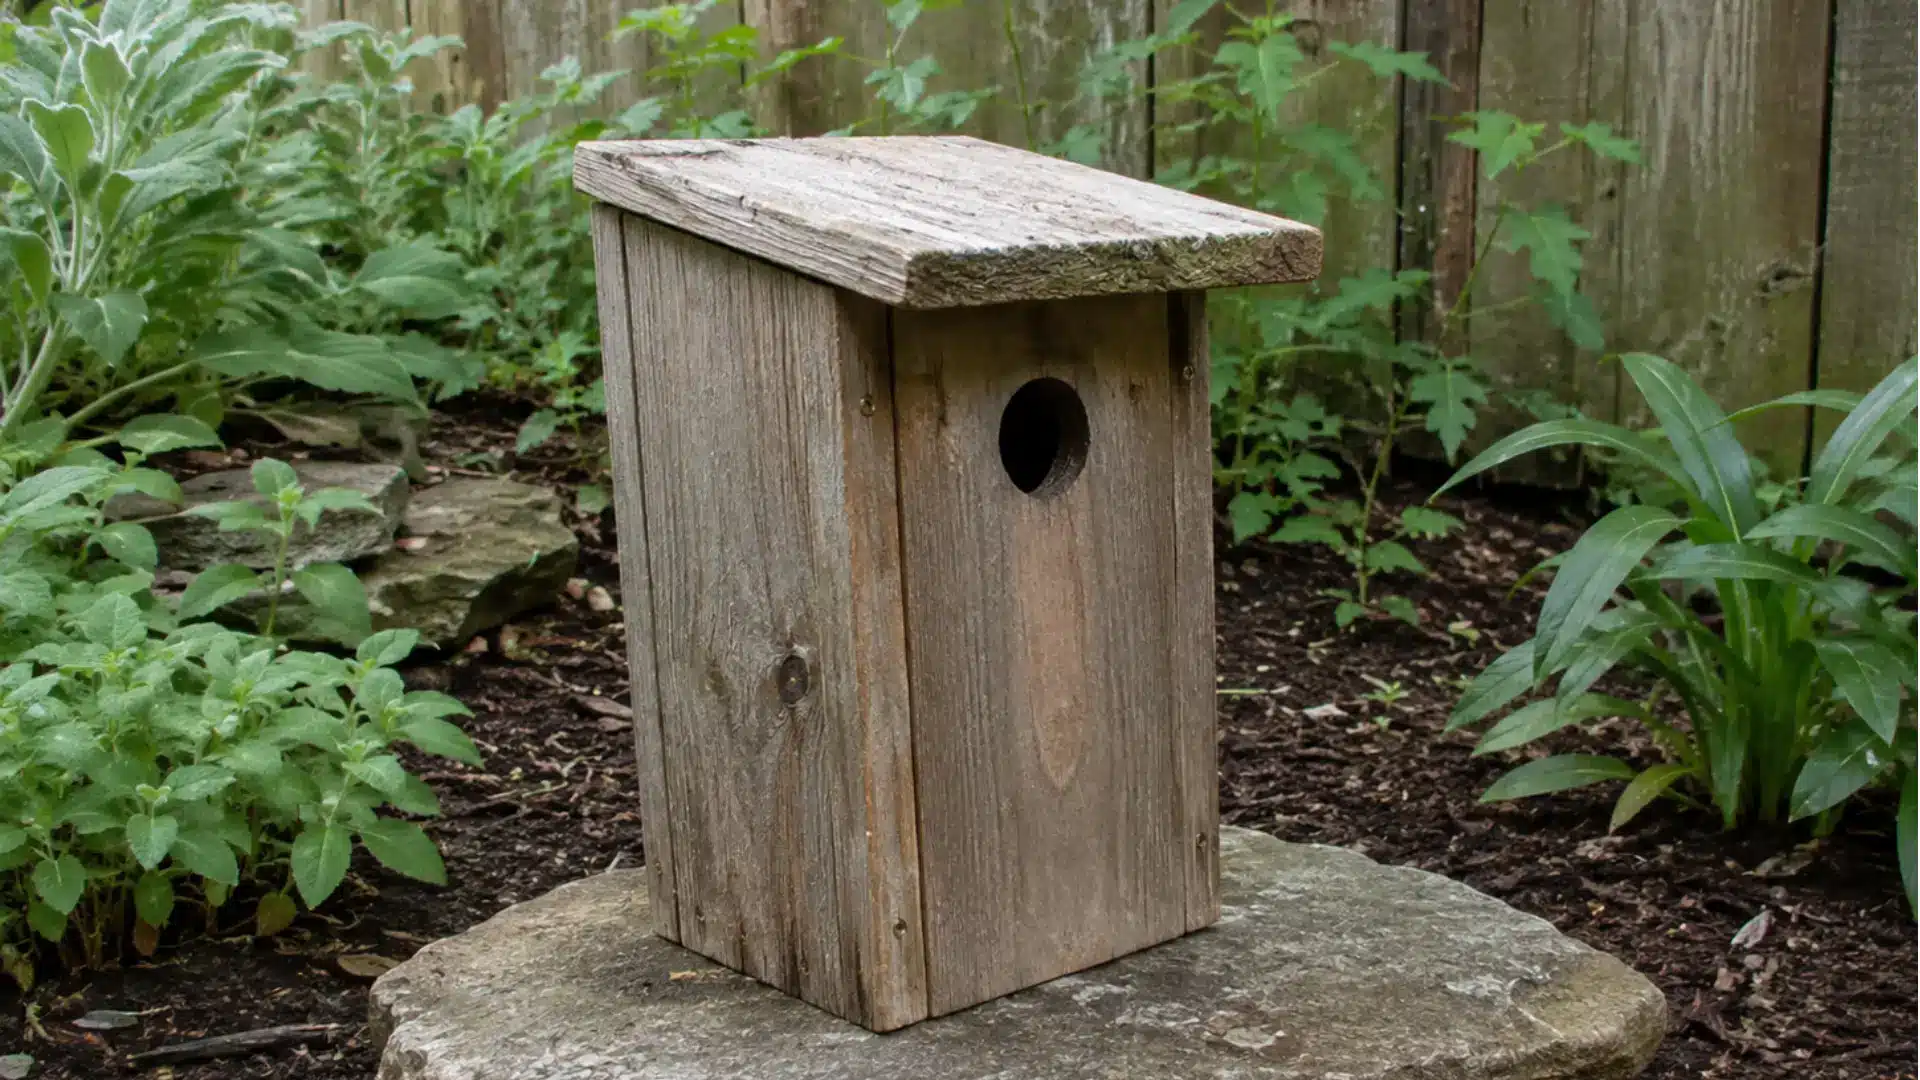
Fix a standard cedar box onto a large flat fieldstone base using exterior construction adhesive, and you get something that looks rooted in the garden.
And it will be heavy enough to stay put without any extra fixing hardware.
Easy Minimalist DIY Birdhouse Builds
Also, if you’re a minimal aesthetic fanatic, these ideas are perfect for you.
17. White-Washed Cedar Box Birdhouse
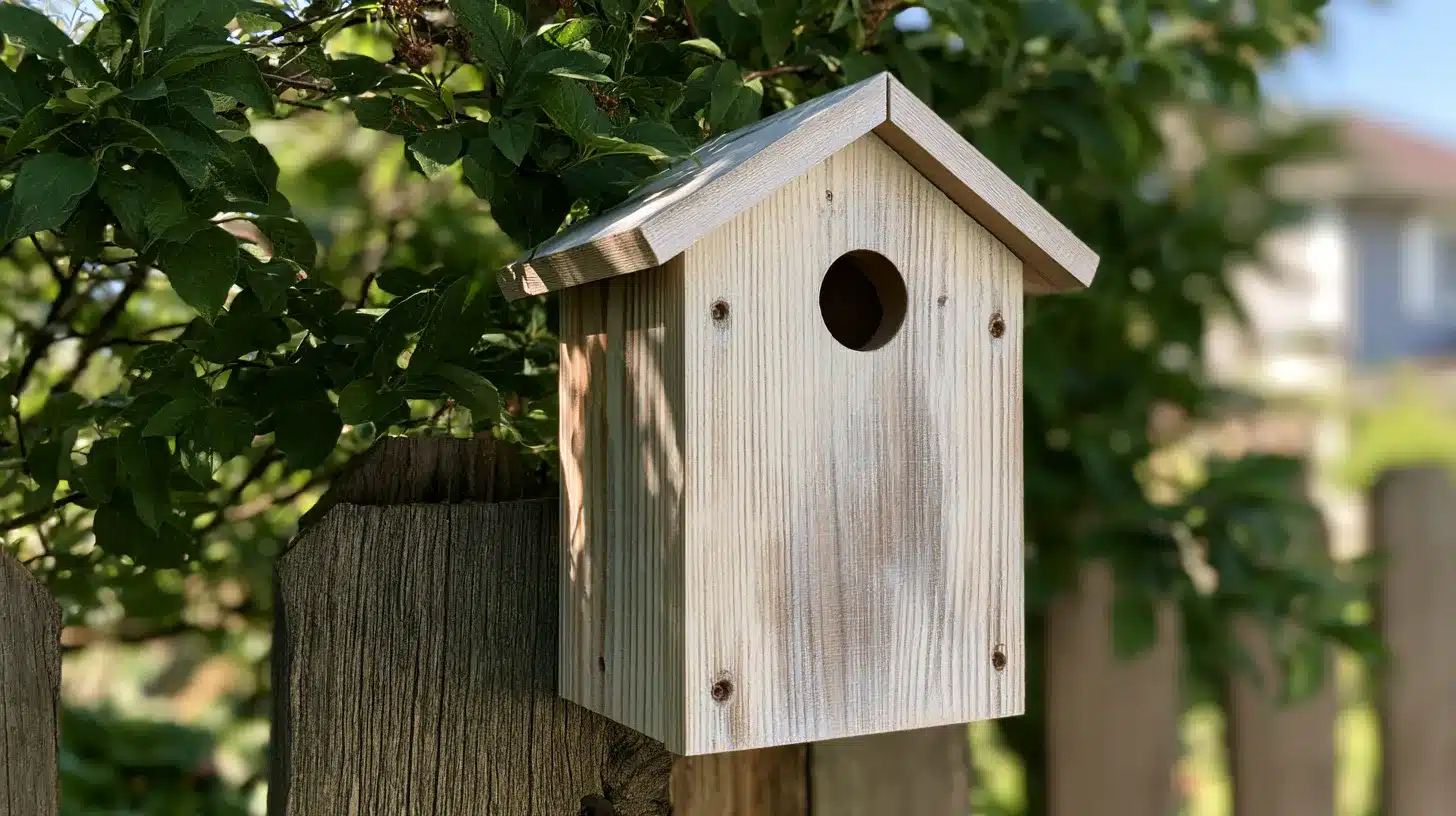
If you want a painted look but without fully covering the wood, try this.
Mix white exterior paint with an equal part water and brush it over the cedar in only one thin coat. And wipe back gently with a dry cloth while it is still wet.
The wood grain shows through, and the finish looks beautiful.
18. Black-Painted Cedar Box Birdhouse
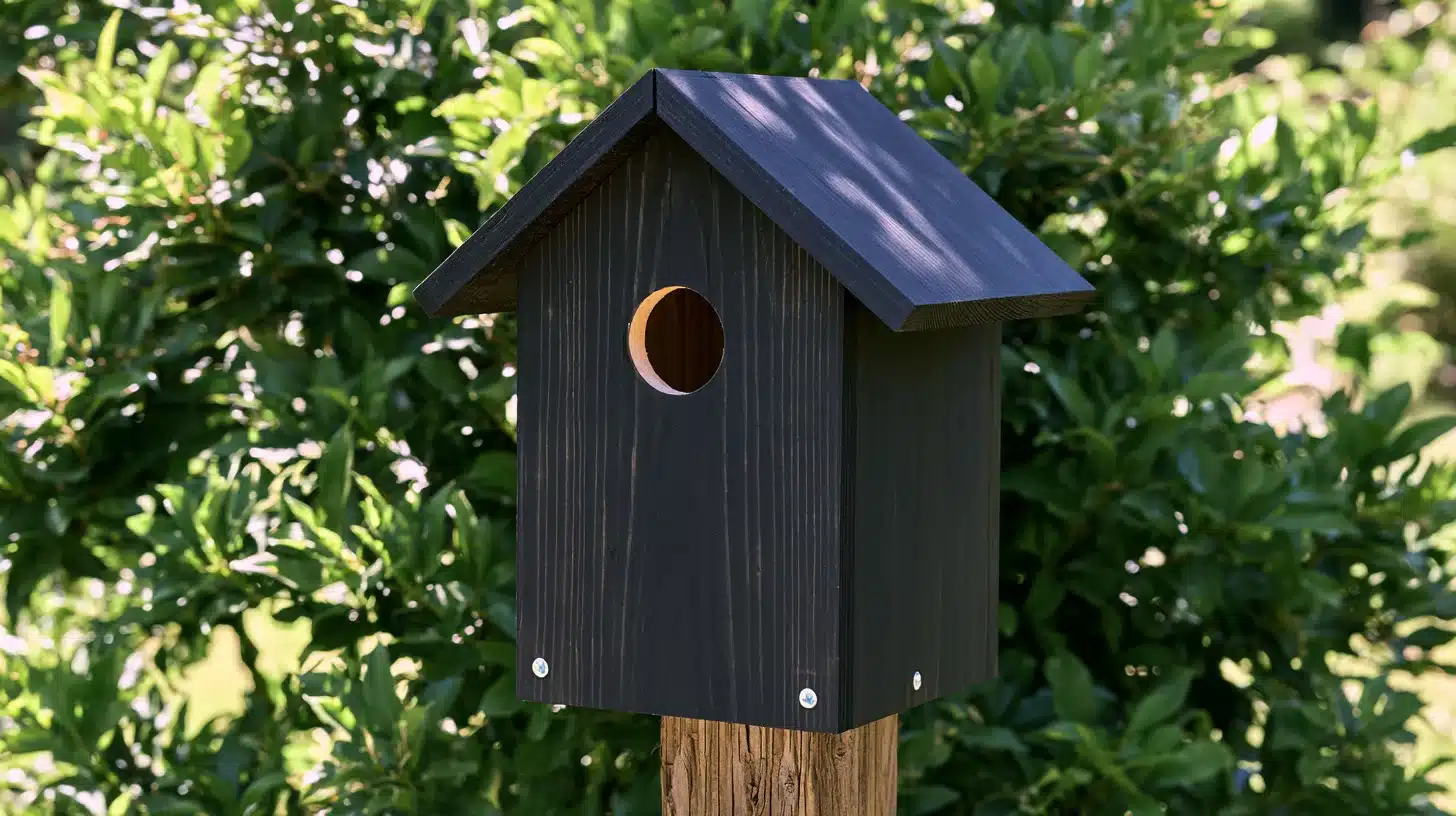
Use one coat of black water-based exterior paint on the outside of a standard cedar box.
Black weathers well outdoors and looks striking against green foliage. Keep the interior completely unpainted and the entrance hole centered.
Affordable, Upcycled DIY Birdhouse Ideas
Before you head to the hardware store, take a look around the house first.
You can use old containers, worn-out garden tools, and unused kitchen items; they can all be turned into a birdhouse.
19. Teapot Birdhouse
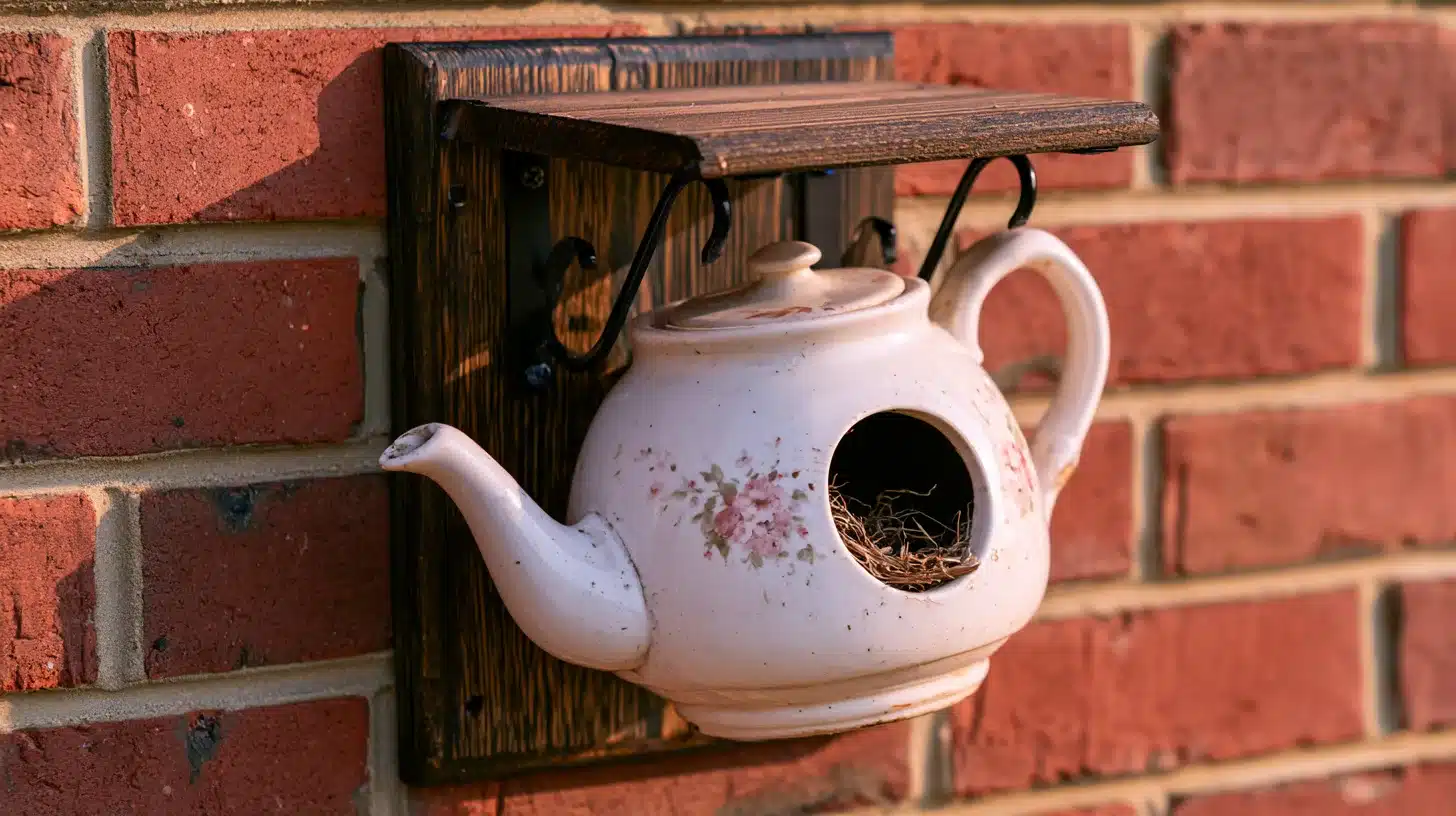
Take an old ceramic teapot you no longer use, drill a small entrance hole, and fix it to a wooden post or wall bracket using exterior adhesive.
That is genuinely all there is to it; it’s beautiful, creative, and genuinely very attractive.
20. Tin Can Cluster Birdhouse
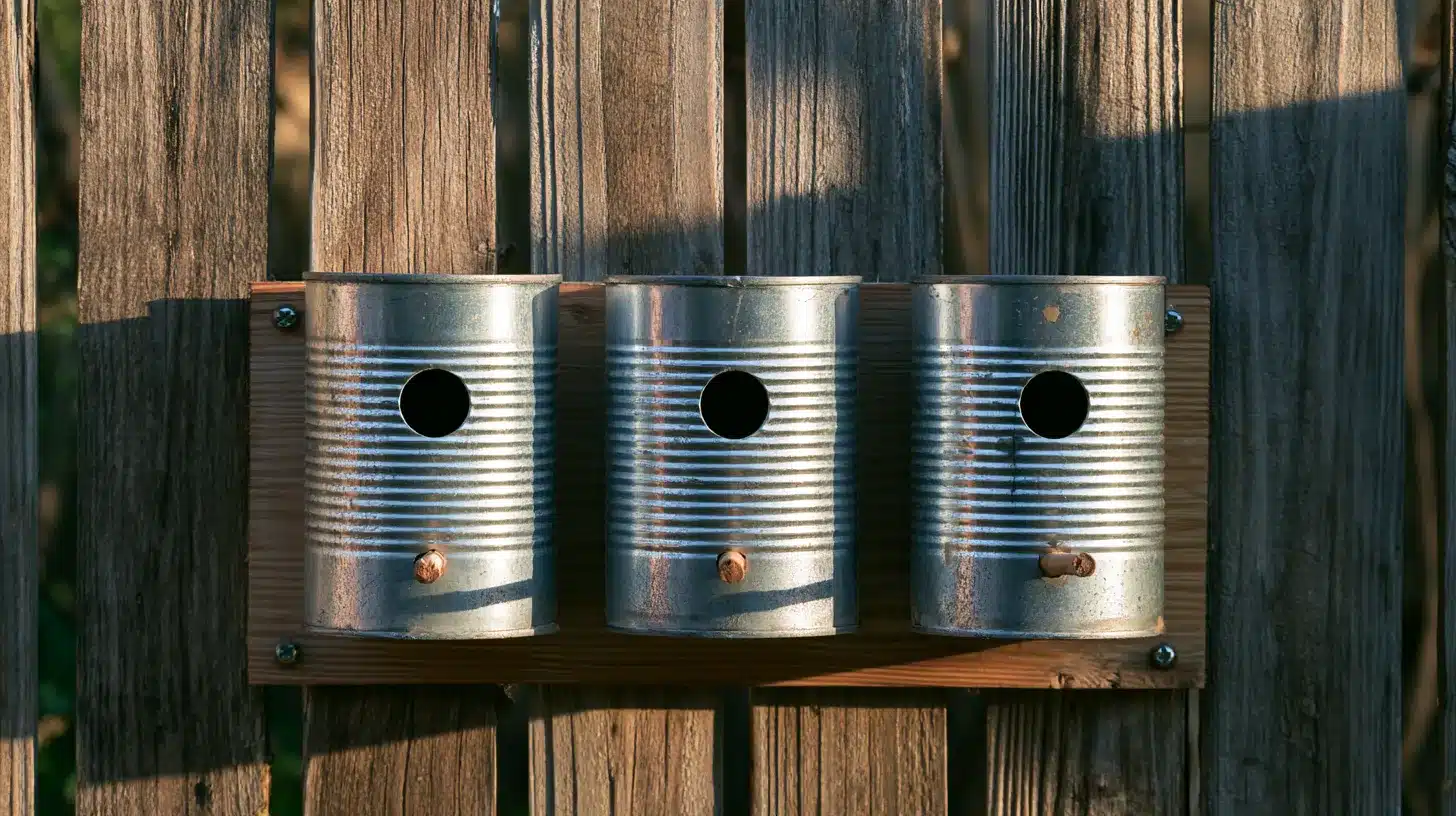
Three large tin cans and a piece of scrap wood are all you need.
Fix the cans side by side onto a wooden backing board, drill an entrance hole in each, and mount the whole thing on a fence or wall.
Sand every cut edge smooth before assembling so no sharp burrs are left exposed.
21. Old Boot Birdhouse

Yes, really.
A weathered rubber or leather boot fixed to a fence, and that to a birdhouse, is interesting.
Drill a small entrance hole and add a small wood roof according to your preferences. It looks eccentric in the best possible way and costs nothing more.
Conclusion
That is really all there is to it.
One board, a free afternoon, and the right entrance hole size are enough to build a birdhouse that birds will actually use.
Put it up before nesting season starts, clean it out each fall, and it will keep going year after year.
Frequently Asked Questions (FAQs)
1. How High Should You Hang a DIY Birdhouse?
Mount the box 5-10 feet off the ground, facing northeast or east to avoid afternoon heat buildup. Keep it away from feeders as nesting birds prefer quiet spots.
2. How Do You Clean a DIY Birdhouse?
Clean once a year after nesting season ends, around September or October. Remove the roof, clear out old nesting material, and scrub the interior.
3. Can You Move or Relocate a Birdhouse?
Yes. You can take down, relocate, or disassemble a birdhouse at any time outside nesting season (May through August).