Patriotic Dessert Ideas

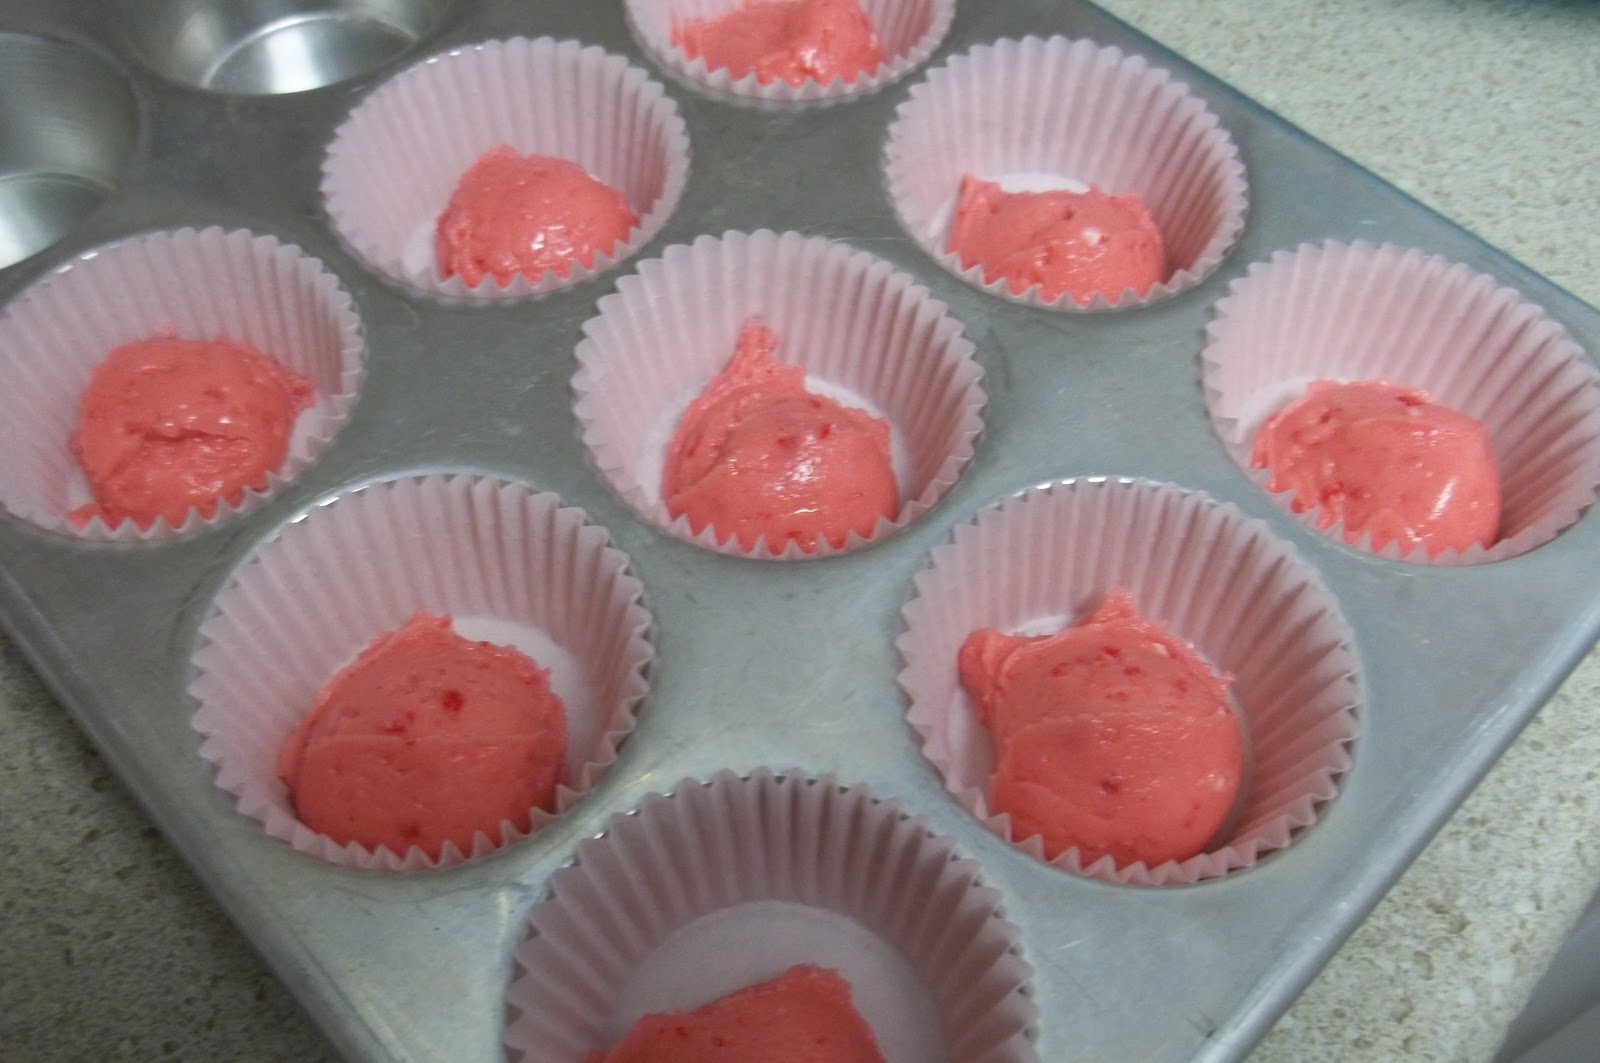
Since Memorial Day is coming up next week (and 4th of July is just around the corner), I thought it would be fun to share some patriotic dessert ideas for this week’s food post.  I found some many cute ideas as I looked on my Google Reader and on Pinterest.  Here’s some of my favorites! Hope you enjoy!
Red, White, and Blue Cookie Bark from Your Home Based Mom

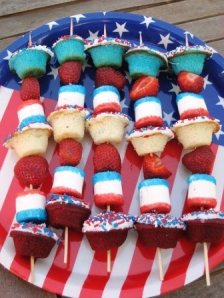
Patriotic Cupcake Kebobs from Zen Cupcake

Patriotic Fruit Tarts from Nothing But Country

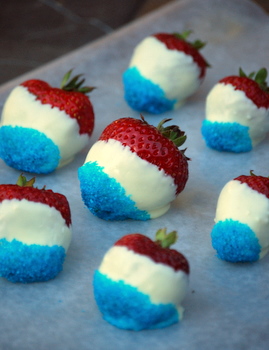
Red, White, & Blue Chocolate Dipped Strawberries from Baking Bites

Flag Cake from Make It. Love It.

I’m linking up to these parties.

Photobucket

Pineapple Upside Down Cake

Photo Credit: Betty Crocker

In honor of Mother’s Day being yesterday, I’m sharing a recipe that always makes me think of my mom.  I have to admit, as a kid I didn’t like pineapple, so when she made this, I was always wishing for her famous pound cake!  But now as an adult, I’ve developed a love of pineapple, so now I can give this Pineapple Upside Down Cake a thumbs up!

Recipe for Pineapple Upside Down Cake


Ingredients:
1/4 cup butter or margarine
1 cup packed brown sugar
1 can (20 oz) pineapple slices in juice, drained, juice reserved
1 jar (6 oz) maraschino cherries without stems, drained
1 box Betty Crocker® SuperMoist® yellow cake mix
Vegetable oil and eggs called for on cake mix box
Directions:
Heat oven to 350°F (325°F for dark or nonstick pan). In 13×9-inch pan, melt butter in oven. Sprinkle brown sugar evenly over butter. Arrange pineapple slices on brown sugar. Place cherry in center of each pineapple slice, and arrange remaining cherries around slices; press gently into brown sugar.
Add enough water to reserved pineapple juice to measure 1 1/4 cups. Make cake batter as directed on box, substituting pineapple juice mixture for the water. Pour batter over pineapple and cherries.
Bake 40 to 45 minutes (42 to 48 minutes for dark or nonstick pan) or until toothpick inserted in center comes out clean. Immediately run knife around side of pan to loosen cake. Place heatproof serving plate upside down onto pan; turn plate and pan over. Leave pan over cake 5 minutes so brown sugar topping can drizzle over cake; remove pan. Cool 30 minutes. Serve warm or cool. Store covered in refrigerator.

Linking up to these parties.

Photobucket

Homemade Peanut Butter Cups

I’m really excited to bring you this week’s recipe!  It is a homemade version of one of my all time favorite candies—the peanut butter cup!
I first saw this recipe in Taste of Home magazine a few years ago, and I marked the page but never got around to trying the recipe. (This tends to happen a lot with me.)  But a few days ago, I was wanting to make some kind of new spring/Easter treat, so I started looking through my old magazines, and found these again.  I had all the ingredients I needed, and they were pretty easy to make, so I decided to give it a whirl!
I have to warn, these things are very tasty!  They remind me of the gourmet peanut butter cups that you order, except they’re much cheaper, and the peanut butter is more sweet, almost like a Reese Cup!  And since these are so easy to make, I’d say if you make them once, you’ll probably be tempted to make them again and again.  So don’t say I didn’t warn you!  Hope you enjoy!
Recipe for Homemade Peanut Butter Cups:
Ingredients:
1 cup creamy peanut butter, divided
4-1/2 teaspoons butter, softened
1/2 cup confectioners’ sugar
1/2 teaspoon salt
2 cups (12 ounces) semisweet chocolate chips
4 milk chocolate candy bars (1.55 ounces each), coarsely chopped
Colored sprinkles, optional
Directions:  In a small bowl, combine 1/2 cup peanut butter, butter, confectioners’ sugar and salt until smooth; set aside.
In a microwave, melt the chocolate chips, candy bars and remaining peanut butter; stir until smooth.
Drop teaspoonfuls of chocolate mixture into paper-lined miniature muffin cups. (I didn’t have any miniatures, so I used the regular sized cups and started with about a tablespoon of chocolate in each cup, but I recommend making miniatures, because these things are rich!)
Top each with about a teaspoonful of peanut butter mixture. (For the regular sized cups, I actually used a cookie scoop to measure, so it was just under a tablespoon of peanut butter.  Then I rolled it into a ball See pic below.)
Then top with another teaspoonful of chocolate mixture. (tablespoon for regular size cups)
For fun and extra added cuteness, decorate with sprinkles! Refrigerate until set. Store in an airtight container.
This makes 3 dozen minature cups, and anywhere from 12 to 18 regular sized cups, depending on how you distribute the ingredients and how big you make the cups.
This post is sponsored by Petite Rouge. Are you looking for the perfect finishing touch? Petite Rouge has it. Simple, elegant blossoms to brighten up any outfit. Dainty enough for your smallest princess. Sophisticated enough for your growing girls. Clip on a headband or wear alone.

I’m linking up at these weekly linky parties.

Photobucket
If you’d like to sponsor some posts on Simply Sweet Home, please email me for details.

Sunflower Peep Cake

Photo Credit: Taste of Home

As I was looking through my collection of recipe photos for something to post this week, nothing really inspired me, and since I’m running a little late on the post anyway, I decided I’d just look for something cute from an outside source.  I immediately thought of my husband’s birthday, which is next week!  For those of you who are new and do not know, I have to always make a yellow cake with chocolate icing for his birthday.  It’s his favorite.  It’s what he likes.  End of story! 
Don’t get me wrong! It’s actually one of my favorites too!  But I just can’t blog about the same cake over and over! So for today’s post I thought it would be fun to share an alternative to the plain yellow cake with chocolate icing.  I remember seeing this Sunflower Peep Cake along time ago on Taste of Home.  I can’t believe I never shared it before because it is so cute!
I don’t think I’ll be making one of these next week, as I’m certain that hubby’s birthday is a Peep-Free Zone, but it’s fun to think about just the same!  Hope you enjoy!

Recipe for Sunflower Peep Cake:

Ingredients:
1 package (18-1/4 ounces) yellow cake mix
2 cans (16 ounces each) chocolate frosting
19 yellow chick Peeps candies
1-1/2 cups semisweet chocolate chips

Directions:
Prepare and bake cake according to package directions, using two greased and waxed paper-lined 9-in. round baking pans. Cool for 10 minutes before removing from pans to wire racks to cool completely; carefully remove waxed paper.
Level tops of cakes. Spread frosting between layers and over the top and sides of cake.
Without separating Peeps and curving slightly to fit, arrange chicks around edge of cake for sunflower petals. For sunflower seeds, arrange chocolate chips in center of cake.
Linking up at these parties.

This post is sponsored by Petite Rouge. Are you looking for the perfect finishing touch? Petite Rouge has it. Simple, elegant blossoms to brighten up any outfit. Dainty enough for your smallest princess. Sophisticated enough for your growing girls. Clip on a headband or wear alone. 

Photobucket

If you’d like to sponsor some posts on Simply Sweet Home, please check out my PR page.

Chocolate Chip Cheesecake Cupcakes

I originally shared these cupcakes last year as a guest post for the Cupcake Carnival at Attempting Creative.  At first I wasn’t sure what I’d make for the event, but after a lot of cupcake brainstorming, I decided to combine two of my favorite flavors which are chocolate and cheesecake.  The end product was a batch of yummy Chocolate Chip Cheesecake Cupcakes!
I found the recipe for the cupcake somewhere online, and then for the cheesecake topping  I just threw in a little of this and a little of that, and then a little more of this and that, until I had the perfect taste and consistency that I wanted. Hope you enjoy!
Chocolate Cupcake Recipe:
Ingredients:
1 cup sugar
1 1/2 cups flour
1 teaspoon salt
1 teaspoon baking soda
1/3 cup cocoa powder
1/2 cup vegetable oil
1 cup water (or milk)
1 teaspoon vinegar
1/4 – 1/2 cup chocolate chips (optional)
Directions: Preheat oven to 350.  Mix all your dry ingredients together (except chocolate chips).  Add wet ingredients.  Beat together on low speed for about a minute.  Use a spoon to scrape down the batter off the sides.  Mix for about a minute on medium speed.  Fold in chocolate chips, if using.  If you aren’t using cupcake liners, spray your muffin tin with cooking spray.  Fill your muffin cups about 2/3 of the way full with batter.  Bake for 25 minutes.  (My recipe book says the recipe will yield 20 cupcakes, but I was only able to make 16.)

Chocolate Chip Cheesecake Topping Recipe:
Ingredients:
1 16 oz. coolwhip (thawed)
2 8oz. packages cream cheese (softened)
4 tablespoons sugar
1/4-1/2 cup chocolate chips

Directions: Place cream cheese in the microwave for about 30-45 seconds to soften. (Be sure to check it in 15 second increments and stir if needed.) Add cool whip a little bit at a time. (I added about 4 oz. then stirred, then another 4 oz. and so on.) Blend well together using a spoon or an electric mixer on low. Add sugar and mix well. (Icing should be fairly thick yet creamy, similar to cannoili cream) If you’re not using immediately, you may refrigerate, but don’t let it set in the fridge for too long, or it will thicken like a cheesecake and it will be more difficult to pipe it).


Decorating:
Make sure cupcakes are cooled before frosting. If you’d like your cupcakes to be cream filled, poke a hole in the middle, about half way through the cupcake. (I used a handle of a wooden spoon.) I wasn’t sure how much icing I’d need for decorating, so  I used extra cool whip for the filling, however, I now know that you should have enough icing to frost the cupcakes and to use for filling if you so desire. To do the filling, I just used a small spoon, and dropped the filling in and around the hole.
Next place your icing in a piping bag or a ziploc and apply to cupcakes. Or use a spoon to spread the frosting on the cupcakes. Decorate with chocolate chips. Store in the refrigerator until ready to serve.

I’m linking up to these parties.
Photobucket

Chocolate Mint Parfaits

I love taking recipes that work and giving them a slight twist! Last week I shared my Frozen Mint Cups with you.  And this week I’m taking the same recipe but adding a little brownie to it.  The result is a yummy parfait, suitable for at home snacking or entertaining.  Just imagine serving these up alongside the Frozen Mint Cups for St. Patrick’s Day! So fun and festive! Hope you enjoy!

Recipe for Frozen Mint Cups:

Ingredients:
1 8oz whipped topping
2 teaspoons mint extract
a few drops food coloring
chocolate mint cookies
1 batch of brownies or a chocolate cake

Directions: Add mint extract to whipped topping. Mix well to distribute the flavor. Add a few drops of food coloring and stir in. Add more if you like, to get your desired hue.
Place chocolate mint cookies  (about 3 per parfait) in a ziplok bag and crush with a rolling pin or other kitchen utensil. Or use the food processor. Crumble your brownie into a bowl.  Then layer your ingredients into bowls or cups. Top with a cookie crumbs and an additional cookie.

I’m linking up at these parties.

Photobucket

Frozen Mint Cups

I was in the mood for something minty, when I put on my thinking cap and came up with these Frozen Mint Cups.  These are really sweet and yummy without being too rich, and they are very easy to make.  So if you’re kids like chocolate mint, you may want to consider making something like this for St. Patrick’s Day (or just make them for yourself, either way).  Hope you enjoy!

Recipe for Frozen Mint Cups:

Ingredients:
1 8oz whipped topping
2 teaspoons mint extract
a few drops food coloring
36 chocolate mint cookies

Directions:  Add mint extract to whipped topping. Mix well to distribute the flavor.  Add a few drops of food coloring and stir in. Add more if you like, to get your desired hue.  Take about 24 chocolate mint cookies and crush them in a food processor, or place in a ziplok bag and crush with a rolling pin or other kitchen utensil. 
Line a muffin tin with cupcake wrappers. (This recipe makes about 12.)  Pour the crushed cookies into cupcake liners.  You’ll want to use almost all the crushed cookies, leaving just enought to garnish the top of your mint cups.  Next spoon your whipped topping mixture evenly into each mufin cup.  Garnish with remaining crushed cookies, and then stick an uncrushed cookie in the center of each cup.  Chill in the freezer until ready to serve. 

I’m linking up at these parties.

Photobucket

Strawberry Cookie Cups

I love taking recipes that we love and making them just a little different by adding or changing an ingredient, or even just changing the cooking method or overall presentation.  Last week I shared my strawberry cake mix cookies that I made for Valentine’s Day, and this week I’ve got some other sweet creations that I made using the same recipe: Strawberry Cookie Cups!
Recipe for Strawberry Cookie Cups:
Ingredients:
1 Strawberry Cake Mix (18.5 oz)
1 egg
1/3 cup water
1/3 cup oil
Directions: Mix ingredients together with spoon or electric mixer. Line a muffin tin with paper muffin cups. Use a cookie scoop to place a dough ball in each cup. (For mine, I used one scoop for each cup, but if you want them to rise to the top like cupcakes, use 2 scoops.  If using a mini tin, one scoop should do fine.  If you don’t have a cookie scoop, use a spoon or your hands to create a 2 inch balls for the large cupcakes.)
Bake for about 15 minutes. Then decorate as desired. For my cups, I left some plain, while others are topped with either sprinkles, coconut flakes, or a Hershey Kiss.  You could also frost these like cupcakes, even though they’re not exactly cake like.  Just wait for them to cool before frosting.

I’m linking up at these parties.

Photobucket

Making Snow Cream

We were so excited and surprised to get a White Christmas a couple of weeks ago!  It got me to talking about the few times in my life when we actually got enough snow for my dad to make snow cream.  I was asking my husband if I should try to make some, and I soon found out he had no idea what I was talking about!
When I emphatically said, “You’ve never had snow cream!” he said, “I’m from Mobile. It doesn’t snow in Mobile.”  (Oh yeah! Duh!)  Then remembering that my husband lived in Colorado for a little while, I ask him, “Well, don’t they have it in Colorado?”
He just kinda looked at me.  I guess that was a dumb question. So either they don’t make snow cream in Colorado, or 20-something and 30-something year old men don’t make snow cream!  What do you think?
Either way, my dad always made great snow cream! It tasted just like homemade ice cream.  The stuff I made didn’t taste quite as great as his. (Alas!) But it was still pretty good. Today I’m sharing the recipe I used. 
So do you guys make snow cream where you live?

Recipe for Snow Cream:

Ingredients:

1 gallon snow
1 cup white sugar
1 tablespoon vanilla extract
2 cups milk

Directions: Take a bowl and collect some clean snow. Add sugar and vanilla, then stir in just enough milk for the desired consistency. Serve at once.

I’m linking up this week at these linky parties.

Photobucket

SSH’s Best of 2010: Food

Hi everyone!  Hope you’re enjoying the new year so far!  I think it’s no secret to anyone that food is my favorite thing to post about here at Simply Sweet Home, and I’m so excited every week to get your comments on my recipes. For this week, instead of posting a new recipe, I am revisiting some of my favorite foods that I shared with you on my blog in 2010.  Hopefully you’ll enjoy them just as much the second time around and maybe even catch something that you might have missed the first time! 
Happy Baking in 2011!