My Christmas Home Tour

Photobucket

Only 2 days for Holly Bloggy Christmas!  On Wednesday we shared Christmas Crafts at Just Sew Sassy, and for day 4 we are sharing our Christmas Decor at Shabby Creek Cottage. And then on Friday I’ll be hosting a Christmas Edition of my Friday Favorites Party!
For my decor, I like things that are bright and colorful, and I like to create an elaborate display using simple and inexpensive things like Christmas Balls and Cone Trees from the Dollar Tree, as well as Christmas Wreaths and arrangements.


Photobucket

The center of the display consists of a ball wreath and some rainbow garland.  Then the shelf is covered is some snowflake fabric, and on top of it is a “colored mirror tree,” two glasses of colored balls, and two green-sequin trees, and more rainbow garland.


Photobucket 

Besides the wreath, one of my favorite parts of this display are the vintage trees on each side.  My mom gave me these a while back, and as much as I liked them, I had no idea what I’d do with them.  But as I started working on my display, I knew these balls would be a perfect addition to these little trees and the display!
Photobucket

Each year I hang our stockings from my display case in our living room.  As you can see we have a couple of “Good Cats” for Santa to visit!
And then each year I’ve done something different to the top.  This year I added a green runner, some red and gold trees (all were dollar store finds), and a flower arrangement. And the red and white “garland” up top is actually two garland-candy canes!
Moving on to the kitchen…I have to admit I really didn’t do much in the kitchen this year, and I definitely didn’t do anything new, so I’m going to cheat a little bit, and just share a few of my photos from last year,since it’s the same stuff.
Everyone always seems to love my little kitchen tree filled with cute little utensils. It’s probably the most unique part of my tour each year!
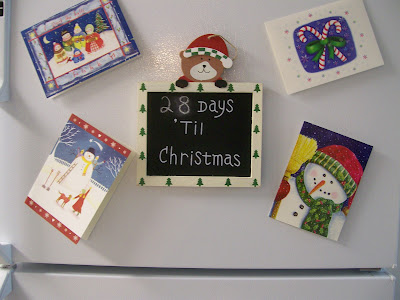
And once again this year, I added my little Christmas countdown and some cute cards to the fridge.
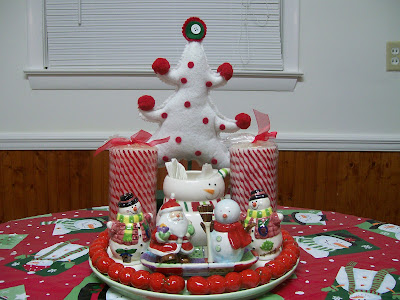
And here’s the dining rom table.  We have a bright, fun, vinyl table cloth featuring snowmen, and then for the center piece I have an array of items:

Photobucket

And finally here’s our tree featuring a combination of Mouse ornaments,  Candy Ornaments, and a rainbow of colors!
Hope you enjoyed my tour!!  Please come back here and link up all your Christmas ideas for Friday Favorites.
hbcbutton
 Photobucket
Disclosure: I am sharing my holiday home decor and cleaning tips for the chance to win prizes from The SITS Girls and Great Cleaners.

I’m linking up at Tidy Mom and these parties.

Christmas Ball Wreath and Display


Photobucket

The last couple of years I’ve been in love with everyone’s ball wreaths! I considered making my own, but when I saw this one at Target for just $20, I decided to just buy it.

Photobucket

To be honest, I’m sure if I’d try to make my own, it wouldn’t have come out nearly as nice.  And I know I would have spent more than $20 just on the balls alone!


And I’m so excited to show you how I decided to use it!

Photobucket

I already had a wreath that lights up to go on the front door, so I decided to hang this one in our living room over our new entertainment center.  It made the perfect center piece for what I’m calling my “Rainbow Christmas Display.”

Photobucket

So what do you think?  I’m sure it may be a little bright for some, but all the colors and shine make me happy!

Photobucket

  Photobucket

I’m linking up at Tidy Mom and these parties.

Scentsicles Review

As you deck the halls this holiday season, how would you like like to add a little old timey Christmas scent? Scentsicles allows you to do just that!

Scentsicle Scented Ornaments are an under-the-radarChristmas secret that instantly bring the joy of Christmas into your home withauthentic seasonal fragrance and keeps it there for the entire Yuletide season.ScentSicles can be hung from treeboughs, tucked into wreaths and garlands, or discreetly hidden throughout thehome to provide the nostalgic scent of fresh-cut Christmas trees or the welcomingaroma of cinnamon. 
I really love the versatility of this product. You can hang them from your tree or tuck them in to other decor.  I added mine to a wreath that’s hanging in my living room.  Not only do they give your room a nice scent, reminiscent of a fresh-cut Christmas tree, but they blend in great with your green garlands, trees, and wreaths! 

Additional ways to use ScentSicles as your secret for a joyful Christmas include:
· Attach a 6 pack as an add-on for those extra special gift recipients
· Hide Scented Ornaments in the hall closet so guests experience a waft of fragrance when you open and close the door
· Give them as a thoughtful and appropriate present to hair stylists, mail carriers, and teachers
· Hide one or two Scentsicles under your car seat for a driving experience that puts you in the holiday spirit
· Bring a little holiday cheer to your workspace. Just place one or two scented ornaments in your office plant
· It also makes a great hostess gift
 

The new Christmas Scents include Fresh-Cut Fir, Fresh-Cut Spruce, Fresh-Cut Pine, and Cinnamon Stick.
ScentSicles are availableseasonally at Walmart, Bed Bath & Beyond, Lowes, Michaels, Cracker Barrel,Office Depot, Frontgate catalogs, AAFES, Meijer, Hallmark and select Home Depotstores nationwide, as well as year round at ScentSicles.comand Amazon.com.  Suggested retail price for a pack of 6 sticks:$6.99.

Photobucket


Easy Ideas for a Festive Thanksgiving

It’s not too late to think about adding a little fall flair to your Thanksgiving table.  Here some easy and inexpensive, last minute ideas.

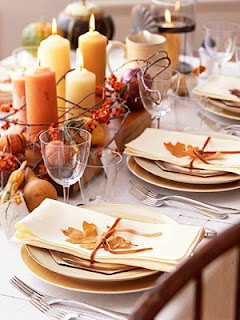
Add color and style to your table using a table runner or place mats in red or orange.  Then use faux leaves and berries to create an inviting tablescape.

Create the perfect fall buffet by placing your food trays on top of pumpkins!  Or mix in some smaller pumpkins and gourds in and around your buffet.

Here’s a display that’s easy and very inexpensive. Take bottles or jars, and place the letters “T-H-A-N-K-S” on them.  (You could even recycle some mayonnaise or jelly jars and just shake up a little pain inside to add color.) Then place straw, fall flowers, leaves, corn husks, or anything else you can think of in each one.

The easiest thing you can do to add color and flair to any table is to add a bouquet of flowers.  Faux will do, but fresh is said to be the way to go if you really want to breathe life into your room.  And the best part is that the local grocer’s and farmer’s markets will have any leftover fall inventory on sale the week of Thanksgiving!
And you can always count on candles to add color and a hint of warmth of and coziness to any room.

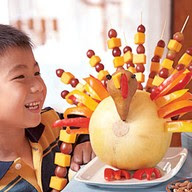
And how about adding something fun for this kids?  It just takes a few simple ingredients to make this cute turkey that also doubles as a holder for appetizer kabobs!


Photobucket

I’m linking up at these parties.

1000th Post and Blogiversary Giveaway: 41 West Designs

Today is the final day of my 4th Blogiversary Celebration, and coincidentally this is also my 1000th post! (Not planned at all!What are the odds, right?)  For the final day of this celebration, we’ve got an amazing giveaway from 41 West Designs.

41 West Designs brings you beautiful typography art.  They have a number of unique designs in modern as well as distressed-vintage styles.  And their wall art and decor will make a fabulous edition to any home!
And they have some lovely items for the upcoming holiday season.  You can add charm and class to your Thanksgiving buffet with their Thanksgiving Typography Word Art.

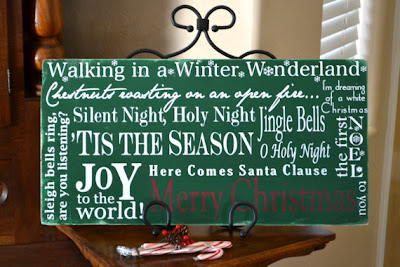
And you can deck your halls this holiday season with their lovely Christmas Typography Art.

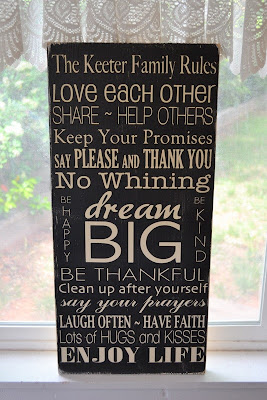
41 West Designs also has a number of word signs that are perfect for all year round, including Family Rules signs, Keep Calm art, Quote art, and other fun designs!
Connect:  Follow on twitter and facebook. Also, follow Brittany of 41 West Designs at her blog House of Sorensens.

Win it!  Brittany at 41 West Designs is offering one Simply Sweet Home reader a $50 shop credit!
How to Enter: Use the Rafflecopter below to enter. After you complete the mandatory entry, the optional entries will be unlocked. Giveaway ends November 15.

Photobucket
I’m linking up at Tidy Mom and these parties.

Pumpkin Wall Hanging

During the summer I shared a couple of projects made with embroidery hoops.  And here’s another! This Pumpkin Wall Hanging is very easy and very budget friendly!
I made with it with a couple of sheets from scrapbook kit that I got at the Dollar Tree and (believe it or not) the fabric from an old shirt.

What You Need:
One embroidery hoop (mine was 12 inches)
Fabric (14 x 14 inch square)
2 pieces scrapbook paper or fabric scraps if you prefer
Glue Stick or Mod Podge
Hot Glue Gun
Scissors
Ribbon
Directions: Cut fabric square into a circle (to fit hoop). Wrap fabric around the outside of the inner hoop. Put the outer hoop in place. Make sure the fabric is pulled and stretched tight. Then tighten the hoops to secure the fabric in place. 
Apply hot glue to the inner frame of the embroidery hoop and wrap and press down the excess fabric.
Using a piece of scrapbook paper or fabric, cut out a pumpkin shape and a pumpkin face. Use glue stick or mod podge to add a face to your pumpkin.  Then use hot glue or mod podge to place the decorated pumpkin on your fabric.
Cut out a 6 inch piece of ribbon, loop it through the top of the hoop and tie for hanging.

Photobucket

I’m linking up at Tidy Mom and these parties.

Free Halloween Printables

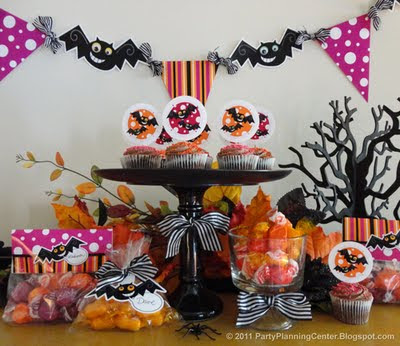
Halloween Party Printables from Party Planning Center

My Free Fall Printables post was my most viewed post last month, so for this month I’ve got some Halloween printables for you. As always you’ll find links to the sources where you can download these beneath the photos. Happy Downloading!

Halloween Versions of “Keep Calm and Carry On” Wall Art from A Southern Accent

Halloween Drink Labels from It’s Written on the Walls

Halloween Subway Art From That’s What Che Said

TREATS Sign from Dittle Dattle

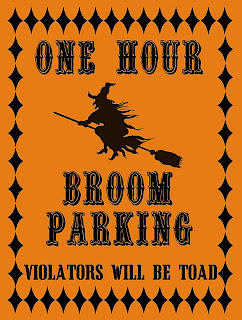
Witch Sign from RainyButterfly05 on Photobucket

Photobucket
I’m linking up at Tidy Mom and these parties.

Blogiversary Giveaway #1 – Little Miss Missy Boutique

I’m really excited to bring you some great giveaways this month in honor of 4 years of blogging! 
Our first giveaway is from Little Miss Missy Boutique. This shop is owned by Missy, a wife and mom from Utah, and it offers Fine Art for Baby, Children, Teen, Adults, Parties, Weddings, Holidays, Custom design and DIY Printables.

Little Miss Missy Boutique specializes in welcome signs and wall art that is custom printed and shipped to your door, as well as printable invitations, cards, and party supplies.
One of my favorite signs from Missy’s shop is this Princess Words Print.

I also love her selection of religious and quote art and her decor for nurseries and kids’ rooms.

Isn’t this Noah’s Ark Print adorable?


She also has some adorable printable items, including shower invitations, baby announcements, Christmas cards, and party supplies!

One of my favorite party sets is the Go Bananas Monkey theme.

Connect!  Follow Little Miss Missy Boutique through their blog or follow on Facebook.

Win it! Little Miss Missy Boutique is offering a $35 Gift Certificate for her shop to one Simply Sweet Home reader.

(Terms:Must use in one visit. If purchase amount goes over $35, you will need to pay the remaining balance. NO Cash Back. May be used for any listing(s) on Little Miss Missy Boutique Etsy Shop.  Etsy Shop only allows credit card or paypal payments)

How to Enter: Please use the Rafflecopter form to enter. Giveaway will run through October 18.


Photobucket
I’m linking up at Tidy Mom and these parties.

Disclsosure: I received no products or compensation for this post. Prize is provided by Little Miss Missy Boutique.

Harvest Halloween Sponsor #2 Paramore Art Works

It’s time to spotlight another Harvest Halloween sponsor.

Paramore Art Works is a unique Etsy shop, which offers handmade gift tags, word banners, potion bottles, and witches’ wands!

This is a fanstastic shop! The items have a sort of vintage, shabby-chic appeal, which I love! A couple of my favorite fall items are these cute tags, although I also love her Halloween garlands!

The thing that really makes Paramore Art Works stand out is their line of witches’ wands and potion bottles!  

What a great decor idea! Each bottle is adorned with cute tags and embellishments, making them perfect for a Halloween themed mantle or buffet. So fun!

The shop also has a lot of non-Halloween items which I wanted to highlight.  I really like their word banners like this one:

And they some very cute vintage and primitive tags featuring everything from from Wizard of Oz to Fleur de lis.  This set is one of my favorites:

Please go by Paramore Art Works and take a look around!

Giveaway! Beth at Paramore Art Works is offering a potion bottle of “Moon Dust” decorated with crusty gauze, twine, moss, and a spider. Perfect for a witches collection of potions!
How to Enter: The Harvest Halloween Giveaway will be posted and open for entries on Oct 14.

Photobucket

Fall Letter Craft Tutorial

I love fall crafts and decor!  I made this shabby style fall craft the other day.  I guess you’d call it a wall hanging (even though I’ve hung it on the fridge).  But the concept behind my little fall letters could also be applied to banners, cards, place mats and more.


What You Need:
Black Felt 
Brown Paper or a paper sack
Faux Leaves
Sand paper (or scrapbook paper)
Black Marker or Alphabet Stickers for lettering
Hot Glue
Twine
Magnets (optional)
Directions:
1. Cut 4 squares of black felt.  Mine are 5 inches by 5 inches. 
2. Then cut 4 squares of brown paper. (I used a paper sack).  The size of the brown pieces will depend on how big your black pieces are and how big you want your black border to be.  For example, my brown squares are about a 1/4 of an inch (or so) smaller than the black squares.  But if I was using 10 inch black squares, I probably would make the brown squares about 9 inches.
3. Next crumple the brown squares to create the textured/wrinkled effect.  
4.  Use hot glue to affix the brown squares to the black felt squares.
5. Next position your leaves on top of the brown paper, and affix using hot glue.
6. Next cut out pieces of sand paper (or scrapbook paper) for your FALL letters.
7.  With a Sharpie draw a letter on each piece of paper and place them on top of the leaves using hot glue.  Or you can add stickers or chipboard letters if your prefer.

Directions and Methods for Display/Hanging
The next step depends on how you wish to use the letters.  Here are some options:
1. You could place your letters inside a frame.
2. Another option is to place the letters in a vertical or horizontal row and attach a piece of twine to the back of the letters using hot glue. (Or poke holes in the felt and weave the twine through to connect the letters). And then tie a piece of twine at the end(s) for hanging. (as in the very first picture)
3. As a third option you can attach magnets to the back of the letters for refrigerator hanging. (or you could even use tape).
4. Or you can do a combination of #2 and #3, which will allow you to hang this of the fridge (or somewhere else) in  a variety of ways.  (See examples below)

Photobucket

I’m linking up at Tidy Mom and these parties.