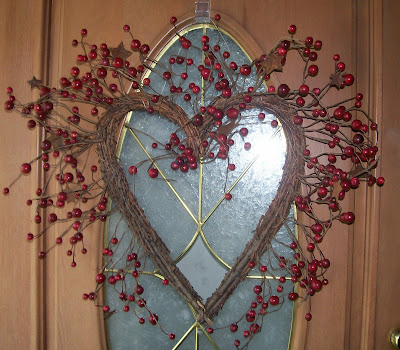
Berry Heart Wreath

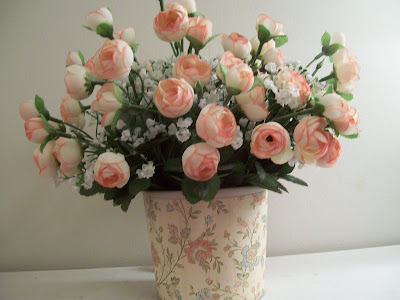
With Valentine’s Day only a month away, (Wow, this month is going fast!) I thought it would great to share this really cute wreath I have on my door.  No, sadly, I didn’t make this.  I actually ordered it a few years back.  I was shopping around and I found a few things similar to it at Shop Wiki if you’d like to take a look.
Anyway, when we moved I packed it up, and I just got it out of our outbuilding this past fall.  So this is our first time to use it.  I really love using bright colors like red in the winter time, even after Christmas.  It really brightens things up and adds a lot of warmth.
What do you guys think?
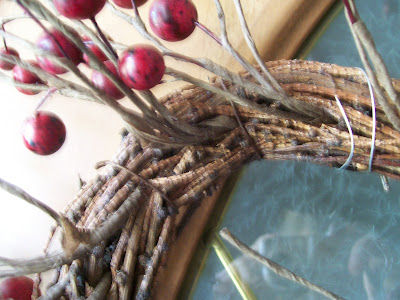
Looking the wreath over, I see that it actually wouldn’t be hard to make one like this either.  You could easily purchase a round twig wreath at Hobby Lobby.  Then purchase a piece of berry garland, and then weave it through the wreath.  Then add just a little hot glue to hold the garland in place and fluff it out as desired.

I attempted to take some pictures of how the pieces of garland are woven through the wreath.  I’m not really sure how good you can see it though.

I also bought a piece of garland to match this wreath, and last week I actually used it on a few projects which I’m really excited to share with you in the coming weeks. So stay tuned!

I’m linking up to these fun craft and decor parties!

Photobucket

SSH’s Best in 2010: Projects

At the end of each year I like to revisit my posts from the year and highlight some of my favorites. I’ve never been a really crafty person, but this year I began trying my hand at Mod Podge and some other craft projects. Today we take a look at some of the things that I made throughout the year.

Next week I’ll be sharing Best in 2010: Food, so please come back and check it out!
I’m linking up this week to these linky parties.

Photobucket

Christmas Wall Art {Holly Bloggy Christmas Crafts}

Today we are sharing Christmas Crafts for the Holly Bloggy Christmas. You can link up your project with Nicholette and Vanessa at Craft Envy.

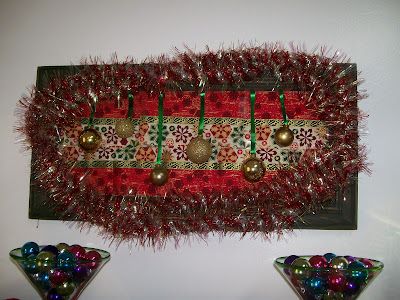
I think you’ll find my project very interesting. I had created this really cute Christmas display in my kitchen, but unfortunately it was set right in front of this apple sign, which as cute as it is, has nothing to do with Christmas. I didn’t really want to take it down, and I didn’t have anything I could replace it with either. So I got to thinking of ways that I could cover it up temporarily during the Christmas season. (After all, how can I share my cute Christmas display with my bloggy friends if there’s a picture behind it that doesn’t even match. Haha!)
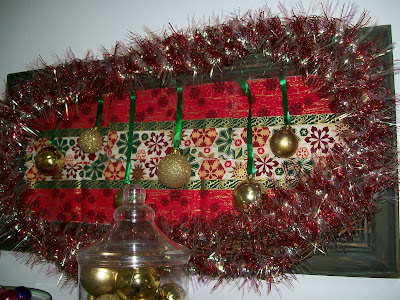
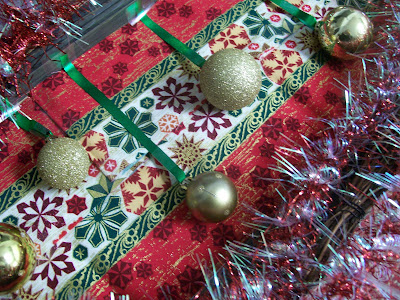
So after going through a few ideas in my head, I came up with this idea that resulted in the piece of art that you see here. In my tutorial, you’ll see how I created this temporary piece of art with my favorite office supply (tape), but I’ll also give you some instructions to help you create a more permanent (and I would also say, a bit more conventional) piece of Christmas art!

What You Need:
Wall Art, Sign, or Picture Frame
Fabric or scrapbook paper
Ribbon
Christmas Balls
Garland
Scissors
Glue, tape, and/or hot glue
Wire & wire cutters (optional)
Step 1 – Find a piece of art to cover. This may be something that’s already in your house, which you will cover temporarily. Or you can find something to cover permanently. A picture frame or old piece of art that you don’t want would be great. And you can always find something cheap to use from the thrift store. It doesn’t matter what it looks like because you are going to cover it anyway.

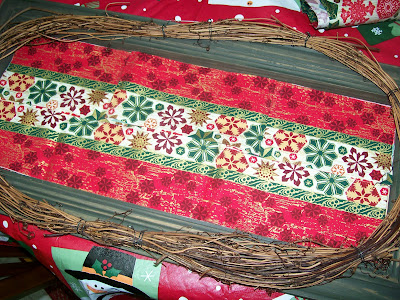
Step 2 – Measure your fabric or scrapbook paper to fit the center of your frame or piece of art. Then attach it to the piece of art. Use mod podge or glue stick to create a permanent piece of art or use tape to create something temporary.

Step 3 – Next add your garland. For my particular piece, I put the garland around the brown vine on my sign. To attach it to the vine, it used little pieces of wire and tied it around the garland and the vine. But more than likely you’re piece will not have this vine. So your best option would be to use hot glue to bond the garland to the frame itself. (But if you’re like me and don’t want to permanently alter your piece of art, I’d suggest skipping this)

Step 4 – Cut out some ribbon. This will be used to hang the balls on your piece of art. You’ll need to cut them in varying lengths. You’ll want some of the balls to hang near the middle, while some will be higher, and others will be lower. Use your piece of art to get a good idea of what sizes you need.
Step 5 – Now loop the ribbons through the balls. To attach them you can either tie a small knot or you can use hot glue or tape to affix the ribbon to itself once it is looped through.

Step 6 – Attach the balls to your piece of art. Again for my temporary piece, I simply used tape to attach the ribbon to the frame. And I was able to place it in such a way that you can’t even tell that it’s taped. But if you want something permanent, you should attach the ribbons with hot glue.

Now you should have a fun piece of Christmas wall art that you can use year after year (or just for this year)!
I’m also linking up to these weekly parties.

Photobucket

Christmas Scarf Project {Holly Bloggy Homemade Gifts}

Monday is the first day of the Holly Bloggy Christmas. The first event is the Homemade Gifts party being hosted by Jen at tater tots and jello

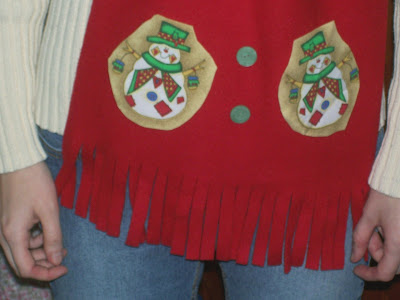
For my homemade gift, I decided to share a fun scarf-upcyle project!  I just happened to have 3 red scarves in my possession, and I decided to transform one of them into a Christmas themed scarf.  Of course, I don’t recommend that you give your old scarves away to your friends!  But if you like to make homemade gifts you could easily buy a plain scarf or some fabric and do this project!

(By the way, if you came by to see my weekly recipe, it’s been postponed this week. Please come back on Thursday to see it and link up for the Christmas Recipe party.)

What you’ll need:
Scarf (or scarf-like fabric)
A piece of Christmas Themed Fabric
Scissors
Mod Podge and/or Hot Glue Gun
Buttons (or other embellishments)

Directions:

Step 1 – Get your scarf ready.  If you don’t have a scarf, I’d suggest getting one from a store like Ross, Marshall’s, or Burkes.  They usually have nice clothes and accessories for cheap!  You may also try Walmart or perhaps even the dollar store. 
Alternatively you could buy a piece of fabric from Walmart or the craft store.  (The scarf in these pictures measures 12 inches by 63 inches, but if you were making it for a small child, you make it about half that length.)  After cutting your fabric just cut some fringe on each end.  The fringe on my scarf is 3 inches.
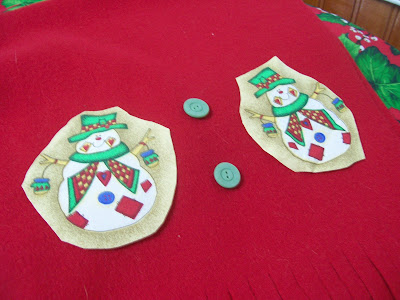
Step 2 – Take your Christmas themed fabric and cut out the shapes that you’d like to have on your scarf.  This will be the dominating image for the scarf.  In order for the shapes to show up good from a distance you need to cut out shapes that are 3 inches tall or more.  Depending on the size of the images, I would cut anywhere from one to four images out for each side of your scarf (2 to 8 images total). 
As you can see I didn’t cut the images out so they’d be absolutely identical.  For one thing, I’m a terrible cutter, and I knew I’d drive myself crazy trying to get them exactly the same.  And secondly I thought it would give the scarf a little more character if they were a little different.
After you’ve cut out the big images arrange them on your scarf.  Then attach them using either mod podge or some hot glue.

Step 3 – Add Embellisments.  I love buttons, so I added 4 coordinating buttons to the scarf, two for each side.  And I just added these with hot glue, no sewing needed!  You could also glue on beads, jewels, or pom poms.  Or if you’re fabric has some smaller images on it, you could cut these out and add them as well.
Step 4 – Finally just wear it and enjoy.  Or wrap it up and place it under the tree!

HollyBloggyButton1

I’m also linking up at these parties.

Photobucket

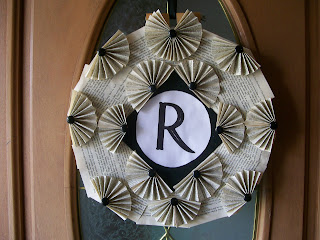
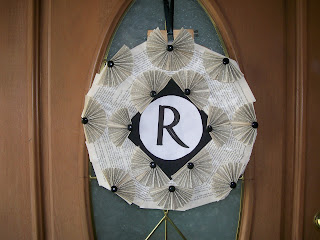
Book Page Initial Wreath

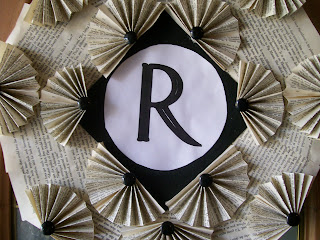
Looking for a personalized Christmas gift?  Or something personalized for your own home?  How about a fun book page intial wreath!
I’ve absolutely loved looking at all the book page projects out in the blogosphere.  While my husband was out of town a few weeks ago, I finally got around to making one of my own.  For this design I was inspired specifically over the summer by someone who created a wreath using an embroidery hoop, except theirs had a fleur de lis in the center.  (If this was you, please comment or email me so that I can include a link to your project!)

Anyway, this was mostly made out of materials I had on hand at home. And it turned out so great that I’m planning a trip to craft store so I can make some more! My husband wants me to make one for his mother for Christmas, and I’m also planning to make something similar for my dad. He’s in the process of moving, and I think it would make a great Christmas and housewarming gift. And while I’m at at it, I’ll make one for my mom as well.
And I’ve also added the wreath to my shop and will take custom orders for anyone who’d like one for their home. For more information on this, including size, features, and pricing, just visit my shop.

For those of you who love to craft yourself, I’ll also be posting a tutorial for this very shortly. I’ll try to post it in the next few weeks when I have more time. It’s not a very difficult project to undertake. It was just kind of long and drawn out, and involved a lot of steps.  Till then, I hope you enjoyed this sneak peek!

I’m linking up at these fun craft and decor parties.

Photobucket

Halloween Kitchen Decor

This post should prove that you don’t have to spend a lot of money or be very crafty to create a super cute table setting.
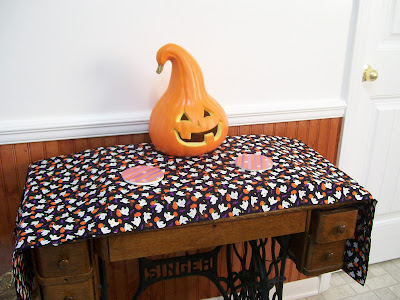
We have an antique sewing machine, which belonged to my grandmother, in our dining room.  I always keep a cover over it to protect from potential cat jumpers, and every few months, I try to change it up a bit.  This month I decided to make it a little more festive for Halloween.

Just like with the coffee table I posted on a couple of week ago, I simply used a piece of fabric as a table runner, and I created another set of these easy coasters to go alongside the pumpkin. Very simple, yet festive!

Here’s a close up picture.  I just love this fabric, featuring a pumpkin, ghosts, purple bats, and little yellow eyes.
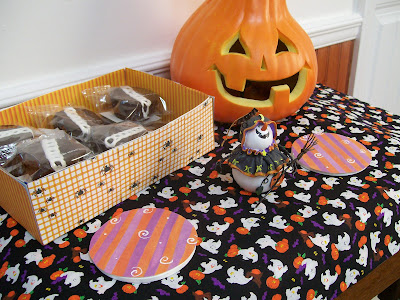
And to add a little more pizazz, I just added my little Halloween treat box and this little Halloween snowman figurine. Very fun and festive! (And Easy!)
I’m linking up this week to these crafty linky parties

Photobucket

Lemons and Lace

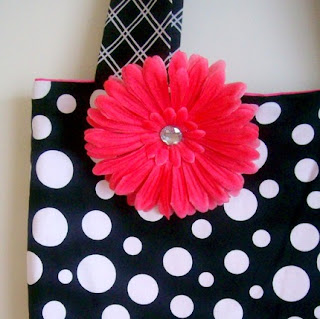
I’m excited to introduce my newest sponsor! Lemons and Lace offers adorable flower clips, headbands, skirts, purses, and lots of girly stuff!  These creations come in a number of bright and bold fabrics that you’re sure to love!

Lemons and Lace is owned and operated by Camille. She is the mother of 2 little girls, barely 3 and 18 months. Camille told me that she began making “boring bow clips” for her daughter, and suddenly started making flower clips, and the rest of her shop and stuff  “just took off from there.” After selling at local markets for the summer,  Camille and her family moved across the country and she decided to open up a new etsy shop.
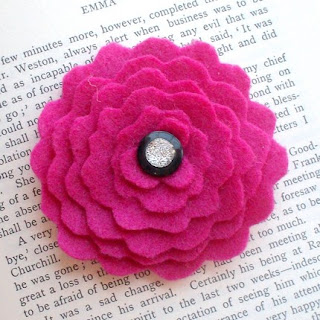
The felt flower above is one of many in the Lemons and Lace shop. These come in a variety of colors and designs and are perfect to add to any clip, head band, or bag.

Camille describes her inspiration and style for these lovely creations: “I am inspired by vintage looks, but at the same time, I love bright colors. My shop is a fusion of the two, vintage and modern, as you may get from my shop name, lemons and lace. Vintage styles, and modern styles, sometimes together in one piece, sometimes entirely their own. I am a combination of Amy Butler, Heather Bailey, and Cath Kidston!”

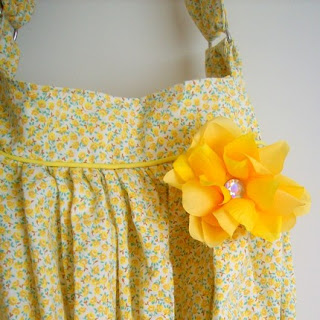
Personally I was very excited to see all of Camille’s lovely handbags.  Many of these feature Camille’s adorable flowers, and the bags are beautiful designed and come in variety of gorgeous fabrics!

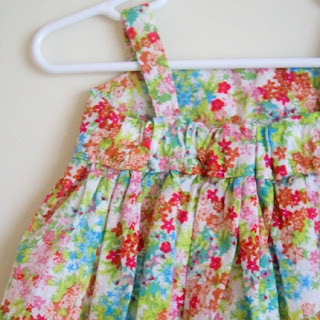
And if you love handmade children’s fashions, you’ll definitely want to check out the adorable tops and skirts at Lemons and Lace.  Sizes are listed  for each item, but all of the skirts can be custom ordered, with your choice of fabric and size.

So if your looking for bold fashion and accessories that’s a mix of vintage and  modern, go by Lemons and Lace. You can also check out Camille’s blog All About Mommies for tutorials, giveaways, and more!  Or connect with Lemons and Lace on facebook.

Discount! Through the end of October, Camille is offering my readers a discount of 15% off.  To take advantage of this, just use the coupon code “halloween.”

Photobucket

Halloween Treat Box

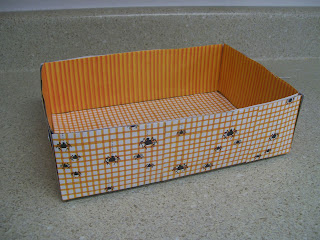
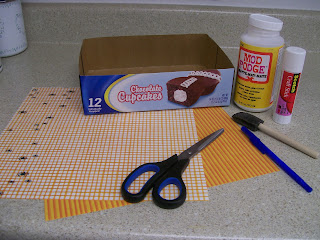
We were grocery shopping the other day when my husband picked up a big box of cupcakes. This was the same weekend that I broke out all the Halloween decorations for outside.  I find that if we don’t keep snacks like cookies and cakes out on the counter, they will  be forgotten in the cabinet and will eventually have to be thrown out. I was deciding which bowl or jar to the put the cupcakes in  I got inspired to create this cute little treat box. 
To make your own treat box, just take any box or other container you find around the house.  Then get a couple of coordinating scrapbook papers. ( I purchased the packet which included 8 sheets of Halloween paper from the Dollar Tree! I actually bought it a year or two ago and had totally forgotten about it.  Big surprise when I started hunting through my paper drawers!)
Next cut your paper to fit your box.  Since I’m not the craftiest person in the world I find it helps a lot to trace the shapes you need with a pen or pencil.  For this particular project I found it easier to cut each side individually but whenever possible, I try to wrap the paper around the item I’m decoupaging.
Finally apply mod podge to the back of your paper and stick the paper to your container.  Make sure it goes on smooth.  If you’re using a cardboard box like I did, you could alternatively use a glue stick.  After you’ve completely covered your container, you can finish all the project by giving it another light coat of mod podge.
After it dries, your ready to fill the box with your favorite Halloween treats!

I’m sharing my project at these crafty linky parties.

Photobucket

Halloween Coffee Table and Coaster Craft

I finally got my Halloween stuff out this past weekend.  In the past I’ve only decorated outside, except for some fall garland over the cabinets in the kitchen, and some fall leaf window clings on our back door, but this year I decided to brighten up the indoors a bit.
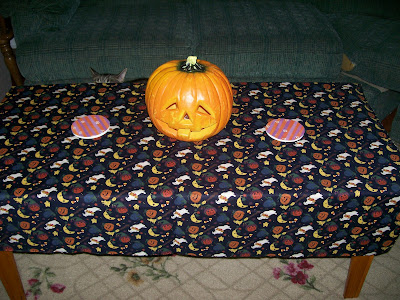
I created this cute arrangement for our coffee table in the living room.  Usually I like to be very elaborate and “busy” with the decor, but in certain areas, I tend to keep it a little more minimalist.  One reason is because stuff can get in the way in certain places, and secondly my cats would be too tempted if I covered the tables with too much stuff.  In fact, in the photo below you’ll notice a small set of gray ears just to the left of the pumpkin. (That’s Rebel.  He loves to decorate, and his style is, well…very unique!)

Easy Table Cloth:
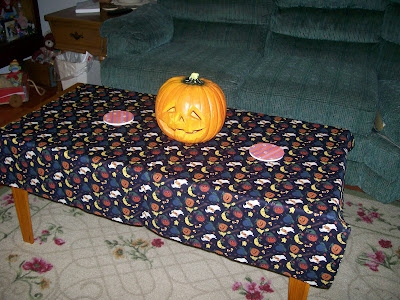
For the coffee table, I simply used a few yards of cute Halloween fabric– no sewing or crafting involved –and it’s much cheaper than any table runner you could buy.  Of course, the jack-o-lantern was added to the center.  I thought about getting a couple of smaller ones to go beside it, but here again, I’m keeping it simple.
Making Your Own Coasters:
And finally I made these cute little coasters just to have something else to set on the table.  For these, I simply took a couple of old coasters that we weren’t using.  Then I used them as a stencil to trace two circles and I cut them out.  For the next step, I’ve seen a lot of people using mod podge to stick the paper to the coaster, but since we won’t really be using these coasters, and since they’ll only be out for a month I came up with an idea to help me change up these coasters any time I want.

I had some magnet strips with adhesive on the back.  And I just took my scissors and cut a very small piece of magnet off, and stuck it to the coaster.  Then I cut off another small piece and stuck in on to the paper.  Put the paper and the old coaster together, and you’ve instantly got a new coaster!  And after the holiday, you can either throw the paper away or save it for next year.  Meanwhile you can create a new set for the next holiday.

Next week I’ll be sharing a Halloween mod podge project that I did over the weekend and another table decoration, so please come back and see!

This week I’m linking up to these craft & decor parties, plus over at My Blessed Life and Tater Tots and Jello for the Celebrating Autumn event, and Susie QT Pies Scraps for Life for the Halloween Tricks N Treats Party!

Photobucket

Mod Podge Bathroom Coordinates

Have you ever done a bathroom makeover? I don’t mean a makeover with a new vanity, cabinets, and floors.  I’m talking just a simple makeover: new shower curtain, rugs, towels, and coordinates.  These days even the simplest of makeovers can get a expensive.  But thanks to Mod Podge, you can now do a bathroom makeover on even the smallest of budgets!
Previously I shared my Flower Arrangement Revamp and my Easy Initial Art, and today I’m sharing some of the bathroom coordinates that I made over with just a little scrapbook paper and Mod Podge! And what’s even better about these makeovers is that I was able to use some really cheap (and I do mean cheap!) stuff that I already had on hand for the project

See what I meant by cheap?  I’ve had the jar on the left forever! This thing was in my bathroom at my dad’s house, and there’s no telling how long we’ve had it!  I used it as a cotton ball holder.  Because I can’t let go of anything it came with me when I moved out.  (It had a lid too, but that seems to have disappeared!)  And the basket on the right was something I bought at the Dollar Tree!

And next we have cocoa. Cocoa? Yes, Cocoa! I recently finished off this container of cocoa, and as I was throwing it away, something inside me screamed, “Don’t do it!” It just so happens that cocoa containers are the perfect size for storing so many things: Markers, Pens, Cosmetic Brushes, etc.

Here’s the trio together!  Quite an improvement, huh?  I should have gotten a better picture, but you’ll be able to see them a lot better when they’re actually on display in the bathroom.
As you can see, I didn’t mod podge the inside of the basket.  I thought about doing it, but it seemed kind of pointless because the basket was going to be filled with a makeup bag and supplies, so you won’t really see the inside anyway, and plus hubby and I are the only ones who will be in this bathroom.

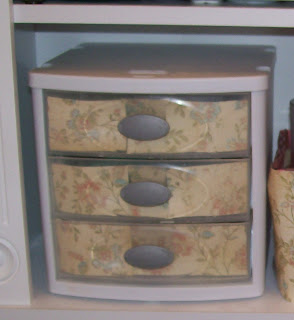
And then I also put paper on this little set of drawers!  I actually didn’t Mod Podge this, but used tape instead.  I was very happy with the way it turned out!
In an upcoming post, I’ll show you the rest of the items, which includes a soap dish & toothbrush holder that I was actually thinking of putting in a yard sale box until I decided to do this instead! And you’ll get to see the bathroom with all the elements put together!
For a list of parties I’m linking up to, please check out the buttons in my sidebar or my Party Page
Photobucket