Archives for 2020

Everything You Need to Know About Rainwater Tanks and Rainwater Harvesting

American families use close to 300 gallons of water every day. A good 30% of that water gets used outdoors. This is quite a lot when factoring annual precipitation!

You’d think the water provided by Mother Nature is sufficient, right?

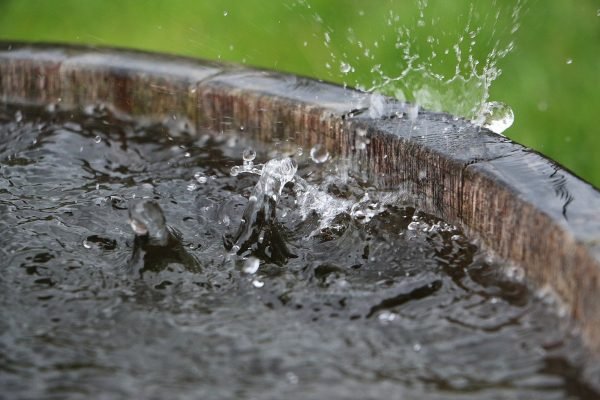
One way to make the most of the precipitation in your area is by capturing and reusing rainwater. This article explores the benefits of rainwater harvesting. And, offers a way to set up a system so you can do your part in conserving water.

The Benefits of Rainwater Harvesting The precipitation in the US amounts to about 30.21 inches on average. This would add up a ton if you had a way to capture and reuse it. That’s the idea behind rainwater harvesting — there are many benefits in doing so:

· It’s Purposeful — Rainwater is safe for most uses (that’s not drinking and cooking). From laundry to personal hygiene, rainwater is a perfect replacement for groundwater.

· Reduces Demand — Access to a supply of rainwater means less demand on the local, public systems. The reduced demand is ideal for sustainability!

· Cost-effective — Rainwater is free. You’re not paying that much to use it beyond the upfront cost of capturing it.

· Environmentally-friendly — Reusing rainwater for plants and everyday activities is green. You can contribute to reducing a carbon footprint by reusing what the Earth gives you!

· Simplicity — Collection systems are easy to maintain. There aren’t a ton of moving parts, almost anyone can manage one!

Imagine all that you could do by collecting rainwater. Now apply those great benefits to scale such as if you had a small farm! Let’s now shift focus and get set up with a rainwater collection system so you can explore these benefits.

How to Collect Rainwater

The process of collecting rainwater for harvesting isn’t too complex. The biggest hurdle in this process is setting up the equipment. Let’s go ahead and cover everything, though, to be sure you’re doing it right.

1. Start by Checking Local Regulations

There are no federal restrictions on rainwater harvesting in the USA. But you’ll want to check the state-level restrictions.

Local laws may dictate how much rainwater you can harvest. Rainwater harvesting is even required in some countries like Australia! In all, it’s best to know that you can versus getting set up and getting fined.

2. Source the Equipment

There are a few different types of rainwater tanks:

· Large, round

· Slimline

· Underground

· Underdeck

These tanks come in all material types, too, like:

· Plastic

· Sheet metal

· Concrete

· Fiberglass

· Stainless steel

The volume of these tanks also depend on the manufacturer and who you’re buying from. Check this page here for a good starting point when comparing suppliers.

You may also want to source:

· Flush diverter

· Water pump

· Filtration system

· Purification system

Think of the system as a large, siphoning operation with filtration built-in.

3. Get Setup

Water collects during rainfall or diverts from a structure (like a roof).

The water passes through the diverter to filter larger gunk. Then, water dumps into the storage. Water gets pumped through the system, filtered, purified, and then becomes accessible.

Kits allow you to DIY these systems. You may choose to have professionals set up a rainwater harvesting unit instead.

Rain, Rain Don’t Go Away

Consider how much water gets used every day. Then, consider the benefits of rainwater harvesting. This opportunity is a no-brainer for those wanting to improve our planet’s sustainability.

interested in learning more ways to simplify and save around the home? Check out the great household tips and guides here on the blog!

The Top Reasons Why You Should Make the Switch to Green Cleaning Products

Each week, Americans spend an average of six hours cleaning their homes. They sweep, vacuum, and mop their floors, wipe down countertops, tables, and desks, and do whatever else needs to be done to keep their homes looking their best.

But far too often, people fail to use green cleaning products when cleaning their homes. Instead, they use cleaning products that contain harsh chemicals that could do them more harm than good while they’re in the process of cleaning.

Many of these old-school cleaning products might get the job done. But at what cost? Rather than continuing to rely on them, you should add eco-friendly cleaning supplies to your cleaning closet and use them from now on.

Here are seven reasons why you should make the switch to green cleaning products.

1. Helps You Keep Harsh Chemicals Out of Your Home Reports have indicated that the average American home contains more than 60 toxic chemicals in it. Many of these toxic chemicals are found in the cleaning products that are used in homes.

Some of these toxic chemicals include:

· Phthalates

· Perchloroethylene

· Triclosan

· 2-Butoxyethanol

Take a look at the back of the cleaning products that you’re using in your home at the moment. If you see any of these chemicals listed, throw these products out and replace them with green cleaning products.

The last thing you want to do is allow these types of toxic chemicals to hang around. They’re going to put you and your family at risk each and every time you use them.

2. Protects the Health of You, Your Family, and Even Your Pets

There is a reason why so many cleaning products contain the toxic chemicals that we just mentioned.

It’s because they make these cleaning products effective. These cleaning products will help you get your home spick and span when you clean it.

But if you, your family, or even your pets are exposed to these chemicals all the time, they can cause all kinds of health problems down the line. You, your family, and pets might be forced to deal with everything from rashes to breathing issues when you’re around toxic chemicals.

3. Lowers the Chances of an Accidental Poisoning Occurring in Your Home

To be clear here: Both cleaning products containing toxic chemicals and green cleaning products should be kept out of the reach of children at all times. You should keep these products locked up somewhere so your kids won’t be able to get to them.

But in the event that your kids are somehow able to access your cleaning products, you’ll be so much better off having green cleaning supplies in your home. You won’t have to worry about your kids ingesting toxic chemicals that could do them real harm.

That’s not to say that green cleaning products can’t cause complications if they’re ingested. But having them in your home as opposed to cleaning products with toxic chemicals will lower the chances of your kids accidentally poisoning themselves.

4. Keeps the Air in Your Home Cleaner Most Americans spend about 90% of their lives indoors these days. They’re almost always inside either at home, at work, or in school.

For this reason, it’s very important for the air in homes, businesses, and schools to be clean. If it isn’t, people will spend all day long breathing in air that contains certain contaminants that can harm their health.

You can’t do much to control the indoor air quality at work or in school. But you can control it at home by using green cleaning products.

These products will keep the air in your home cleaner and safer for you and your family. Visit here to see how these products will help in this department.

5. Prevents Your Local Waterways From Becoming Contaminated

When you use cleaning products containing toxic chemicals to clean things like sinks and toilets, they will end up getting flushed away down the drains in your home.

Once that happens, there is a chance that these products might pollute your local waterways. Things like ammonia and petroleum may end up in the streams, rivers, and lakes in your area, where they can negatively impact animals, fish, and other wildlife.

They can also end up back in your local water supply and return to your home at some point in time. You won’t have to worry about this happening when you choose to use green cleaning products.

6. Encourages You to Establish Other Eco-Friendly Initiatives in Your Home

Using green cleaning products in your home will make you feel good about the steps you’re taking to do your part to help the planet. It’ll also motivate you to implement other eco-friendly initiatives into your day-to-day life.

In addition to adding eco-friendly cleaning supplies to your cleaning closet, you might also start using other eco-friendly products around your home. It’ll make you and your whole family more committed to “going green.” Long term, you will all feel better knowing that you’re using eco friendly products that will have a better footprint on the environment.

7. Cleans Your Home Just as Good as, If Not Better Than, Other Cleaning Products

There are some people who are under the impression that green cleaning supplies don’t work as well as cleaning products with toxic chemicals in them. But this couldn’t be any further from the truth!

Today’s eco-friendly cleaning supplies are designed to work just as good as the tried-and-true cleaning products that people have been using for years now. In fact, many of them will work even better than the products people have traditionally used in their homes.

Consider giving them a try to see how well they work. You might be able to cut down on your weekly cleaning by incorporating them into your cleaning routine.

Buy Up as Many Green Cleaning Products as You Can Today

Have you been thinking about using green cleaning products for a while now but hesitant to test them out for one reason or another? Stop stalling and take them for a test drive.

As you’ve seen, there are so many reasons to start using green cleaning supplies. You’ll be so glad you made the switch once you experience the benefits of using them for yourself.

Read our blog for more useful tips on keeping your home clean.

Dirty Home and Mental Health: What’s the Correlation?

There’s nothing like the feeling of coming home to a perfectly clean house. But could that cleanliness be providing more than the feeling of satisfaction?

Many people find that the cleaner they get, the less stress and anxiety they feel in general. We’re going to talk about the correlations between a dirty home and mental health in this article, exploring some ideas of what the connection is and why it matters.

Hopefully, you’ll have a little more motivation to get up and scrub those dishes after reading this article.

The Connection Between a Dirty Home and Mental Health

There’s something intuitive about the initial benefits of cleaning your home. You feel a sense of accomplishment, you’re not guilty about the rubbish that’s piled up over time, and you can go about your routine smoothly and care-free.

It just feels good to keep things in order. That said, the benefits run a little bit deeper as we begin to examine them.

Let’s take a look at some of the deeper issues that affect mental health.

Improved Diet

Cleaning your house won’t magically improve your diet, but having a clean kitchen makes the idea of cooking your own food a lot more appealing.

We’ve all walked into the kitchen to make something, only to cave and order take out because all of our pots and pans are dirty. This process can get more and more unhealthy until it totally uproots your diet.

Cooking for yourself often is one of the first steps to having a balanced diet. Additionally, nutrition and mental health are intimately connected. Those trips to fast-food restaurants will quickly degrade your mood, confidence, and energy levels.

Social Bonds

A messy house is also a great reason not to invite others to your home. Whether you’d like to invite friends over for dinner or move forward with a romantic relationship, piles of garbage will almost always get in the way.

No one wants others to see the heaps of trash they’ve amassed over the last couple of weeks. If you’ve got your hands on too much rubbish, check out this page to get the problem sorted.

Stress and Anxiety

On top of the practical issues that come with a dirty home, a generally disorganized living space is a big source of stress. Different people have different standards for what they consider clean, of course. That said, there comes a point when you know you’re not upholding your own standards and your home becomes chaotic. That equation causes stress, and stress can be a primary contributor to depression over time.

Not only does it feel good to clean your house, but maintaining a clean house can be a safeguard against mental states that make you feel bad. So, if you’re feeling a bit down, try your hand at cleaning the house and keeping it that way.

You might find that your symptoms improve in a few ways.

Need More Health and Wellness Tips?

The connections between a dirty home and mental health run pretty deep. There are a lot of other factors in a person’s health and well-being, though.

Explore our site to learn more about mental health and how to stay on top of it.

Phew, What’s that Smell? 5 Unusual Household Smells and Their Causes

Has your house been emitting some strange smells lately? Even worse, does the odor seem like it’s impossible to track? This could be due to a ton of different reasons. If you suspect you might have a mold problem, you should look at this article on 10 Warning Signs of Mold Toxicity: https://www.drberg.com/blog/10-warning-signs-of-mold-toxicity

But if you know it’s not mold, then what is the source? Whether it’s the animal droppings, smelly dishwasher or sitting moisture, multiple side-effects of daily life can fill your home with a non-pleasant smell. If you can figure out where the scent is coming from, you can get rid of it.

Check out the following household smells and get what the culprit is.

1. Smelling Gas Natural gas doesn’t have any smell but when the chemical mercaptan is added, it creates the ‘rotten egg’ smell. If you’re smelling a cabbage type smell in your home, it could be a dangerous gas leak. Leaving it untreated could lead to a fire explosion.

Leave the house immediately and call the gas company using your neighbor’s phone. Avoid calling using a landline phone in your home, using a car, turning appliances or lights off, as they could lead to sparks.

2. Garbage Smell

This is one of the most annoying household smells. It almost smells like a waste treatment plant. It might be a leak of the sewer gas that is toxic and potentially dangerous such as hydrogen sulfide that could cause unconsciousness or eye irritation. Methane can also deplete oxygen, causing asphyxiation. One leading cause is a bathroom that isn’t used often. The pipes under a sink or shower have a U-shaped trap that holds a small amount of water that prevents sewer gas from leaking back into your house. If you’re not using your bathroom the water will evaporate, leading to the odors.

To eliminate the smell, pour a cup of water into the bathroom drain. You can go an extra step and add a tablespoon of vegetable oil to prevent the water from evaporating. If you still can’t find the source of the problem, it might be that a vent pipe that routes sewer gas up and out via your roof is clogged or broken.

In this case, ask for the assistance of a plumber or home inspector to investigate.

3. Smokey Smell

Strong smoke smell is a reason to cause panic but even a small smoke smell could be utterly disturbing. If you can smell the odor every once in a while, like when starting an appliance or particular light, it could be an electrical smoke. This could be very risky.

Call your electrician or fire department for help immediately. Consider leaving the house until the source of the odor is detected.

4. Dirty Dog Odor

You might detect a raunchy, weird smell like a fur friend who needs a bath. But then you realize you don’t own one. This could mean you have raccoons, squirrels or rodents in your attic.

Their feces might contain roundworms eggs that might cause health issues. If you find these feces, don’t pick them up yourself. Instead, call the pesticide control.

If you do have a dog in the house, bathe your pet more often. Also, clean where your pet sleeps with soap and water. Avoid harsh chemicals to protect your fur baby.

Additionally, vacuum under your sofas and bed to prevent hair and odor build-up.

5. Mildew Smell

An unpleasant mildew smell might indicate that there is a sink or broken pipe that has led to mold that loves to grow in the dark, damp spots. It could be dangerous for people with asthma and allergies. If you see any mold in your home, disinfect non-porous surfaces such as tiles with a 10% water/bleach solution and let it sit for at least ten minutes when ventilating.

For surfaces such as walls, it’s best to replace them. If you can’t see any mold, it might be inside the walls. Seek assistance from the local health department to check where the issue might be. Here are some drain cleaning tips to get rid of the smell in the meantime:

Physically get rid of the mold. The best method to remove the mold is by using water and detergent to scrub the surface. Since mold collects in the drain tailpiece, scrub both the stopper and strainer inside it.

Natural cleaning alternatives. You might not want to remove the strainer to clean the mold physically. In this case, pour a half cup of baking soda followed by a half cup of vinegar. Cover the pipe for at least ten minutes to restrain the foam of the pipe.

Rinse the pipe with a gallon of hot water with a half cup of salt. If your pipes are made of plastic, use warm water to avoid destroying them and boiling water if your pipes are made of metal.

Keep the drain clean. Frequently treating the drain with baking/vinegar soda is a great way to maintain it. For maintenance purposes, divide the portions by half.

You can also make your mold-cleaning cleaner by mixing hydrogen peroxide, vinegar, and borax. It foams when you add water.

Cleaning the global disposal. Mold is likely to stay in garbage disposal where it feeds from food waste. Regular maintenance includes filling global disposal with soapy water. You can also add one or two chopped-up lemons.

Say Goodbye to Household Smells!

Dealing with odors in your home isn’t always easy. You need to know where the smell is coming from as a first step to eliminating them.

After realizing what the smell is, take action right away so you don’t leave the mess lingering. Some household smells could lead to health issues so the best thing to do is act fast.

If you’d love to learn more tips and tricks, visit our blog.

How To Keep Your Home Looking Beautiful Year-Round

A beautiful home is a happy home, so it’s worth taking the time to figure out how you can make it look more appealing. Be glad to know there are several ways for how you can make it more attractive all year-round.

It’ll take an effort on your part but know that all your hard work will pay off in the long run. You’ll not only enjoy your space more and feel more comfortable in it, but onlookers and visitors will also notice your updates. It’s a wise idea to keep a checklist handy of maintenance items you should be taking care of during each month of the year as well.

Know When to Call the Professionals

You can keep your home looking beautiful year-round by knowing when you should call the professionals and enlist their help. For example, you may experience water damage due to bad weather or a leak in your home. In this case, you don’t want to put off cleaning this mess up, and instead, you should contact the experts at trilink.pro to take a look and help you restore your property.  

Follow A Cleaning Schedule

It can be challenging to keep up with the cleaning when you’re a busy and working parent. Therefore, follow a schedule that will help to ensure you stay on track with your tasks. It’s also a wise idea to clean up messes throughout the week and sweep your floors regularly. Your home will not only look more beautiful, but you’ll likely all be healthier without so much dirt and grime lurking around. Not only tidy up but also perform a deep clean every so often and declutter your closets and pantry to help you stay organized.

Touch it up with Paint

Paint goes a long way in helping you to improve the look of your home and make it look more beautiful. Touch up areas that are damaged or chipped and consider adding a fresh coat of paint to rooms that are dingy or outdated. You may also want to use paint to make a small bathroom appear larger or as an opportunity to create more excitement in a dull or boring room by painting an accent wall. Another way to modernize your home is to paint wood trim and doors white.

Decorate for the Seasons

You can keep your home looking more beautiful year-round by switching out your décor based on the season. For example, in the summertime, you can display fresh flowers and hang images of the beach and outdoors. During the wintertime, it’s your chance to cozy it up with wreaths, pinecones, and lots of rugs and blankets. Remember also change up the décor on the outside of your home to help boost your curb appeal.

Conclusion

Apply these tips to help you maintain a beautiful and charming home year-round. It’s all about the details and staying on top of your to-do list. All of these improvements will have you falling back in love with your home and enjoying your space more.

Your Outdoor Spring Cleaning Guide: The Ultimate Exterior Home Cleaning Checklist

When springtime rolls around the corner, it’s time to begin your spring cleaning! Before you start to dig through closets and deep clean your home’s interior, consider starting with exterior home cleaning.  If you’re not a DIYer, you may consider calling in professionals like evergreen cleans exterior cleaning service.

Get the inside of your home sparkling clean with a few exterior home cleaning tips before you begin to tidy up the inside. Your home’s curb appeal is just as important as what’s on the inside.

To help you get started, we’ve put together a list of some great exterior-cleaning tips. Continue reading below for everything you need to know!

1. Roof Inspections

Just as when cleaning inside your home, be sure to start with the top and work your way down. It wouldn’t make much sense to clean your windows only to have debris from the roof fall onto them later. Because of this, it’s essential to start with the roof.

If you haven’t had a roof inspection done in quite some time, schedule it now. Mold, mildew, and moss can all grow on your roof.  For assitance, check out roof cleaning Vancouver WA.  You’ll also want to check for shingles in need of repair and chimneys and gutters in need of cleaning as well.

2. Pressure Washing

Pressure washing is a great way to clean your home’s exterior, the decking, and the driveway as well. Different types of cleaners and pressure settings are used depending on the type of material you’re cleaning. Be sure to follow the directions on the pressure washer and hire a professional is ever in doubt.

Remove all weeds from your driveway before pressure washing it or having a professional pressure wash it. For homes with vinyl siding, you can use a garden hose and soapy water to wash it clean.

3. Window Screens and Windows

Over time, window screens and windows become caked with dirt and other debris. Fill a kiddie pool with warm soapy water and allow the window screens to soak in the solution. After soaking for a while, gently scrub the screens clean on a flat surface to avoid rips.

Then, rinse the screens off with a garden hose. Be sure to use a gentle setting to avoid damaging the screens. While the screens are in the soaking process, you can tend to the glass on the windows by using a glass cleaner.

4. Freshen Up the Garden Beds

If your garden beds are looking a bit dull, freshen them up by adding new mulch into them. You can also trim your herbs and other plants to keep them well-groomed. If there are any dying flowers or branches, be sure to trim these parts as well.

If needed, plant a few new flowers, herbs, or other plants to really freshen the garden up. Uproot any dying bushes, shrubs, or trees and try this site for rubbish removal.

Start Your Exterior Home Cleaning With These Tips Today!

With spring quickly approaching, it’s time to start some exterior home cleaning tasks using these tips listed above!   Once you check everything off of this list, you can begin cleaning inside your home.

For more posts as helpful as this one, be sure to check back with us on a regular basis!

4 Smart Ways to Add Life to Boring Walls

Dull walls tend to detract from the overall look of your home and this could leave a poor impression on the guest. Once, it was okay to believe that a simple coat of paint is all your walls need.

Now, there are more interesting options available that have nothing to do with paint. Whether you’re into clean neutral colors or you prefer a mix of different but complementary colors on your walls, here a few smart ways to liven up your drab walls.

1 Add some framed photographs or paintings

You can never go wrong with wall art. This option is also perfect for individuals who prefer clean neutral colors rather than a blend of different colors on their walls.

But adding framed photos of friends and family, or artwork on your walls, you can retain the simple look you love while adding some personality to the room.

Consider adding an oversized wall photo for that trendy look or simply hang a collection of beautiful paintings or photos on a section of the wall. Ensure that they are positioned in such a way that they blend with other furnishings in the room.

2 Reflect the elegance of your room with a few carefully placed mirrors

In the world of home design, certain trends will never go away. Attaching mirrors to your walls is one of the best and easiest ways to add depth to a room. This option is also perfect if you have a small space and you want it to look less cramped.

Mirrored walls reflect the contents of the room and this allows them to create the illusion of a larger space. Once again, positioning and coordination are key. Assess the overall design of the room and choose the best spots to add some mirrors.

With mirrors, there’s no one-size-fits-all so you can pick out different shapes and sizes.

3 Transform your walls with some stylish wallpapers.

Paint is not always the answer to a dull, boring wall and  decorative Wallpapers can do more for your walls than you can imagine. Think of the walls in your home as blank canvasses ready for an artist’s touch.

You are the artist and you have an array of different prints, colors, and textures to choose from – look for colours that are opposite on the colour wheel, as they will go the best together. For example, pale pink and sage green interiors can be used to brighten up a space and will compliment eachother beautifully. Add some large prints with intricate designs for a more appealing visual. Choose textures and patterns that suit your taste and add to the design of your home.

4 Vamp up those bare walls with creative lighting

Installing a light fixture and making it a focal point of the room can distract guests from the simple look of the walls. You don’t have to light up the entire room like a stage. Different lights provide different effects and you can choose to combine various lighting options for a unique look.

Attach some string lights to the wall to create an intimate and cozy feel. You could also place some dimly-lit lamps in various areas of the room for an ambient effect.

Walls are probably the easiest parts of the home to decorate. However, you choose to liven up your walls, be sure that it fits with the overall decor of the room.

Friday Favorites Linky Party – Week 521

Please support and follow our lovely blog party hostesses:

Jerri at Simply Sweet HomeTwitter | FB | G+ | Pin | Inst

Lisa at Condo BluesTwitter | FB | G+ | Pin | Inst

Amy at A Day of Small ThingsPin

Penny at Penny’s PassionTwitter | FB | G+ | Pin | Inst

Jennifer at Busy Being JenniferTwitter | FB | Pin | Inst

If you are featured this week, be sure and grab a featured button for your blog!

You can show your love for this week’s favorites by going over and commenting on the posts and by pinning or sharing!

And if you love all of this week’s favorites, please pin, share, and invite your friends to this week’s linky party! [Read more…]

Getting Your Garden Ready for the Upcoming Summer Months

We’ve reached spring and the weather is beginning to improve. The sun is making more of a presence, the days are getting longer, the temperature is rising and we’re starting to get a little less rain, sleet and snow. So, you may be looking ahead to the summer months and anticipating the season many of us love most! Now, summer may be a few months away, but it’s important that you start work on your garden now if you’re going to want to kick back and relax out back when the really good weather finally hits. Gardening is a process and it will take a little time and effort to get things exactly how you want them. Here’s some advice that can help you to achieve this as best possible!

Bring In a Landscape Designer

If you’re planning big changes for your garden this summer, you should start taking a look at different landscape designers nearby. These Landscape Designer, if you want to make sure your landscape is designed professionally, should specialize in completely reworking your gardens to create stunning spaces that meet all of your needs and preferences. They can add in features, such as ponds or water features, they can make all areas of your garden easily accessible, adding in walkways, patios and decking, and all in all, create a more enjoyable space for you to spend time in. During a consultation you should make sure to detail everything you’re intending to use your garden for. Whether that’s lounging in the sun, keeping your kids occupied, hosting summer parties and barbecues, or simply sitting out and reading a book. They’ll be able to craft a space that really ticks all of your boxes!

Bring In a Gardener

If your garden has grown truly unruly over the winter months, it may be beneficial to bring in a gardener to help put wrongs to rights. A gardener can do all sorts when it comes to making your garden look great. They can cut the grass and trim the edges, they can pull weeds, they can dig out flower beds and they can remove any dead tree branches that may pose a risk to people spending time beneath any trees you may have. Most will want a quick look over your garden before offering a quote to determine the amount of work that needs to be done. But this is a simple and often low cost way to get things back onto a good and easily maintainable level.

Do a Little DIY

Once things are a bit more manageable, you may want to try a little gardening yourself. This can be a really rewarding hobby to get into and you’ll see beautiful results the more work you put in. Why not look up a few plants or flowers you might like to plant. You could grow your own vegetables in a patch. You could create your own hanging baskets to place from hooks around the garden. You can create a truly beautiful space of your own accord!

The above process should help you to get a lovely garden ready and in ship shape by the time you want to spend time outside! Put the effort in now and you’ll reap some brilliant rewards in just a few months!

8 Creative Uses of Mirror and Lighting for Interior Design

You spend a third of your life in your bedroom.

Why wouldn’t you want to make the most of your space?

If you’re not 100 percent happy with the way the inside of your house looks, it’s time to do something about it. We understand how costly home renovations can be. However, with the right uses of mirrors and light, you can transform any room on a budget.

To help you out, we’re here to present the top eight ways to light up your house. So take a look! You may find the perfect tip to have the interior decor you’ve always dreamed of.

1. Uses Of Mirrors And Mantles

One of our favorite uses of mirror and lighting tricks takes place in the living room. It’s common for people to put a mirror over their living room mantel. However, we suggest adding in lights to showcase a piece of art on your mantle. You can also mix the two together, and get yourself a wall mirror with lights.

Instead of having a traditional standalone mirror set up, you’ll be able to highlight your space, while putting the focus on a piece of art. You can also choose to highlight a photograph or a small statue.

Next, surround the focus point (the art or photograph) with light. Rather than trying to hang light fixtures, it’s best if you find flat strips of light that can lay discreetly on your mantle.

Guests you won’t notice the special setup is there until you turn the lights on. Once on, the light will illuminate the painting, also casting shadows on the background of the mirror. It’s a great “wow” factor for guests, while also creating a sense of elegance.

2. Cover Your Chimney

If you’re lucky enough to have a chimney and fireplace, you need to bedazzle it with mirrors and lights. For a truly impressive look, cover the entire breast of the chimney in mirrored panels. Now, the next time you light up your fireplace, the light will begin dancing off of the chimney.

The type of mirror panels you choose should reflect the entire design of your interior decor. If you’re going for a contemporary look, you want to use clear mirror panels.

However, if your house has a traditional cozy feel, tinted glass is the way to go. If you want an elegant look, antique mercury glass works great, and it will complement any antique furniture you have.

3. Front Porch Greenery

If you have a front porch or a small patio, you can use mirror panels along with a hanging lantern to create a sense of wonder. To accomplish this look, you’ll want to get either a real or fake hanging plant.

After hanging up the plant, place your mirror panels along the sides of the plant and on the ceiling. Next, place the hanging lantern right in front of the hanging plant.

The plant will suddenly have an entirely new look, and so will your entire patio. You’ll have created a jungle wonderland to decorate the entrance of your home.

4. Add Space and Depth

Hidden lights are great for adding space and depth to any room. You can use a plain LED strip, and hide the lights in different corners of your home.

We suggest putting the lights high above your head, in nooks and crannies along your ceiling area. The hidden lights will give the room an added sense of space and depth, while also creating a calming glow.

To make things special, consider getting LED lights that can turn the color blue. Science shows that blue lights help create a sense of calm, more so than white lights.

5. Uniform Vs. Random Lights

If you already have a room with a few mirrors in it, you’ll just need to decide how to hang your lights. If your main goal is to frame your living space, then uniform lighting is the best option. When you place your lights using uniform lighting, they’ll be on a grid system, and you’ll have even light levels throughout the house.

However, if you’re looking for a more eye-catching approach, random light placements are for you. To find lights that hang, such as pendant lights, check out Pagazzi. You can place the pendant lights at different heights, to create a classy, casual, look.

6. Filling Empty Spaces

We often think about trying to create space in our home, but sometimes we also have to fill the space. If you have a room, that doesn’t have a lot of decorations or furniture, you can use groupings of light fixtures to fill the space.

First, you’ll want to buy a lot of the same type of light fixtures. Next, pick a spot in the room where you want all of them to be. Once your lights are in place, position one to two mirrors in the room along the floor, casually leaning against the wall.

A full-length body mirror gently tilted back works great as well. Having all of the lights together will create a sense of space as they become the focus of the room. However, you won’t have to worry about the lights being too intense since the mirror will create a light bouncing effect.

7. Side-Mounted Sconces

Are you looking for gentle but effective lighting to use with your mirrors? Then you should try side-mounted sconces. You can either mount the sconces beside the mirror or put the sconces directly on the mirror’s sides.

Here are a few tips to get the best look:

· Glass downlights should be barely below eye level

· Glass uplights should be barely above eye level

· Center your mirror above the sink

Mount the sconces only a couple of inches away from the mirror

You’ll want to have the lighting fixtures close to the mirror so they can illuminate your face.

8. Marvelous Mirror Sizes And Placements

The placement and size of your mirror and lights will determine how your room feels. If you have a really large room and you want it to feel full of energy, put mirrors right next to the light source.

Whatever you do, don’t put the mirrors directly in front of the light, because this could make the reflected light too intense. A good example would be hanging mirrors a few inches away from wall sconces. if you’re lucky enough to have a chandelier, hang a long mirror on the wall right below it.

Light Reflects Love

Now you know about eight of the top uses of mirrors and lighting. All you need now is a mirror, any type of light, and a space to create your masterpiece. We challenge you to pick one room in your house to begin transforming today!

If you want more interior decorating tips, we’ve got you covered. Go ahead and check out the rest of this site.