Archives for 2009

Adventures in Shopping: I Love Ross! (Dress For Less, that is)

One of my favorite places to look for bargains is Ross Dress For Less. They have a vast selection of clothing of all sizes and styles, and they have a number of housewares, kitchen, and decor items. I’ve bought items from every single department in this store, but I’ve been most impressed with the deals I’ve gotten on jeans, shorts, and capris. I can usually find really cute stuff for $15 or less, which is awesome if you’re on a tight budget.

I also love their housewares stuff, and I enjoy looking through their picture frames and photo albums, and if you’re in to organizing, they have great deals on baskets and stuff.

My husband also likes this store. He loves athetic shorts and jerseys, and he especially loves Adidas and Nike stuff, and he’s found some good deals on these. Last trip he was looking for a pair of comfortable shoes to wear for work, and he was pleasantly surprised to find a very stylish and comfortable pair of Dr. Martens for $30. (They would have normally sold for over $100) Overall, I’d have to say that this is the best deal we’ve ever gotten. The cashier was even commenting on what a great deal we were getting and how great the shoes looked….but I think she thought we were a little crazy when my husband said he was going to wear the shoes for work.

Last trip I also bought something really cute for myself, which I think all my baking, homemaking, blogger friends will love! It’s this lovely Butterfly Apron:

I always have to check out the back of the store to see if they have any nice kitchen or household items, and this last trip, I was really surpised to find a stack of aprons. They’ve never had these before at any of the locations where I shop. It may be a new item that they’re going to carry regularly, or it may be a limited time thing. Whichever the case, I was really happy to find these.

Each apron is made of cotton, and is one size fits most. They all tie around the waist and around the neck, and they have a single pocket. And they had several colors and designs available at my location. (I remember seeing a couple of different flower patterns and also a polka dot one.)

I’ve looked around at aprons on the internet. The cheapest ones I have found are around $20, though many are $30, $40, or even $50. So I was very pleased to find the ones at Ross for only $7. If you’re in the market to purchase an apron, you may want to check them out.

-Jerri


————————–

I’m sharing this post for Frugal Friday over at Life As Mom.

Recipe of the Week: Pineapple Angel Food Cake

This week I’m sharing a yummy recipe for Pineapple Angel Food Cake. My mom made this a couple of weeks ago and gave me some slices to take home (hence, there’s no photo of the whole cake).

This is the perfect dessert for spring and summer. And this was very easy because it was made using an angel food cake mix. But of course, you could incorporate this into a homemade angel food cake recipe as well. Enjoy!

Recipe for Pineaple Angel Food Cake

Ingredients:

1 box of angel food cake mix

1 (15 oz) can pineapple chunks, drained

1/2 cup coconut

1/2 teaspoon ginger

Directions: Mix up angel food cake batter as directed. (The kind I used only required that you add 1 1/4 cups of water before mixing.) Then add ginger and coconut and mix. Fold in pineapple chunks. Pour into a tube pan or a 9X13 pan. Bake as directed on box.

Tips & Suggestions:

– Try serving this topped with whipped cream and additional pineapple chunks.

– Reserve the juice from the pineapple chunks and pour it over baked cake like a glaze.

-If you love coconut, I suggest adding more to this recipe.

-Jerri

———————————–

I’m posting a link to this post on the following sites:
Tempt My Tummy Tuesday is hosted by Blessed With Grace.
Homemaker Mondays is hosted by
11th Heaven’s Homemade Haven.
Making A Happy Home Monday is hosted by
As For Me and My House….
Kitchen Tip
Tuesdays is hosted by Tammy’s Recipes
Make Something Monday is hosted by
Go Graham Go! and Jolly Mom and Diana Rambles.
Tasty Tuesday is hosted by Balancing Beauty & Bedlam.

I Am Blissfully Domestic is hosted by Blissfully Domestic.
Ultimate Recipe is Swap is hosted by Life as Mom.

Menu Plan Monday for April 13

Breakfasts: pancakes, cereal, carnation instant breakfast, yogurt, fruit

Lunches: tuna sandwiches, salad, leftovers

Dinners:
Monday – Roast Beef & Gravy, Mashed Potatoes, Biscuits
Tuesday – Hamburgers & Fries
Wednesday – Shrimp Alfredo, salad, & garlic bread
Thursday – Bacon & Egg Sandwiches
Friday – leftovers
Saturday – eat out
Sunday – Cheeseburger Macaroni

Visit Org Junkie for more menus and recipes.

-Jerri


Sweet Thursday: Easter Parade of Goodies

Is everyone ready for Easter? The people who made these lovely desserts certainly are! Thanks everyone for allowing me to feature your lovely work here!

Next month’s theme is going to be a little different, and I’m sure you’ll all enjoy it. Next month we’ll be featuring Cupcakes! If you’d like to be included in the cupcake round-up just send your pic and/or link in an email to simplysweethome@hotmail.com. And let me remind you that it’s okay to submit a pic of cupcakes you’ve decorated, even without a recipe. In fact, you don’t even have to have a blog! And it’s okay to send in something from an older post.

Now for the due date: I will be posting the round-up on Thursday, May 14, so as long as you get your stuff sent in before then, you’ll be fine. For more information on Sweet Thursday, click here.

Thanks you guys and enjoy the Easter Parade!

Flower Power Brownies Five Star Sweets

Birds Nest Macaroons from Five Star Sweets

Chocolate Covered Marshmallow Eggs from ROOTSANDWINGSCO

Crunchy Critters from Georgikids

Rolled Fondant Sugar Cookies from The Parson’s Wife

Chocolate Dipped Peeps at Forever Wherever

Easter Cupcakes from Nina’s Culinary Creations

I found this the other day and wanted to share it here as well. It’s a Rich Chocolate Cake with Truffle-Egg Nest from Martha Stewart.
———————————
I’m sharing this over at Ultimate Recipe is Swap, hosted by Life as Mom.


-Jerri

Review for List2Shop.com

We all know that having an organized shopping list is an important key to saving time and money at the grocery store. Today I’m going to tell you about a site where you can create multiple shopping lists. It’s called List2Shop.com.

With this free site you can easily and quickly create and print your shopping lists online, and if you sign up for a free account, you can save your shopping lists to use at a later time. This is a perfect tool for someone who wants to list a few items at a time and then come back later to add a few more or for anyone who wants to create a master shopping list to print out for each trip.

Also, consider this: How many times have you been at work and thought of something that you needed to add to your grocery list? And how times have you planned a shopping trip for after work and realized that you left your list at home? With this website you can access your list from anywhere.

A free account also gives you access to the Favorites Tab, where you can create a list of your favorite stores or a list of your favorite items. With this feature, you can make a list of a few items that you buy every week, or you can create a larger list of items that you buy when your stocking up.

I just signed up for a free account and began making my shopping lists. It was very easy to set up, and the features on the shopping list tab allow you to create a detailed and organized list. I’ll explain how it works.

On the page you have 3 columns. Under the first column, there’s a list of categories such as “baked goods,” “medicine” and “spices & herbs.” When you click on the category of your choice, a list of products that belong in the category pops up in the second column. You then click on the item that you want add to your list. (There’s also a place where you can manually type in an item that may not appear on the menu.)

Then there’s an optional third column, which allows you to pick a store that you’d like for the item to be listed under. I really liked this feature, because I always make one list for Aldi and one list for Wal-mart. And this feature will allow me to easily add an item under one store or the other. (And I think you will be impressed with the vast array of categories, products, and stores that are listed.) You can also minimize your lists on the page, so that you can easily or focus on a particular list.

Now as I said, the site allows you to create a detailed list. For each item that you place on your list, you have the option to enter a quantity, the price, and even a comment. This is perfect if you’re someone like me. I often write a quantity beside each item on my list, and in the past I’ve also used my old receipts to determine the price of each item so that I can have an idea of how much my grocery bill will be. And now that I have access to this website, I can enter the prices so I’ll be able to quickly estimate my grocery bill each week.

I also like the idea of the comments section. I think this would be a great place to type in the brand name and/or the portion size you want to buy, which will really save time when you’re in the grocery store, and it would also be helpful if you ever send somebody else to do the shopping.

And once you’ve created your list, you can easily edit your items and move them up or down on the list for perfect organization.

What I love about the site is that it is very easy to understand and navigate through. Your shopping lists and the menus used to add items to your list are all located on the same page, so you don’t have to go back and forth between webpages. You can add items to your list with just a few clicks. And most of all, I enjoyed being able to organize my list and add the extra details about each item.

If you’re a busy woman looking to get organized and save time and money, you should check out List2Shop.com.


-Jerri

——————
I’m going to share this post for Frugal Friday over at Life as Mom.

Craft Corner: Fun Easter Projects

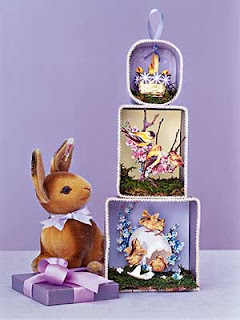
Just in time for Easter, here’s a collection of craft projects that you can try. There are so many cute ideas out for Easter eggs, including these lovely flower and bird decoupage eggs that would look lovely in your home year round. I’ve also been finding different ideas for making your own dioramas, which are very cute!

Oversize Botanical Decoupage Eggs from Martha Stewart

Elegant Eggs from Country Living

Easter Diorama from BHG

Bunny Painting Egg at Favecrafts.com

Bright Ribbon Eggs at Favecrafts.com

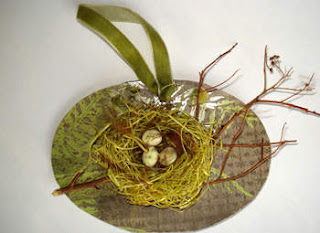
Bird’s Nest Easter Card from Kaboose


-Jerri

Recipe of the Week: Foil Pack Potatoes

I’m posting my menu & recipe a little later than usual because I wanted to give my posts that I published over the weekend a little more time at the top of the blog. And then I flipped through all my photos and just could not decide on what recipe to post for this week.

Finally I decided to go with these foil pack potatoes. Sorry that the photo’s not that great, but it is a delicious side item that you can bake in the oven or on the grill. The recipe I used called for taco seasoning, but I used chili powder and a little salt and pepper instead. But you could use any seasonings or toppings you like.

———————————–

Recipe for Foil Pack Potatoes: Ingredients:
Potatoes (1 or 2 per person)
Shredded Cheddar Cheese
Chili Powder
Salt & pepper
Directions: Cut potatoes into thin slices or cubes. Place slices from one potato (or 2 small potatoes) on a piece of foil. Sprinkle with chili powder and cheddar cheese. Bring up foil sides and fold down to seal the packet Bake at 400 degrees for about 30 minutes. Serve beside your favorite dish. (Optional – Top with sour cream and other toppings when serving.)

———————————–
Tips & Suggestions:
-I actually boiled my potatoes on the stove for 10 to 15 minutes to ensure they were soft enough for our liking. But I suppose you could also bake them a little longer, and maybe add a tiny bit of water to each pack to prevent them from being too dry.
-Add other veggies to your pack like peppers, onions, carrots, or mushrooms.
-For a complete meal, add a piece of chicken or other meat to your pack.
-For a cookout, place your packets on the grill for 35 to 40 minutes.
———————————–

I’m posting a link to this post on the following sites:
Tempt My Tummy Tuesday is hosted by Blessed With Grace.
Homemaker Mondays is hosted by
11th Heaven’s Homemade Haven.
Making A Happy Home Monday is hosted by
As For Me and My House….
Kitchen Tip
Tuesdays is hosted by Tammy’s Recipes
Make Something Monday is hosted by
Go Graham Go! and Jolly Mom
Tasty Tuesday is hosted by
Forever Wherever.
I Am Blissfully Domestic is hosted by Blissfully Domestic.
Ultimate Recipe is Swap is hosted by Life as Mom.


-Jerri

Menu Plan Monday for April 6


Breakfasts: French toast, waffles, yogurt, fruit, Carnation Instant Breakfast

Lunches: Bacon & Egg Sandwiches, Grilled Chicken Salad, leftovers from dinner

Dinners:

Monday -Chicken Mutz – I’m doing a slight variation on this recipe.
Tuesday – Leftovers from Monday
Wednesday – Tacos
Thursday – Chicken Poulet
Friday – Leftovers
Saturday – Going out for Hubby’s Birthday
Sunday – Sloppy Joes or Hamburger Helper (for hubby’s birthday)

Visit Org Junkie for more menus and recipes.

-Jerri

Our 2 Peas In A Pod Custom Boutique Jewelry Designs

If you love beaded jewelry, you should check out Our 2 Peas in a Pod Custom Boutique Jewelry Designs. They have a lovely array of jewelry for all occasions, in a variety of unique colors and styles for kids and adults. (In this post, you’ll find photos and links of just a few of my favorites from their collection.)
Amy is the designer and mom-preneur. She began making jewelry for her daughter in 2002 and after receiving requests for her designs, she began selling her jewelry locally. She then moved on to Ebay, and now she has her own website where she sells her jewelry.


At Our 2 Peas in a Pod you’ll find nothing but high quality items. Amy uses Professional series beading wire, the finest quality Crystals and Pearls manufactured by Swarovski, Czech glass beads, Grade A Fiber Optic Cats Eye beads, Lampwork beads, Vintage & One of a Kind beads, .925 Sterling Silver components, Bali Silver, Polymer Clay beads, and many other Top Quality beads and components. And all metal components used in her designs are .925 sterling silver and are lead free.

You’ll find everything you love from earrings to bracelets and necklaces. Amy’s products come in a variety of bold, vibrant colors, and she offers many unique lines including Personalized Jewelry, The Princess Collection, The Candy Shoppe, Made to Match, Sweet Animal Jewelry, Whimsical Jewelry, Dangle Bracelets, Ladies Jewelry (including a cancer awareness line) , a Boys Line, Holiday jewelry, and Character Jewelry like Disney, Mickey Mouse, Dora, Sesame Street, Hello Kitty,and so many more!

She also takes special orders, and she will even sell you her children’s products in adult size! Head on over and take a look at her Design Portfolio, Custom Gallery, and all the wonderful designs at Our 2 Peas in a Pod.

-Jerri

The Making of A New Flower Bed


In this post I’ll be sharing our newly built flower beds with you and going through a step-by-step process to making flower beds. I know it’s not exactly rocket science, but then again, there may be people who read this blog who, like me, have very little gardening experience and could use a tutorial. And to tell you the truth, I did learn a couple of new things from a landscaping expert, which I’ll share with you.

First hubby had to take a pick and chop on some roots from a little bush/tree that used to be in front of the porch. (Fun!) Below are all the roots.The first step in the flower bed making process was to till up the ground a little, and then we spread out the peat moss. (I believe we used about 10 big cubes of this.) Then we used a tape measure and placed the plants where they should go. Then hubby used the post hole diggers to make a hole. My job was pull the plant out of the pot, place it in the hole, and pack the dirt in around it, while he went to the next place to make another hole.

Then we placed professional grade landscaping paper over the beds. (The landscaper who broke up our sidewalk recommended the professional grade over the regular kind. He said we’d still have weeds if we used the regular kind, and he informed us that newspaper is not good to use with azaleas. Funny, my parents always used newspaper…who knew it was “bad,”? But since he’s the expert, I’ll believe it.)


After spreading landscaping paper over the length of the bed, cut it from the roll. Then go to plant, and make a cut with your scissors. The cut should be made so that it’s along the center of the plant, and it should be long enough that it goes slightly past the back of the plant.

Tuck the paper in around the plant. Get it as close to the plant as possible. Then pull the two ends of the paper (from the cut you made) together, and use landscaping staples to hold the paper tightly together. (We used 3 large packs of these.)

The use the mulch of your choice to spread over the top of your bed. For azaleas it is recommended that you use a hard wood mulch rather than a soft wood mulch. Usually I prefer brown mulch, but we chose black instead. (We used about a dozen bags of this.)


Finally place a border/barrier around the flower bed. This can be as simple as a strip of plastic edging or something a little more fancy like concrete landscaping blocks. (Unfortunately I don’t have a photo of our completely finished products, as we put out the edging on a different day from when these pictures were taken. I’ll try to get a photo and add it to the post soon though!

Oh, and last but not least, get a broom and sweep all the stray dirt and mulch off the sidewalk!

-Jerri


————————————
I’m submitting this post to the following carnivals:
Make Something Monday is hosted by
Jolly Mom and Go Graham Go.
Show and Tell Friday is hosted by
There is no place like home
Hooked on Fridays is hosted by
Hooked on Houses
Project Friday is hosted by
Sugarplum Cottage