Homemade Chocolate Frosties

I’m really excited to bring you today’s recipe!  I first saw this on another blog last minute and forgot about it.  But then several months ago, I saw it again on Food.com via Pinterest, and I made it almost immediately!

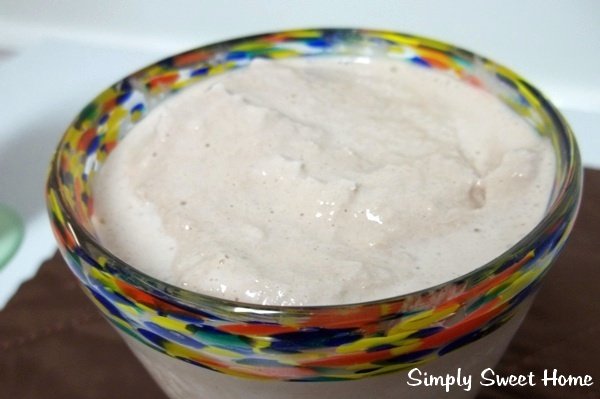
This is a homemade version of Wendy’s chocolate Frosties!  You are going to love this! It only requires three ingredients, and it tastes so yummy and just like the ones you get at Wendy’s. (Maybe even better!)

And if you like this idea, you should also try these homemade fudgesicles that I posted last year! They are fantastic!
[Read more…]

Coming This Month – Grilling Giveaway for Dad

It’s time to give back to DAD! Sponsored by:

Route 249 Mom Does Reviews Jackie’s Reviews, Mom Blog Society

It is open to both US & Canada

The giveaway will run May 15th, 12:01 until May 31st 12:01

1 winner will receive their choice of the gas grill or Paypal Cash Value 129.00

$100 Gift Certificate to Omaha Steaks

DAD Branding Iron

Wood Chip Box and an Injector Kit

&

7-Piece BBQ Set with Apron

[Read more…]

Snickers Caramel Shake

I was in the mood for a sweet treat the other day.  Sadly there were no cakes and cookies on hand. (I hate it when that happens!)  But we did have a little ice cream in the freezer, so this is what I decided to make.  Hope you enjoy!

Recipe for Snickers Caramel Shake:

Ingredients:
2 1/2 cups vanilla ice cream
1 cup milk
6 Fun Size Snickers
Caramel Syrup (I just poured some in.)
Directions:  Place Snickers in blender and chop for a few seconds, until the candy bars are in tiny bits.  Add icecream, milk, and caramel.  Blend.  Pour into glass and serve.  Top with additional snickers bits if desired.

Photobucket

I’m linking up at these parties and TidyMom.

Lemon Pudding Pound Cake

Lemon is such an amazing flavor for summer time! As a kid, lemon desserts were always my favorite!  Since getting married I haven’t tried many recipes of the lemon persuasion, as my hubby’s not a fan.  But then several months ago, I had a slice of this lemon cake at a potluck, and I was totally wishing I could take the whole thing home with me!
Since then I’ve been on a search for the perfect lemon pound cake.  I decided to start with this recipe.  I’ve seen it on several sites but most recently over at Tidy Mom.  And I think I’ve already found my perfect lemon pound cake.  (Hubby even tried it and loved it! So…Hooray! We have a winner!)

Recipe for Lemon Pudding Pound Cake:
Cake Ingredients:
1 box lemon instant pudding mix (4 serving size)
1 box yellow cake mix
4 eggs
1 cup water
1/2 cup oil
Glaze Ingredients: 
2-3 tablespoons lemon juice
1 cup powdered sugar
Directions:  Spray pan with cooking spray.  You can use a 9×13 or bundnt.  Preheat oven to 350.  Combine all cake ingredients and mix for 2 minutes and medium speed.  Pour into pan and bake. For a 9×13 cake bake for 30-35.  For a bundt, bake 35-40 minutes.
Let cake cool completely.  Then whisk together powdered sugar and lemon juice until smooth.  Drizzle over cake.  Serve and enjoy!

I’m linking up over these great blogs.

This post is sponsored by Cutie Patootie Creations. Why settle for the same “cookie cutter” party invites, when you can have something custom created for you?  Cutie Patooties has unique invitations in a variety of fun styles and themes.  And they have all the matching decorations and supplies you need to get your party on! Check out Cutie Patootie Creations today, and get started planning your perfect party!

Photobucket

Summer Pinwheel and Burlap Wreath

I think pinwheels are so cute and fun for the summer!  Several weeks ago while making my flag wreath, I also put this little pinwheel wreath together.
Since it’s made using the scrapbook paper of your choice, it’s a very versatile project.  And I made fairly easy by using “flat pinwheels.”  Hope you enjoy this tutorial.

What You Need:
1 Embroidery Hoop (mine is 12 inches)
Scrapbook Paper
Burlap (or your choice of material)
Hot Glue Gun
Glue stick
Ribbon

Tutorial:
1.  Choose some coordinating scrapbook papers (preferably with designs on both sides).  I used 3 different sheets for mine, but you could use more or less.  Cut your paper into 5 inch squares.  You’ll need about six for a 12 inch wreath.  (By the way, the paper that I used came out of a kit from Scrapbook Circle which I actually won last year through a blog giveaway. Yay!)
2.  Using scissors, cut your paper starting and the corner, and cutting toward the center, stopping about 1/2 an inch from the center.  Do this at each corner.  Next you need to fold one of the corners over, folding flat toward the center, and repeat with the remaining corners. Use glue stick so that pinwheel shape stays in place. (Or if you don’t want flat pinwheels, you can fold them over without folding flat and secure the pinwheel with a brad.)
3.  Next cover your embroidery hoop with burlap or your choice of fabric.  Use the hot glue gun to secure your fabric to the hoop.
4.  Now use your glue stick to attach the pinwheels to the wreath.
5.  Finally add some ribbon for hanging, and you’re done!

This post is sponsored by Cutie Patootie Creations. Why settle for the same “cookie cutter” party invites, when you can have something custom created for you?  Cutie Patooties has unique invitations in a variety of fun styles and themes.  And they have all the matching decorations and supplies you need to get your party on! Check out Cutie Patootie Creations today, and get started planning your perfect party!

I’m linking up at these crafty parties and Tidy Mom.

Photobucket

Orange Cream Shakes

It’s super hot and humid here!  Lucky for me, I’m an indoor girl! hehe. But I still like to eat my cool summer snacks!  And I’ve had a super craving for ice cream lately.  Maybe it’s because the ice cream man drives by our house every day!
This week I’m sharing a wonderfully yummy recipe that came to me via my lovely bloggy friend Chaya of Chaya’s Comfy Cook Blog. Seriously, I made this almost immediately after I saw it!
If you love Orange Dreamsicles, Push-ups or anything like that, you’re sure to love these Orange Cream Shakes!

Recipe for Orange Cream Shakes:

Ingredients:

4 cups vanilla ice cream or frozen yogurt
2 cups orange juice
4 tablespoons milk
6 tablespoons sugar or agave
2 teaspoons pure vanilla extract

Directions:  Place all ingredients in blender.  Blend until smooth.


I’m linking up at these parties.

Photobucket

It’s An Ice Cream Social!

Don’t you just love the blogosphere? One minute you’re at a recipe party, and the next minute your at a craft party! And this weekend we can all go to an Ice Cream Social over at Kitchen Bouquet! With my husband on a no-dessert diet, and me busy with projects in the house this week, I didn’t get a chance to make anything, so I’ll be highlighting a few things that I found on some of my favorite sites instead!  Hope you enjoy!
Also, don’t forget we’ll be having Sweet Thursday here next week! Email your desserts to me by Tuesday if you’d like to be featured, or link up here on Thursday! Have a great weekend!

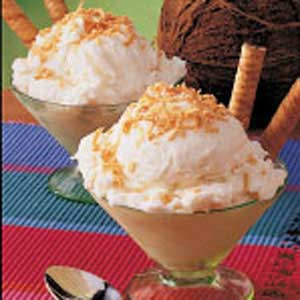
Coconut Ice Cream from Taste of Home
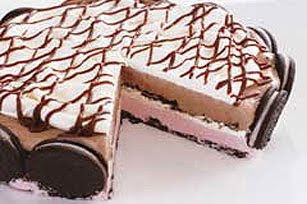
Easy Celebration Ice Cream Cake from Kraft
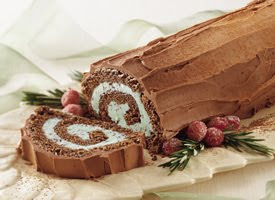
Berry Chocolae Ice Cream Loaf from Eagle Brand
S’mores Ice Cream Pie from Hershey’s
French Silk Ice Cream Roll from Betty Crocker
-Jerri

Summer Star Garland

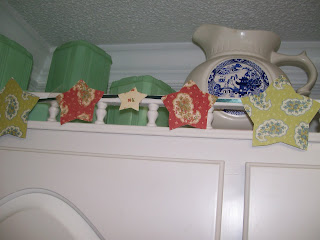
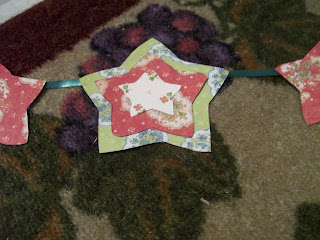
You may remember the Easter Garland I posted on back in March.  I actually kept it up through spring, and then finally I decided I needed something new for summer.  So the other day I used the same concept behind the Easter Garland and made some star garland for the summer. 
I would have liked to have done this in red, white, and blue, but I didn’t have any  coordinating papers that I liked together, and I’ve decided I need to use some of the supplies I already have rather than going out and buying new stuff all the time, so I went with a red, green, and blue color scheme.

What You’ll Need:
Scrapbook paper
Ribbon
Scissors
Tape
Cookie Cutters
Pencil/Pen
Garland Tutorial:
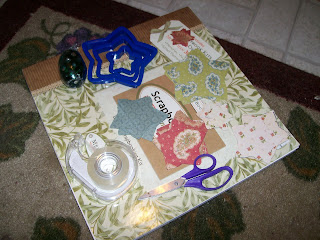
-Use cookie cutters or stencils to trace shapes onto the back of scrapbook paper. You can use a single shape or multiple shapes. (I used 3 different size stars, and I used 4 different paper designs.)
-Next take your scissors and cut out the shapes. (I made 24 cut outs for a seven and a half foot string of garland last time and this time.)
-Cut off a line of ribbon. Make the ribbon as long as you like. I suggest cutting off at least a foot more than the intended length. (I made a 7 1/2 foot garland, but I actually cut about 8 1/2 foot of ribbon off. I used the extra length on each end to wrap it around the “edging” on the top of the cabinets.)
-Now attach the shapes to the ribbon. (I placed them about an inch to an inch and a half apart from each other.)
-There are a few different methods you can use for this. Liz from Hoosier Homemade  actually sewed the cutouts to the ribbon. I, however, am not a seamstress and decided to use a short cut method. I used tape to attach the shapes. I used two small pieces of tape on each shape (making a t or x with the tape on the back of each shape.) I used two pieces to make sure it was secured, and put them on there cross-ways so that the garland would be more flexible/movable. For this step you could also mod podge or a glue gun if you prefer. (I just used tape because it’s quicker, there’s no mess, and it would allow me to make adjustments if I needed to.)
-Then hang your garland and enjoy!

-Jerri
I am happy to link up my posts each week to some awesome Linky Parties.

Best of SSH: Summer Fun Edition

Party Ideas:

-Jerri


Best of SSH: Summer Food Edition

Just in time for the 4th of July, here is a special Summer Food Edition of Best of SSH, complete with an appetizer, some stuff for the grill, and plenty of yummy desserts!

I’m also going to be posting a Summer Fun edition which will include some posts on Summer Party Ideas, Activities, Vacation Stuff, and some Summer Safety Posts.

I’m doing two separate posts, because I was going through last summer’s posts, and there were just too many links for one post. Plus, I have a lot more readers now than I did last year when I wrote these posts, and I want to give more people the opportunity to see them. Hope you enjoy!

Burgers on the Grill

Yummy Kabob Recipes for the Summer

Bacon Chive Potato Salad

Under the Sea Cake

Banana Cream Trifle

Orange Cream Cake

Flag Cake

Red, White, and Blue Shortcake

Pina Colada Plus

Strawberry Pie

Crab Appetizer Napoleons

-Jerri