Recipe of the Week: Chocolate Cookies

Dieters, look away! (Just kidding!) Since Valentine’s Day is this week, I just had to post something sweet and chocolately. Over the weekend I tried out this new recipe for Chocolate Cookies, which definitely fits the bill! Bet you can’t eat just a dozen!

Recipe for Chocolate Cookies:

Ingredients:
1/2 cup (1 stick) of butter or margarine, softened
1 cup sugar
1 egg
1-1/2 teaspoons vanilla extract
1-1/2 cups all-purpose flour
1/3 cup cocoa
1/2 teaspoon baking soda
1/4 teaspoon salt
1/4 cup milk

Directions: Beat butter, sugar, egg, and vanilla in large bowl until well blended. Add flour, cocoa, baking soda and salt alternately with milk, beating until well blended. Cover and chill for an hour or until dough is firm. Shape into 1-inch balls and place on ungreased baking sheet. Bake at 375 for 8 to 10 minutes

———————————–

Please visit the following sites for more great recipes & other ideas:
Tempt My Tummy Tuesday is hosted by Blessed With Grace.
Homemaker Mondays is hosted by
11th Heaven’s Homemade Haven.
Making A Happy Home Monday is hosted by
As For Me and My House….
Kitchen Tip Tuesdays is hosted by Tammy’s Recipes
Make Something Monday is hosted by
Go Graham Go! and Jolly Mom
Tasty Tuesday is hosted by Forever Wherever.
Life as a Mom is hosting a cookie exchange on April 16.


-Jerri

Recipe of the Week: Spoon Bread


Just a reminder: If you’d like to submit a dessert for my February edition of Sweet Thursday, you have until this week to do that. You can send your stuff to: simplysweethome@hotmail.com. For more information, click here.

———————————

This week I decided to share one of my new recipes. I tried this for the first time a couple of weeks ago, and I wasn’t exactly sure how it would turn out or how it would go over with my husband. I’m pleased to report that he liked it, even though I cooked it a little longer than I was supposed to! It’s supposed to be mushy, kind of like oatmeal or pudding, but mine was a little more solid than that. Still tasted pretty good though!

I actually tasted this for the first time when the singing group that I was in, in high school, went to Virginia. We ate at this really nice Revolutionary period resturant, and I swear it was the best meal I’ve ever eaten! We had fried chicken, mixed vegetables, mashed potatoes, corn on the cob, biscuits & rolls, and of course spoon bread. (And I think we had ice cream for dessert.) Anyway, I’m sorry to say that I don’t know the name of the place, but it was fabulous!

I think I liked the chicken and mashed potatoes the best, but I was also rather impressed with the Spoon Bread; I’d never had it before, and I never would have thought I’d eat something like that, but since they put it in front of me, I tried it out. I think theirs was a little better than the stuff I made, but mine was good too, if I do say so myself! Hope you enjoy it!


Recipe for Spoon Bread

Ingredients:
1 cup cornmeal
1 tsp. salt
2 cups boiling water
1 cup cold milk
4 eggs
5 tbsp. butter or margarine, melted

Directions: Preheat oven to 425. Combine cornmeal and salt in a bowl and stir in boiling water until smooth. Let mixture stand for several minutes. Stir in milk. Add the eggs one at a time, beating well after each egg is added. Stir in melted butter. Pour batter into a 2 1/2 quart baking dish and cook for 25-30 minutes. Serve while still warm with LOTS of extra butter.


Tips & Suggestions:

-Be sure that you serve this with plenty of butter. It makes a HUGE difference in the taste.

-I’ve also heard of people serving this in a bowl and pouring a little extra milk over it. Could be good, if you’re an old fashioned kind of person…then again, it’s already an old fashioned recipe to begin with, isn’t it?

-My husband said that this reminded him of grits, and so I thought that this would be great to serve as a breakfast food. You could serve it with bacon & eggs. Or you could serve it by itself, as you would with grits or oatmeal. And I think it would be great with butter and sugar on top! Maybe a little cinnamon too!

———————————–

Please visit the following sites for more great recipes & other ideas:
Tempt My Tummy Tuesday is hosted by Blessed With Grace.
Homemaker Mondays is hosted by
11th Heaven’s Homemade Haven.
Making A Happy Home Monday is hosted by
As For Me and My House….
Kitchen Tip Tuesdays is hosted by Tammy’s Recipes
Make Something Monday is hosted by
Go Graham Go! and Jolly Mom
Tasty Tuesday is hosted by Forever Wherever.

-Jerri

Recipe of the Week: Black Bean Spirals

With the Super Bowl coming up here soon, I thought it would be a good time to post an appetizer. Last year one of the appetizers I made was Black Bean Spirals. Actually I did the recipe for the filling, and I used about half of it for the spirals, and I used the other half of the filling as a dip for nacho chips. You could also skip the step of cutting them into spirals and have black bean wraps (adding toppings if you so desire).

I really like these. I can’t really think of a good way to describe them other than to say that they’re just different. There very light compared to a lot of appetizers out there, which also makes them a great snack for summer time parties. And this is another great recipe that you can use as a base and then add other ingredients or serve it in a variety of ways.

Here’s the recipe:

Ingredients:
4 ounces of Cream Cheese, softened
1/2 cup of cheddar cheese
1/4 cup of sour cream
dash of salt (optional)
1 cup canned black beans, rinsed & drained.
3 flour tortillas

Directions:
-Mix cheeses, sour cream, and salt until well blended.
-Place beans in food processor and process till smooth. Add beans to the mixture and spread on tortillas.
-Roll up tortillas and chill for 30 minutes. Cut into 1/2 inch slices and serve.
-Optional: Garnish with pico de gallo or a little salsa, or serve salsa on the side for dipping.

I took these photos as I went through the process of making them:

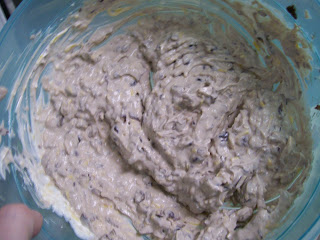
This is the filling mixture…again, I LOVE this as a dip!

Spooned out on a tortilla.

Wrapped up.

The final product: Black Bean Spirals

Tips & Suggestions:

-Try adding shredded chicken to the filling mix….everything’s better with chicken!
-The filling mix would be a great topping for tacos, taco salad, and other Mexican dishes.

-It could also be used for filling in finger sandwiches, pitas, and other bread items.

———————————–

Please visit the following sites for more great recipes & other ideas:
Tempt My Tummy Tuesday is hosted by Blessed With Grace.
Homemaker Mondays is hosted by
11th Heaven’s Homemade Haven.
Making A Happy Home Monday is hosted by
As For Me and My House….
Kitchen Tip Tuesdays is hosted by Tammy’s Recipes
Make Something Monday is hosted by
Go Graham Go! and Jolly Mom
Tasty Tuesday is hosted by Forever Wherever.

-Jerri

Recipe of the Week: Easy Chicken & Dumplins

For this week’s recipe I decided to post my Easy Chicken & Dumplin recipe. I posted the recipe previously in an MPM post, but for future linking purposes, and because I love the recipe so much and feel that it deserves its own post, I decided to post it again. (not to mention, it’s a good time to do so, considering that I’m making it again this week!)

Originally I had found a recipe for Chicken Noodle Casserole and whenever I tried it, the taste reminded me a lot of these chicken & dumplins that a friend of ours used to make, so I decided to make a few changes to the recipe and relabel it “Easy Chicken & Dumplins.”

This recipe can be made in very little time, and it also makes a great make ahead meal for those of you who like to do all your cooking the day before.

Easy Chicken & Dumplings

Ingredients:
1 can Cream of Chicken Soup

1 can Cream of Mushroom Soup

1/2 cup milk

2 cans of white chicken OR 3/4 – 1 lb of cooked boneless chicken breast (I like to have some of it in shreds and some it in chunks.)

3 cups of egg noodles

Chicken Broth (optional, I don’t really measure it out, I just pour a little in, about 1/2 cup to a 3/4 cup, but you may put more or less, depending on how thick you want the mixture to be.)

Directions: Cook noodles according to package direction. When finished drain off water. Mix milk soups, and chicken in a large cooking pot. Heat through. Then stir in noodles.


Please visit the following sites for more great recipes & other ideas:
Tempt My Tummy Tuesday is hosted by Blessed With Grace.
Homemaker Mondays is hosted by
11th Heaven’s Homemade Haven.
Making A Happy Home Monday is hosted by
As For Me and My House….
Kitchen Tip Tuesdays is hosted by Tammy’s Recipes
Make Something Monday is hosted by
Go Graham Go! and Jolly Mom
Tasty Tuesday is hosted by Forever Wherever.

-Jerri

Recipe of the Week: Bacon Cheeseburger Skillet


I’ve been looking at a lot of new recipes lately, and a few weeks ago, I decided to make up one of my own. My husband really liked it. It’s a kid friendly, and I would say a man friendly recipe. And best of all, it was relatively quick and easy! My husband called it Bacon Cheeseburger Surprise, but I called it Bacon Cheeseburger Skillet. You can use whichever name your prefer!

I had a good time visiting the other blogs from the memes last week, so hopefully I’ll be able to join in on the fun every week. And now here’s my recipe for this week.

Ingredients:
1 pound hamburger meat
3-4 potatoes, peeled, & diced (boiled or fried)
3-6 bacon strips, cooked. (I think I used about 4 or 5.) Or use bacon bits.
Shredded cheese (I just sprinkled some over the top)
Mustard (poured on top & serve on the side)
Ketchup (poured on top & serve on the side)

Directions: Cook potatoes potatoes entirely. You can boil or fry them; it’s up to you. Cook bacon (I actually used the pre-cooked bacon that you just microwave.) Brown hamburger meat in skillet. Drain fat. Add potatoes to skillet and mix. Crumble the bacon and place it in skillet. Mix all ingredients together. Top with cheese, ketchup, and mustard. (I only put a little; then everyone can put on as much they want on their plate.) Season with salt or your choice of seasoning if desired.

Tips & Suggestions

– You could spoon the mixture out on tortillas and have wraps, or perhaps roll it up inside refrigerated pizza dough and bake and make your own hot pockets or calzones. Or you could do sub sandwiches or pitas. It would work with just about about every kind of bread-type that you could think of. You could even load it up with lettuce, tomato, onions and other sandwich toppings.

-Instead of potatoes, use hasbrowns, french fries (possibly chopped up), or those little potato cubes from the freezer section.

-Instead of shredded cheese, use slice cheese, cheese cubes, or slices of block-cheese. I used cheddar with mine, but I know it would been great American or other cheeses.

**********

Well, that’s it. Pretty simple, huh? And best of all, my husband loved it!

Please visit the following sites for more great recipes & other ideas:
Tempt My Tummy Tuesday is hosted by
Blessed With Grace.
Homemaker Mondays is hosted by
11th Heaven’s Homemade Haven.
Making A Happy Home Monday is hosted by
As For Me and My House….
Kitchen Tip Tuesdays is hosted by
Tammy’s Recipes.
Make Something Monday is hosted by
Go Graham Go! and Jolly Mom.
Tasty Tuesday is hosted by Forever Wherever.


-Jerri

Recipe of the Week: Potato Soup

With so many people experiencing cold winter weather, it seemed like a good time to post a soup recipe. I made this potato soup a few weeks ago. My dad used to make this for me, and it’s one of my favorites.

By the way, I am submitting this post to a few carnivals. I had a tough time deciding which one to particpate in, so I decided to try a few. I think I’m still going to use “Recipe of the Week” in the title though, or maybe I’ll come up with something else.

Anyway I’d like to say a big welcome to everyone who’s visiting my blog for the first time via those blogs. I just love sharing recipes, and I hope that by participating in these weekly events, I can not only get new ideas to try but also pass some good ideas along, and make some new friends at the same time.

Ingredients:
1 bag hashbrowns (thawed) (I believe it’s a 1 lb bag)
1/2 stick of margarine
2 cups of milk
1 can cream of mushroom OR cream of chicken soup (I’ve used both)
1 small onion (chopped, optional)

Directions: Saute onions (if using). Place all ingredients in crockpot and cook on low. Cooks in 1 to 2 hours on low. (3 or 4 hours if hashbrowns are still frozen at the start of cooking) Serve with cheese and bacon bits.

Tips & Suggestions:

-I’ve actually cut the recipe in half here. As there are only 2 of us, we can eat this size batch for 2 meals, sometimes 3. If you have a bigger family, you’ll want to double this recipe.
-If doubling the recipe, you can use 2 cans of cream of mushroom/chicken, or use one can of each. I can’t ever really tell much of a difference in the taste.

-The last time I made this I had some extra chicken broth in the fridge, so I added some to the mixture. I believe I added either a half a cup or a full cup. It turned out good.

-This recipe also freezes good.

-By the way, my crockpot cooks super fast, so if you have an older model, then this may take a little longer to cook.

-Now here’s something that I haven’t tried yet, because I only just thought of it while we were eating it this last time. My husband is a big meat-eater…well, I am too actually, but my husband really is…he hates meatless meals! So I was thinking the next time I make this I might put some chicken or even some hamburger meat in it.

Now for the memes…I plan on posting my link to the sites listed below. Normally I’d post their icons at the top of the post, but since I found more than one place to post it too, I thought that would look a little cluttered at the top of the post. I had never actually thought of placing the same the link on more than one carnival, until this last month with all the different Christmas events.

And then I was looking around at some of the people who post for Tempt My Tummy Tuesday, and I realized that some of them were posting their link for more than one event, so I decided to do the same thing…I guess this means that if some bloggers decided to jump off a bridge, I’d have to do it too! (As long as the water’s not too deep, and they’re serving cake & cookies below.)

Not sure if I’ll put the icons up every week…maybe just the links, and I’ll see how these icons look in my sidebar. (And sorry if these are aligned all funny, I’ve worked & worked with it, but it just keeps formatting itself….does anyone else have this problem?)

Ultimate Recipe Swap at Life As Mom.

Tempt My Tummy Tuesday is hosted by Blessed With Grace.

Homemaker Mondays is hosted by 11th Heaven’s Homemade Haven.

Making A Happy Home Monday is hosted by As For Me and My House….

Make Something Monday

Make Something Monday is hosted by Go Graham Go! and Jolly Mom.

-Jerri

Recipe of the Week: Egg Custard Pie

custard-pie

I made something a little different for this week’s featured recipe. This week was my dad’s birthday, and for the occasion I decided to make my first attempt at an Egg Custard Pie. I remember my grandmother making these for my dad when I was still a kid. He loved them, but I don’t recall him ever getting the recipe for it or attempting to make it himself, which is kind of odd because my dad’s always trying new recipes. Anyway, my dad feels that he has basically everything he needs, and he’d much rather receive a gift that someone made for him as opposed to something that’s been bought, so for his birthday, I wanted to try this recipe.

I have to admit, I was a little clueless here. Not only had I never made this, but I’ve never even tasted one before! So I had nothing to compare it to, other than the memory of what my grandmother’s pie looked like! And there were only about half a dozen different recipes to choose from in my books! So basically I went in to this, knowing that at the very least my dad would be happy that I even made the attempt and he’d be pleased that I paid attention and remembered that he liked this pie.

 Well, that idea turned out to be a major understatement. When I showed up with the pie, my dad was thrilled! He said that he didn’t think he’d had one since the last time my grandmother made one before she got sick, which was about 15 years ago! He was very surprised and happy, and upon tasting it, he said it was just as good as the one’s grandma used to make. (yay!) I actually can’t remember the last time I saw him react to a gift like that, so it was very touching, and made me very happy as well!

[Read more…]

Recipe of the Week: Unbaked Caramel Cookie Bars


Here’s a recipe that’s kind of fall-ish. This comes from my grandmother’s old cookbook. The original recipe doesn’t include sugar, but as my grandmother wrote it into the recipe, that’s how I made it too. And after trying it with the sugar, I can’t imagine how it could be any better without it.

It kind of reminds me of Harry Potter using the “Half Blood Prince’s” instructions that are written in the margin, rather than the textbook instructions, and getting a much better result. (except I’m not a wizard, and I’m making cookies rather than potions, and well…nevermind)

Anyway, this is a great recipe if you’re looking for something rich, sweet, and gooey. It’s extremely easy to make and a great treat that you can make at the last minute, so it’s perfect for a holiday party or just a quick snack at home.


Unbaked Caramel Cookie Bars

3/4 cup margarine
1 small can evaporated milk
2 cups sugar
1 4 oz package of instant butterscotch pudding
3 1/2 cups quick cooking oats

Bring margarine and milk to a rolling boil, stirring frequently. Remove from heat and add pudding mix, sugar, and oats. Mix together thoroughly. Cool about 10 minutes. Then press into an 11X7 or 9X13in pan, or use a teaspoon and drop cookies onto wax paper. Chill in the refrigerator or freezer.


-Jerri


Recipe of the Week: Sweet Jack-o’-laterns

I got this really cute treat in my email last week, and I thought it would be a great recipe to feature as the recipe of the week. The idea comes from Taste of home and they call them Sweet Jack-o’-lanterns. These would be such a great treat to take to a school Halloween party or serve at home.

If you’re a regular reader of my blog, you know that I love sweet treats, especially if they are easy to make and decorate (since I’m not much of an artist), and this definitely fits that mold. It’s something you can make even if you’re short on time, and it’s easy enough that you could even get the kids in on the action. And you can make something that’s very fun and professional looking without spending a lot of money and without having to be a culinary artist. Excellent!

Ingredients:
1 package (18-1/4 ounces) yellow cake mix or cake mix of your choice
3-3/4 cups confectioners’ sugar
3 tablespoons butter, softened
2/3 to 3/4 cup milk
1 to 1-1/2 teaspoons orange paste food coloring
12 gumdrops
12 black jujubes
Directions: Prepare and bake cake according to package directions for cupcakes. Fill 24 greased muffin cups two-thirds full. Bake at 350° for 15-18 minutes or until a toothpick comes out clean. Cool for 5 minutes before removing from pans to wire racks to cool completely. For frosting, in a small bowl, combine confectioners’ sugar, butter and enough milk to achieve spreading consistency. Stir in food coloring. Cut a thin slice off the top of each cupcake. Spread frosting on 12 cupcakes. Invert remaining cupcakes and place on top; frost top and sides. For stems, place one gumdrop on each pumpkin. Cut jujubes into thin slices; use a bottom slice for each mouth. From remaining slices, cut one large triangle and two smaller ones. Position two small triangles and a large triangle on each cupcake for eyes and nose. Yield: 1 dozen.


The One Year Anniversary of Simply Sweet Home & The Recipe of the Week: Coca Cola Cake

Greetings everyone! It was a very busy week for me. No time for posting, as I was out job searching. I had some meetings with a couple of agencies this week and have sent some applications to a few places as well. Aside from that, I’ve been getting some stuff out of storage at my dad’s house this week and am still trying to find places for some odds and ends stuff at our house. And then of course there’s the usual errands to run as well. There just aren’t enough hours in the day!

But no matter what, I had to find time to post today, because it is the one year anniversary of the blog. Yea! It almost doesn’t seem like it’s been a year, but internet time stamps never lie (not to mention all the Halloween posts I did last year).

So in celebration of the blog’s one year anniversary/birthday, I made a yellow cake with chocolate icing. (Mine and my husband’s favorite) My grandmother used to make a Coca-Cola cake, which was a chocolate cake with chocolate icing. I’ve made the cake myself and it’s delicious, but as my husband prefers the yellow cake by far, I usually just make the coca-cola icing and put it on a yellow cake.

For this special post, I’m featuring the pictures of the cake that I made last night for the occasion, and in case anyone wants to try it, I’ve included the classic recipe straight from my grandmother’s old cookbook for Coca Cola Cake. Enjoy!

And finally I want to say thank you to everyone who reads/subscribes/comments at Simply Sweet Home. I really enjoy writing and sharing my ideas and having this creative outlet, and it thrills my soul to know that there are people out there who are reading it and who enjoy my posts. Thanks again!

Coca-Cola Cake:
2 cups sugar
2 cups flour
1 cup butter
3 tablespoons cocoa
1 cup Coca-Cola
1 teaspoon baking soda
1/2 cup buttermilk
2 eggs, beaten
1 teaspoon vanilla
1 1/2 cups miniature marshmallows (optional)

Sift sugar and flour together. Boil butter, cocoa, and Coca-Cola. Pour over flour and sugar. Dissolve soda in buttermilk and pour in with the above ingredients. Then add eggs, vanilla, and marshmallows. Pour into greased 13X9 inch pan and bake 45 minutes at 350 degrees.

Chocolate Icing:
1/2 cup butter
3 tablespoons cocoa
6 tablespoons Coca-cola
1 box confectioners’ sugar
1 teaspoon broken pecans (optional)

Bring to boil the butter, cocoa, and Coca-Cola. Add the sugar, vanilla and pecans. Pour over cake in the pan while icing is hot.