Today we have another great recipe guest post from one of our bloggy friends. Judy from Season of Sweets is here to share a fruity take on an old classic ice cream treat. Check it out!
Guest Post: Sparkling Strawberry Lemonade from Melissa of Melissa’s Cuisine
July 1, 2013 3 Comments
I’m very excited to present some guest recipe posts this months from some of our Friday Favorites bloggers! If you wish to share one of your recipes as a guest blogger, I’d love to give you the opportunity. Just shoot me an email. This month, our guests are sharing some favorite summertime recipes. We are starting with Melissa from Melissa’s Cuisine.
Guest Post: S’mores Bark from Kassi at Truly Lovely
December 11, 2012 Leave a Comment

I’m excited to present another fun Christmas Treats guest post today! This one is from my sweet friend Kassi from Truly Lovely, and she is sharing a yummy holiday take on a campfire favorite: S’mores Bark! [Read more…]
Guest Post: Hot Chocolate Floats from Keri at Shaken Together
December 6, 2012 10 Comments
Today we have another fun guest post! This one is from Keri at shaken together, and she’s made us a yummy treat: Hot Chocolate Floats. Take it away Keri!
Hi there, Simply Sweet Home friends! My name is Keri and I blog over at shaken together!!

It’s my home away from home where I share recipes, easy crafts/DIY projects, giveaways, a weekly link party and snippets of our life with 12 years of marriage and counting, two kids and two cats … you know, our life, shaken together! I would love to connect with you at my blog, on Facebook, Twitter or Pinterest!
Today, I am so excited that Jerri invited me to share one of our family’s favorite holiday treats …

There is nothing better than a rich mug of hot chocolate on a cold night, right?! Well, unless it is topped with a scoop of ice cream, sprinkles and maybe a drizzle of hot fudge!

Whip up a batch of hot chocolate – you can use instant mix, I won’t judge – but there are tons of easy recipes for homemade hot chocolate that will probably rock your socks off 🙂 I am dying to try this hot chocolate mix from Something Swanky!
Anyway, gather your mugs and fill about 2/3 full with your hot chocolate. Add a scoop of ice cream (we used peppermint!) and sprinkle on your favorite toppings. I added a drizzle of warm hot fudge and festive holiday sprinkles!

This is seriously the best of both worlds … an ice cream sundae and a sweet steamy mug of hot chocolate!!

Jerri, thanks so much for the opportunity to share this sweet treat with your readers! Hope to see you all again soon! And happy, happy holidays!
Thanks again to Keri for posting here today!

Guest Post: Snow Globe Cake Pops from Karyn of Pint Sized Baker
November 29, 2012 12 Comments
Today we’ve got another guest post for our Six Weeks of Christmas Treats! This one is from Karyn of Pint Sized Baker, and she has some adorable Snow Globe Cake Pops for you. These are too fun! Hope you enjoy!

 Hi Everyone, I’m Karyn from the Pint Sized Baker. I’m a wife to Mr. Quart and a mom to my Little Cup. The best part of writing a blog about baking treats, is that they enjoy eating them!
Christmas is a great time for sweet treats and I’m sharing some of my favorites, so pop on over and check out all the fun things I’ve made; like THIS, THIS and THIS!
Every Friday I post a new Cake Pop Tutorial or Cake Pop Kit Review. I really enjoy making cake pops. Once you figure out how to get the right consistency for the cake pop batter and candy melts, making them is totally addicting!
Today, I wanted to share an easy Cake Pop tutorial that I know everyone can make!
These snow globes are very similar to the Gumball Machine Cake Pops I made during the summer.

These cake pops are very easy using some pre-made ingredients.
The base of the snow globe is a bell shaped caramel candy and the snowman is a Wilton cupcake topper.
You can go the extra step and make the base and decorate a centerpiece. It all depends on your time, creativity and willingness to go the extra step.
To make these, you will need to make your cake pop batter with 1/2 of a 9×11 cake and two tablespoons of frosting. Combine them with a paddle attachment until the batter is smooth.
I find that box cake and caned frosting work best. These pops were yellow cake and lemon frosting. YUM!
I took two of my standard pops and made one BIG pop. Make them round and then flatten them slightly. You should get a dozen larger pops from half the cake.
Place them into the fridge while you get the candies ready.

Take the bell candies and pierce them with a skewer. This skewer is smaller than a lollipop stick. Once the hole is made, then slide the lollipop stick through the candy. Because I used a caramel filled bell, I did not add anything to adhere the candy to the stick. It stayed in place just fine. Push the candy down so that an inch of lollipop stick is above it.
Melt your candy low and slow in the microwave being careful not to overheat it. I used 90% white candy melts and 10% blue candy to get this pale blue color.
Dip your stick into the candy melt and then insert it into the cake ball. Allow it to dry upright as you adhere all the cake pops to the sticks.
Dip your cake pop in the candy coating it completely. Attach the snowman and sprinkle on the snow.
Dry upright and then store individually wrapped or in an airtight container.
Cake Pops freeze well, so you can make these now for your holiday gift giving and cookie exchange.
If you need any more tips on how to make cake pops, please come on over and check out my videos and other cake pop tutorials.

Thanks for having me over, Jerri!
I hope you have a wonderful Christmas Season!

Thanks again to Karyn for posting here today!
Guest Post: Spice Cookies from Kristen of Frugal Antics of a Harried Homemaker
November 26, 2012 2 Comments
I’m so excited to have some guest bloggers lined up for the holiday season. Today I’m happy to welcome Kristen from Frugal Antics of a Harried Homemaker. She’s sharing her Spice Cookies, a classic and perfect holiday treat, which I’m sure you’ll love. Here’s Kristen!
Hi Everyone! I am so pleased to be a guest here today. What fun it is to “meet” all of you! My name is Kristen and I blog over at Frugal Antics of a Harried Homemaker. (Yes, I don’t know what I was thinking when I chose that title…it’s too long, but it’s stuck to me like frosting on cake). My motto is “delicious doesn’t have to be expensive.” I make family friendly recipes using everyday ingredients.
![]()
By way of introduction, I am a mom to five kids ranging in age from 6 to 18. The oldest four are teenage boys, all of whom we adopted at birth. The youngest was a “surprise” little girl that I gave birth to myself. We live in the Jacksonville, FL area while my husband commutes to his job in San Fransisco two weeks out of every month. Life is rarely dull in my house. In fact, those blessed hours while the kids are in school are the only quiet ones of the whole day!

The recipe I am sharing with you today was given to me by a friend when we lived in the Seattle area. Susan and her husband were in a dinner group with us and we also shared a love of music, but what made her so special to me was her love for my young boys. She brought them these cookies whenever she visited and once even came over to my house with all of the ingredients and spent an afternoon baking with them. Those are priceless memories which make these cookies all the more tasty.

Spice Cookies:
1/2 cup vegetable oil
1 cup sugar
1/4 cup molasses
1 egg
2 cups flour
2 tsp baking soda
1 tsp cinnamon
1/2 tsp each cloves, ginger and salt
Extra sugar
Combine the oil, sugar, molasses and egg in a mixing bowl.
Beat with a mixer until smooth.
Combine the dry ingredients in a smaller bowl and add to the sugar mixture.
Mix well.
Refrigerate dough for 1 hour.
Shape dough into small balls, roll in the extra sugar and place on an ungreased cookie sheet.
Bake at 350 degrees for 8-10 minutes or until top starts to crinkle.
Cool on a wire rack.
Thanks, Jerri for inviting me over. It’s been a pleasure. Happy Holidays to all of you, too!!
Guest Post: Pantry Cookie Pie by Dorothy at Crazy for Crust
May 28, 2012 10 Comments

Today I’m excited to have Dorothy from Crazy for Crust guest posting. Dorothy is a regular participant at my Friday Favorites event, and I’m always excited to see what kind of scrumptious treats she’s going to share each week! Dorothy also has a linky party called Crazy Sweet Tuesday, where you can link up your own sweet treats!
And without further ado, here is Dorothy:
Blog Swap with Angie from Country Chic Cottage
August 26, 2011 2 Comments
Today I’m swapping blogs with Angie from The Country Chic Cottage, and she has some great things to share with you today!
Hello my name is Angie with The Country Chic Cottage and I am so happy to be here on Simply Sweet Home!!
The Country Chic Cottage is all about home decor and crafting with farmhouse flair!! I love anything vintage and working into my home! I started blogging after a new year’s resolution to spruce up my home decor. The twist? No budget to do it with! 🙂 Come on over and follow along with my DIY adventures! Some of my favorite projects…
I love to knock off designer home decor at a fraction of the price! This is just one of my faves!! I posted a Ballard Knock off this week — come on over and check it out!!

A perfect gift for any little diva! I love decorating for my kids!! Two girls and a boy! This project is amazing in person and by far one of my favorite things I have ever made!

The ultimate in texture for any home! This is one of my most popular projects to date — and yep I still love em!!

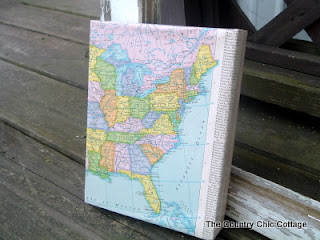

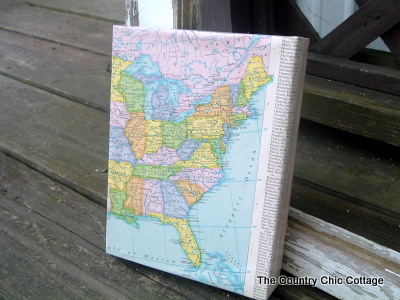
I love map decor!! And this one is easy and gorgeous!!
Stop by the cottage any time for a visit! I would love to have ya! Thanks Jerri for the blog swap!!
~Angie~
Thanks again to Angie for swapping blogs with me and for a lovely post!
Christmas Traditions Event
November 17, 2010 1 Comment
I was honored when Elizabeth at Twelve Crafts Till Christmas asked me to be a guest contributor for her Twelve (plus) Days of Christmas Traditions event!
For this event, I’ll be sharing a tree trimming tradition called “The Christmas Keys.” It’s a very fun and meaningful tradition that we’ve started since we got married, and I think you will enjoy it.
Please head over to Elizabeth’s blog to check out my guest post. And keep visiting throughout the month, as there will be lots of guest recipes and tutorials through December 3!
Big Thanks to Elizabeth for hosting this!
Cupcake Carnival at Attempting Creative
June 20, 2010 1 Comment
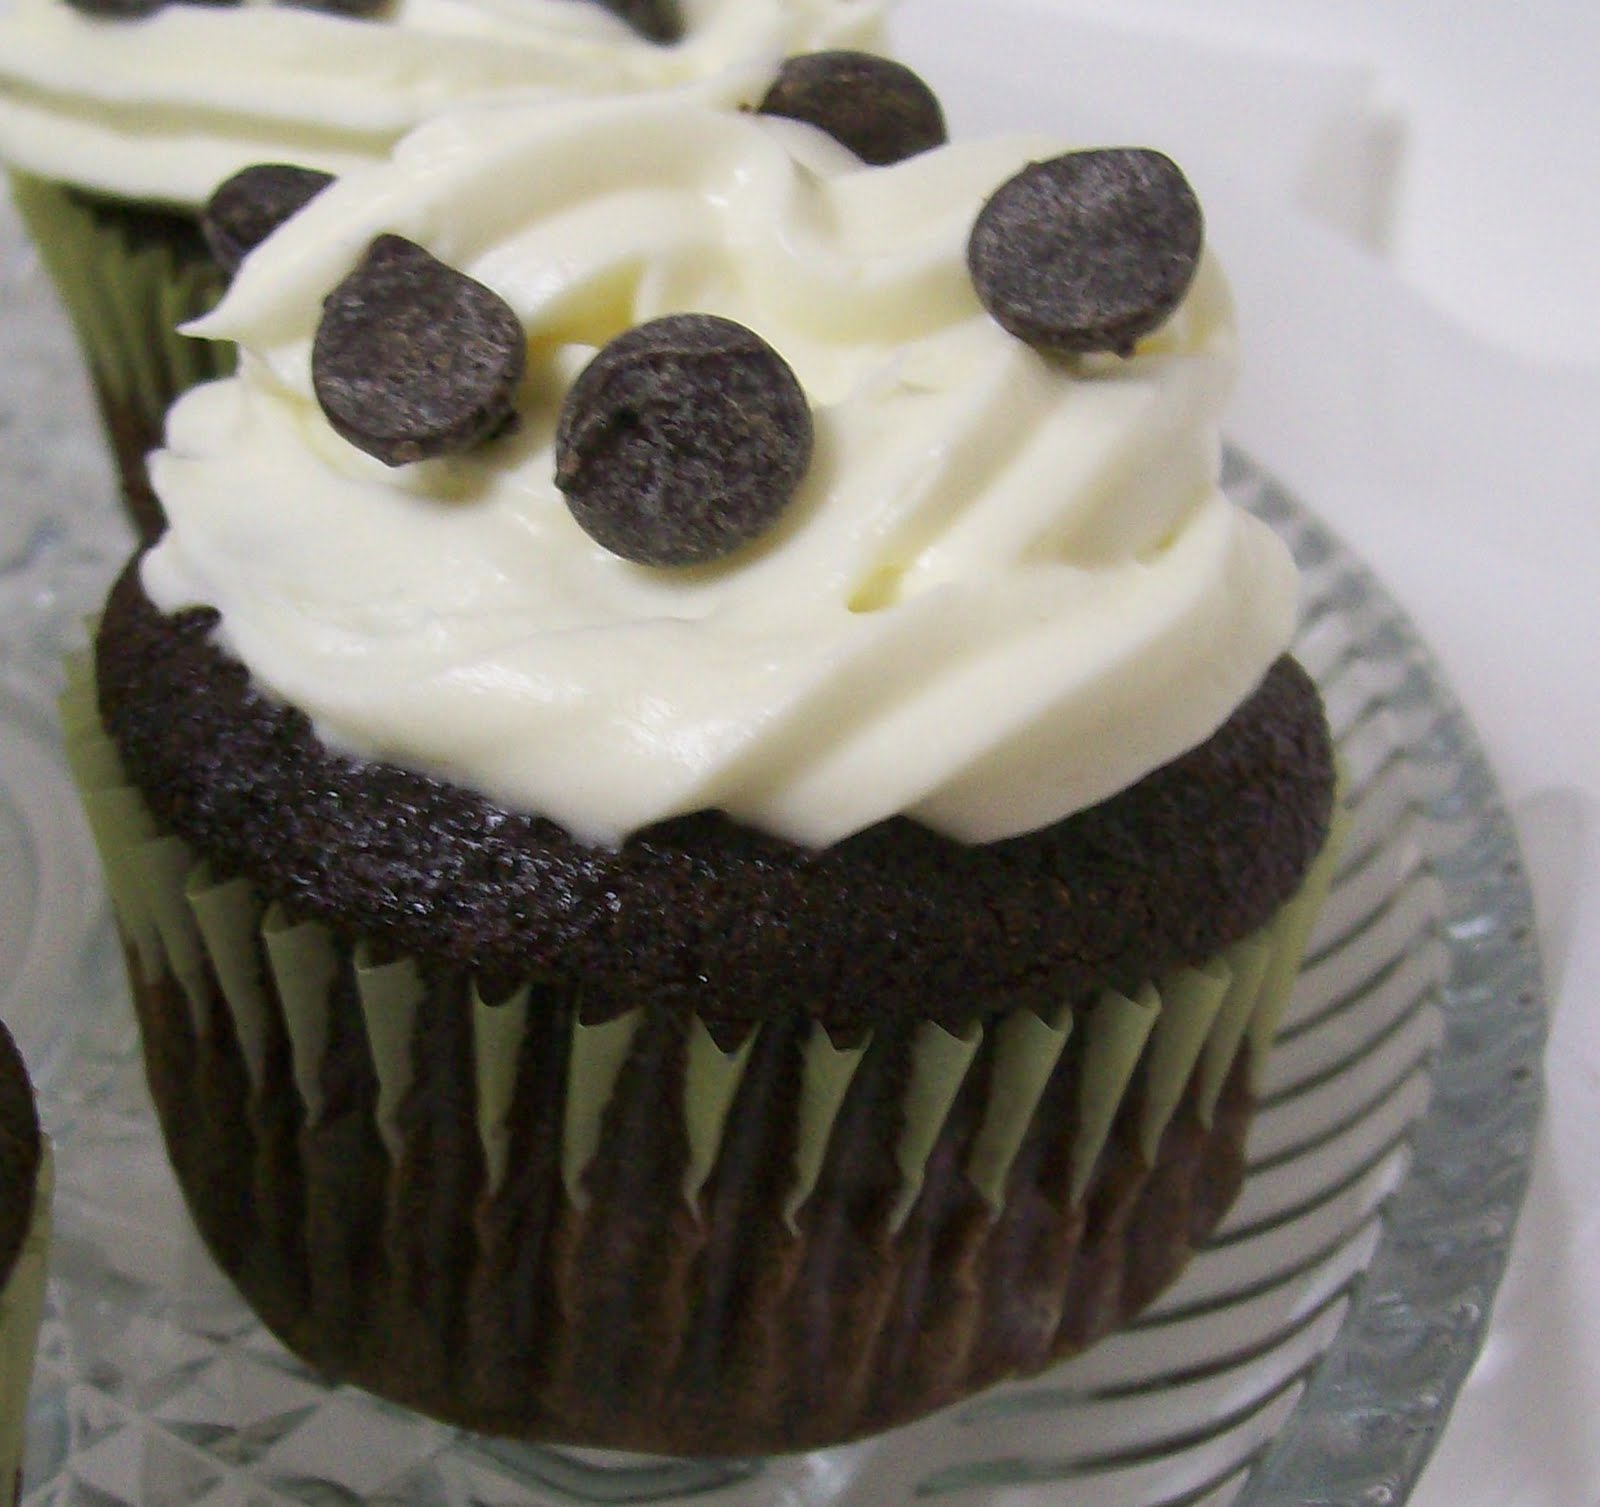
I’m excited to be guest posting today for the Cupcake Carnival at Attempting Creative! Please stop by over there today and find out how to make Chocolate Chip Cheesecake Cupcakes! Have a great Sunday! And Happy Father’s Day to all the dad’s out there!
-Jerri
