Creative Remodeling Ideas to Increase Your Home’s Value

In today’s market, it’s more important than ever to make sure you’re doing everything you can to increase the value of your home. Even if you’re not planning on selling shortly, it’s worth investing in some creative remodeling projects that will help your house stand out from the pack. Remodeling a home can be a great way to increase its value, but you need to ensure that the changes you make don’t end up making it less valuable. There are many creative ways to remodel your home to make it more appealing, but also keep it in line with what potential buyers are looking for. The following article will discuss some creative ideas for increasing your home’s value without lowering its saleability.

Replace Your Front Door

If you’re looking to increase the value of your home, consider replacing your front door with a more energy efficient one. New doors can be made with high-quality insulation, which will help keep your home cooler in summer and warmer in winter.

Another way to increase the value of your home is by installing a security door that is heavy-duty and more difficult for intruders to break through than a traditional wooden frame door. This could mean spending more money upfront but it will pay off over time as burglars won’t be able to get into your house so easily–and therefore won’t target it as often! Finally, consider replacing every door in your house (or at least all those leading from inside) with stylish glass panels instead of solid wood or metal ones; this can add style while also providing natural light into otherwise dark areas such as basements or closets.”

Add deco panels

If you’re looking for creative remodeling ideas to increase your home’s value, then consider adding deco panels like this, deco panel in Brisbane. These panels will make any room more visually interesting, and they can also be used to add dimensional depth to a space. They can be used on the ceiling or the walls, and they come in a variety of colors and finishes.

Deco panels are especially popular because they can help to break up large expanses of color, which can make rooms feel smaller and more claustrophobic. The addition of deco panels along with other decorative elements such as artwork and mirrors will also help to make your room appear more luxurious. 

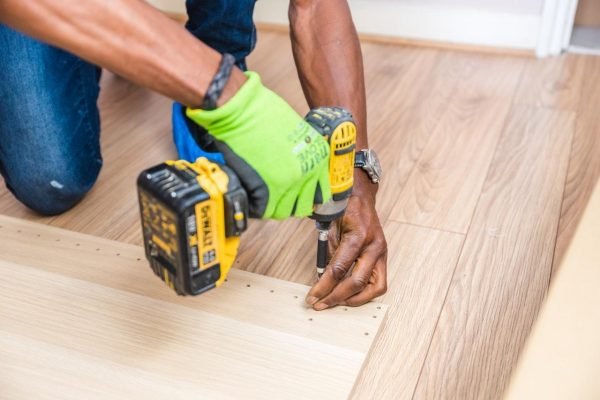
Install New Flooring

You can update your home’s style with stylish flooring. There are many types of flooring available, but each has its advantages and disadvantages.

There are two main types of flooring: hardwood and carpeting. Hardwood floors are made from real wood planks that have been glued together and sanded smooth; they tend to be very durable and add warmth and character to any room in which they’re installed. Carpeting comes in many different varieties–from low-pile rugs that feel soft underfoot but don’t provide much traction, up to high-density wall-to-wall carpets with deep pile (which provides more comfort). Carpet is usually cheaper than hardwood but requires more maintenance over time because it can get dirty easily; furthermore, some people find it difficult on their knees when kneeling on them (such as during prayer).

Restore old frames

Restoring old frames is a great way to give your home an updated look without breaking the bank. If you’ve got some old photographs and paintings sitting around, consider having them framed. You can restore old frames by removing the glass and backing of the frame, sanding down any rough edges or splinters, cleaning them thoroughly with a soft cloth or sponge dipped in warm water and soap (use dish soap if necessary), then repainting with spray paint made specifically for wood surfaces (such as Kilz). Once dry, reattach both pieces of glass back onto their original positions using painter’s tape on each side so they stay firmly in place while drying overnight before hanging up your newly restored masterpiece.

Frame restoration is one of our favorite ways to add value without breaking the bank. By repairing and repainting your home’s exterior, you can give it a fresh new look that will increase its value in no time—without having to invest any money into construction or renovation. Frame restoration is a quick and easy way to make your home look brand new again, so even if you’re on a tight budget, this is an option worth considering!

Update Your Lighting

Lighting is another area where you can make quick, inexpensive changes that will have a big impact on your home’s value. The first thing you should do is replace any old light bulbs with energy-efficient ones. Then, consider installing dimmer switches so that you can adjust the brightness of lights in different rooms as needed. Next up: take a look at what kind of lighting fixtures are currently installed throughout your house and think about whether or not they match the decor of each room (and whether or not they fit with the style).

If none of these options work for you, consider changing up your color scheme instead. Changing out an orange bulb for a red one might be enough to give an outdated kitchen an updated look–and it won’t cost much either! Finally, if none of these ideas sound appealing then go ahead and invest in some new track lighting or recessed lighting systems which give off more focused illumination than traditional overhead fixtures do.”

Replace with new roofing

Replacing your roof is a major investment, but it can also be one of the most rewarding. It’s not just an aesthetic decision–replacing your roof with new materials will increase the value of your home and make it more energy efficient. Newer roofs are better at keeping out moisture and preventing leaks, so they’ll last longer than older ones. And if you choose high-quality materials that last longer than expected, then you’ll save money in the long run on repairs as well as maintenance costs like cleaning shingles or replacing gutters every few years (which would otherwise wear out before their time).

With a good roofer like this Brisbane roofers, you can count on quality workmanship and a lasting solution to any problems with your roof. But there are other things you can do to increase the value of your home as well, including changing out your windows, adding a porch or fence, or even landscaping around the house. Any of these projects can help you sell your home more quickly and for more money when the time comes.

Replace Your Garbage Disposal

One of the easiest ways to increase the value of your home is by replacing your garbage disposal. If you notice that your garbage disposal has been on the fritz lately and doesn’t seem to be working as well as it used to, then this might be an indication that it needs to be replaced with a new one. You should also check underneath your sink for any signs of leaks or clogs from other plumbing fixtures before calling a plumber; often these issues are what cause problems with garbage disposals in the first place.

Remodel your bathrooms

Remodeling your bathrooms is a great way to increase the value of your home. Bathrooms are one of the most common places to see renovation projects, as they can be updated at a relatively low cost. New fixtures, like new sinks or toilets, can make your bathroom look brand new and modern. Tile flooring can also make it seem like there’s more space in the room than before–and with brighter lighting, it’ll feel even more spacious.

Bathroom renovation like this, bathroom renovations in North Shore Auckland is a great way to add value to your home. It’s also a great way to increase the functionality of your bathroom, improve the aesthetics of your home, and make it more comfortable for you and your family. When you’re updating your bathroom, it’s easy to get caught up in the idea of what you want and forget about what other people will think of it.

Upgrade Your Kitchen Sink

The kitchen sink is arguably the most important part of your kitchen. It’s where you wash dishes, hands, and even sometimes food. If you’re looking to update your sink but don’t want to spend a lot of money on it–and who does?–some simple things can be done to make it look brand new again.

First off, if there is any rust around the base of your current sink or on any other parts of its structure (such as faucets), get rid of it by scrubbing it with steel wool or sandpaper until all traces are gone. This will ensure that no more rust forms in those places again! Next up: replacing anything that doesn’t work quite right with something new and improved. Consider replacing both drain assemblies if one has become clogged over time; this will save time when cleaning out drains later down the line because they won’t fill up as quickly due to being blocked by debris such as hairballs from pets’ grooming sessions). You could also replace garbage disposal units since they wear out after many years’ worth of usage so having brand new ones installed could help improve efficiency levels dramatically.”

Replace Your Countertops

Replacing your countertops is a great way to add value to your home. However, replacing countertops can be expensive and there are many different materials from which you can choose. Some of these materials are more durable than others, so it’s important to choose one that will last for the lifetime of your home.

If you are replacing your existing countertops with new ones, then it’s likely that you will also need to replace the sink as well (unless it’s an island sink). This means that if you’re planning on doing any kind of remodeling project like this one–or any other type of remodeling project–you should hire professionals who have experience working with contractors and subcontractors to ensure everything goes smoothly.

Replace Your Appliances

One of the best ways to increase the value of your home is by replacing your appliances. While it may seem like an expensive undertaking, upgrading your appliances can actually save you money in the long run. When buying new models, it’s important to look for Energy Star-labeled products since they tend to be more efficient than other models and use less energy.

When considering kitchen remodeling ideas, think about what kind of new equipment would fit into your lifestyle and budget best–and then talk with a contractor about how much they would cost before deciding whether or not they’re worth it.

Update your Kitchen Cabinets

If your cabinets are outdated, or if they’re just plain ugly, updating them is an easy way to update the entire look of your kitchen without having to do much else at all. Just replace those old wooden doors with brand new ones that match whatever other upgrades you’ve made throughout the rest of the house–like new countertops or stainless steel appliances–and voila. Your kitchen will feel brand new again!

Conclusion

If you’re thinking of selling your home, these projects can help increase its value. If you’re planning on staying in it for a while longer, then they’ll still make a difference by making your home more comfortable and attractive to live in. To determine if a project is worth it, you need to consider both cost and impact on your home’s overall value.  Upgrading your home with the right projects can increase its value. The trick is to choose projects that are going to make a big impact on your home’s appearance and not just cost you a lot of money. If DIY isn’t for you, hire a contractor who specializes in remodeling or redesigning homes.


Must-Have Tools for DIY Home Improvement Projects

When you’re ready to do some DIY home improvement, the right tools can make all the difference. Whether you’re planning on painting your walls, repairing a leaky pipe, or building a new deck, it’s worth investing in high-quality tools that will last and are easy to use. If you’re a DIY enthusiast, then you know that the right tools are essential when it comes to completing your projects. That said, not all tools are created equal—some will help you get the job done faster while others can trip you up entirely. Here’s the list of must-have tools for any DIY project.

Hammer

The hammer is one of the most common tools used in construction and DIY projects. It can be used to drive nails or other fasteners into materials such as wood, concrete, or metal. Hammers also come in different sizes, depending on the job at hand. The most common type of hammer has a straight claw on one side for pulling out nails and a flat face opposite it for pounding down boards.

Hammer handles are made from various materials including fiberglass composite or steel tubing with rubber grips; some even feature shock-absorbing technology so they don’t jar your arm when driving in long screws!

Grinder Wheels

Bench Grinder Wheels are a must-have tool for DIY home improvement projects, whether you’re working on your own or with a team. These wheels can be used to shape, sharpen, and smoothen metal objects and surfaces, making them perfect for all kinds of jobs. Grinder wheels come in many different shapes and sizes, but they all have one thing in common: they’re designed to fit onto a bench grinder. This allows you to use the wheel’s vibration to work easily on any kind of material without having to worry about it slipping off or getting stuck on the surface you’re working with.

You’ll find that bench grinder wheels come in different types, such as coarse grit or fine grit. Coarse grit is best suited for removing rust from old tools or sharpening woodworking tools like saw blades; fine grit is better suited for polishing metals and other materials without leaving behind any residue from impurities getting ground up during use (such as when using oil-based lubrication).

Stud finder

A stud finder is a tool used to locate the studs in walls. It uses a magnetic sensor to detect the metal in the studs, which helps you know where you can place heavy items like picture frames or shelves on the wall. The best part is that they’re not very expensive–you can get one at any hardware store for under $20!

Hand Tools

Hand tools like this, Dewalt hand tools are the most common tools used by DIYers. They’re lightweight, portable, and easy to use. Hand tools can be used for a wide range of projects, from small jobs around the house like installing new cabinets or hanging pictures on the wall, to larger home improvement projects such as framing an addition or replacing your roof. Hand tools are versatile and can be used in many different situations.

Whether you’re working on a small job or a major project, there’s a tool out there for every job. From hammers and saws to measuring tapes and screwdrivers, hand tools are what make DIY possible. And when it comes to choosing the right one for your project, it’s important to know what you’re looking for before you go shopping.

Utility knife

A utility knife is a versatile tool that can be used for cutting, scraping, and scoring. The blade on a utility knife is usually longer than other types of knives. This allows you to cut through thicker materials like sheetrock, drywall, and plywood. You can also use it to scrape paint off of surfaces or score wood so that it’s easier to cut through with another tool such as a saw or circular saw in DIY home improvement projects around your house.

Ceramic Fibres

Ceramic Fibres are used for electrical insulation and are used in electrical wiring. They can also be found in the manufacture of ceramic capacitors and filters. Ceramic Fibres are made from a mixture of zirconia oxides (ZrO2), which is melted down at high temperatures until it becomes liquid. Once this has been done, it is poured into a mold where it solidifies into its final shape as it cools down again.

For this, ceramic fibre blankets are a must-have for DIY home improvement projects. They’re used to insulate walls and roofs, which means they will help keep your home warm in the winter and cool in the summer. And they’re lightweight and easy to install with minimal mess or disruption of your home’s interior.

Level

A level is used to ensure that a surface is flat, or horizontal. It can be either a bubble level, laser level, or spirit level.

The bubble in the center of this tool is filled with water and will move around as you tilt your tool up and down. If it stays in one place for too long, then it means that something is not right with your surface–it’s either higher than it should be or lower than it should be. To use this tool effectively on DIY projects around your home (like installing new cabinets), make sure that all surfaces are leveled before proceeding with any work!

Nyloc Nuts

Nyloc Nuts like this, Nyloc Nuts in Brisbane are a special kind of nut that has a nylon insert that prevents the nut from loosening. They’re used in applications where vibration is present, such as on motorcycles or cars, or where there is a high risk of the nut coming loose, such as when installing flooring.

Nyloc Nuts are made of nylon, so you don’t have to worry about rusting or corrosion from water and exposure. They’re also rated for high strength, meaning they’ll hold up under pressure in a variety of conditions. Plus, the nuts come in several different sizes and materials, which makes them easy to fit into any space or area where you need to install something new—whether that’s a railing or an electrical outlet. Plus, since they’re made of nylon, they won’t leave any residue behind on your project when you remove them later!

Tape measure

A tape measure is one of the most important tools for any DIY home improvement project. It’s used for measuring, marking, and cutting.

To make sure your tape measure is accurate, you should check it against another known length of the same type of material (for example, wood). If they are different lengths then one or both tapes are likely not calibrated correctly and need to be adjusted by their manufacturer. You can also use a tape measure to check the dimensions of rooms or furniture before buying them so that they fit into your home once they arrive at your doorstep! If you’re building shelves or other pieces of furniture yourself, then these must fit properly inside each other too!

Drill

Drills are used for drilling holes in wood, metal, and other materials. They come in different sizes, with different power sources, and with different types of bits. Drills are used for many different DIY projects including making holes for electrical outlets or switches; installing hinges on doors and cabinets; hanging pictures or mirrors on the wall; installing locksets on doors (door knobs).

Pliers

Pliers are one of the most basic tools you can use for DIY home improvement projects. They’re used for gripping, bending, and cutting wire, as well as crimping electrical connectors. Pliers come in many different shapes and sizes so you’ll want to choose the right ones for your project.

Some types of pliers are used for gripping and twisting, while other types cut through metal or wire–but they all share one thing in common: they have two opposing jaws that come together at one end (or sometimes both ends). There are three main types of pliers: slip-joint; needle-nose; and lineman’s/wire-stripper.

Miter saw

A miter saw is a power tool used to make precise cuts in wood or other materials. It’s used for cutting angles other than 90 degrees, as well as for making crosscuts (the horizontal cuts you make when you’re building with wood).

Miter saws can handle most materials, including plywood, hardwoods, and softwoods. You can use them to cut off the excess length from boards that are too long for your table saw or circular saw.

Wire cutter/stripper/crimper tool kit

This multi-tool is a must-have for any DIYer, especially if you’re working with electrical wiring. The tool kit features a wire cutter, stripper, and crimper that can be used to cut, strip, and crimp different types of wires. It’s compact and portable so it’s easy to carry around in your toolbox or back pocket.

The wire cutter/stripper/crimper tool kit also comes with an instruction manual that explains how each part functions as well as how they should be used together when doing electrical work.

Conclusion

If you’re planning on doing your home improvement projects, some tools will make your job much easier. These tools can be expensive, but they’re worth it. They can also be dangerous if not used correctly and should only be used by trained professionals in safe working conditions. However, if used properly and appropriately by someone who knows how to use them, these same tools could be used for other jobs or hobbies as well.

Simple Renovation Projects That Can Make a Huge Difference

Renovating your home can be a daunting task, especially if you’re not experienced in a particular area. If you’re looking to makeover your kitchen but don’t know where to start, or if you want to refurbish an entire room but don’t know where the money should go first… don’t fret. Many easy-to-do projects will make a huge difference in your house without breaking the bank. Here’s a list of simple renovation projects that can make all the difference:

Remove old wallpaper

Removing old wallpaper can be a messy job, so make sure you have plenty of space to work in and that you have all the materials you need before starting. You can remove it by scraping it off or using a wallpaper removal kit (if there are multiple layers). If you’re not sure about removing the wallpaper yourself, consult a professional.

New Blinds and Shutters

New blinds and shutters like this, coastal blinds and shutters can make a big difference in your home’s appearance. This is especially true if yours are outdated or mismatched with the rest of your décor. They’re also relatively inexpensive to replace, so it’s not like you have to spend thousands on them if you don’t want to—and if you do want to invest in new window treatments, it won’t be difficult at all! You can even do this project yourself over an afternoon (or weekend). If DIY isn’t your thing, don’t worry: hiring professionals will give you results just as good as doing it yourself would have done—and they’ll save you time too. Coastal blinds and shutters are a simple way to make your home look more modern, but they can also add value to your home. The style of a coastal blind is often very similar to the style of the rest of your house, so if you have an older-looking house with traditional windows and doors, you can go ahead and add coastal blinds without having to replace any other parts of your home.

The best thing about this type of renovation project is that it’s easy to do yourself. If you’re not up for doing it yourself, most companies will come out and install them for you at a reasonable price. They’re also easy to maintain because there aren’t many parts involved; all you have to do is clean them with soap and water every once in a while.

Install new lighting fixtures.

Installing new lighting fixtures is a quick and easy way to update a room. If you’re looking for something simple, consider what kind of lighting you want to achieve: bright. soft? moody? You’ll want to choose the right fixture for the job. For example, if your room is large and open with high ceilings and lots of windows, consider installing track lights that can be aimed wherever they’re needed most. On the other hand, if your space has low ceilings or lots of nooks and crannies (like an entryway), try using hanging pendants instead–they’ll add some drama without being overwhelming.

New Floor Tiles

If you’re looking for a simple renovation project, floor tiles are the way to go. They’re easy to install and can make a huge difference in your home’s aesthetic–and they don’t require any major construction work or expensive materials. Here are some things to keep in mind when choosing new floor tiles:

For example, if there’s an area where water splashes often (for example, around a sink or bathtub), consider installing an extra-durable type of tile there that won’t get damaged easily by spills or moisture. This will save both time and money. Similarly, if you want the look of wood floors but don’t have access to them because they’re not available in your area (or just not within budget), try using wood grain patterns on ceramic or porcelain tiles instead–you’ll be able to achieve similar effects without having any construction done at all. It’s worth trying this method out before spending thousands on actual hardwood floors.

You can also use floor tile adhesive in small areas where there isn’t enough room for traditional tiling methods. For example, if you want to add some tile accents around the edges of your bathroom or kitchen floor but don’t want to put in permanent floors, then using a glue-on tile is perfect. The glue will hold up just as well as regular tiles would.

Replace your home’s door handles, knobs, and hardware.

If you haven’t updated your home’s door hardware, it’s time to do so. Don’t worry–you don’t have to replace all of your doors at once! Take a look at each one, then decide which ones might be worth updating.

If you want something modern and minimalist, try replacing just the knobs or handles on some of the more ornate ones with sleek new designs. Or if you want something bolder and more eye-catching, consider replacing all four pieces: knob/lever set (also known as “cope” joint), deadbolt lock set (also known as “mortise” joint), latch plate and strike plate or jamb block (which will attach directly into the frame).

New Wall Paint

If you’re looking for a way to make a big impact on the look of your home, painting is the perfect solution. It’s quick, simple, and affordable. Painting is also one of the best ways to update a room without having to do major renovations or spend a lot of money. There are so many different types of paint that you can use in your home. You can choose from water-based paints, latex paints, oil-based paints, and more. If you plan on using oil-based paints on your walls, be sure to use them with extreme care and clean up any spills immediately.

Painting services like this, Rudi’s painting are a great way to freshen up your home and make it look new again. If you’re looking for a quick and easy renovation project, painting your walls is the way to go.

If you want to get rid of that old beige paint or give your home a fresh coat of color, painting services are an affordable option. When you hire an experienced painting service provider like [company name], you’ll enjoy the peace of mind that comes from knowing that they have the experience and expertise needed to get the job done right. They’ll also be able to help you choose the right colors for your space and offer suggestions on how best to use them to achieve the look you want at an affordable price.

Replace the hardware in your kitchen.

There are lots of simple renovation projects that can make a huge difference in your home. One of the easiest and most beneficial is replacing the hardware on your kitchen cabinets. Most people think they need to get their cabinets repainted or refinished before they can replace the hardware, but it’s easier than that. It’s just a matter of taking off the old hardware, putting new hardware on, and then putting everything back together again.

The best part is that you can do this with some simple tools—just make sure you have a screwdriver or drill at hand so you don’t strip any screws. And if you’re feeling adventurous, you could even try painting or staining your cabinets so they match the new hardware color scheme! You can consider hiring professional house renovation service providers who specialize in house renovations because they’ll know exactly what needs to be done.

Update your fireplace surround.

If you have an outdated fireplace surround, it’s time to update it. There are many different styles of surrounds available these days and they can be made from a wide variety of materials–wood, stone or brick are just some examples. To determine which material will work best for your home and personal style preferences, consider how much money you want to invest in the project as well as how much maintenance is required for each option (for example: if exposed wood will need regular staining).

Hang your grandmothers’ antique quilt somewhere in your house so it can be seen and loved!

The most important thing to consider when hanging a quilt is where you want it to be displayed. If you’re going for more of a statement piece, try hanging your grandmother’s antique quilt on the wall as an accent piece. You can also use it as a bedspread or hang it over a couch for added comfort and warmth in colder months.

If you’d rather keep things simple and subtle, then consider using one of the following options. Hang your grandmothers’ antique quilt somewhere in your house so it can be seen and loved every day (for example: on top of curtains). This way, everyone who enters will get reminded of their family history every time they see this beautiful piece.

Conclusion

You don’t have to do a whole renovation to make a big difference in your home. You can make an impact with something as simple as painting or adding new light fixtures. The impact of a small change can be just as big as a big one–and it doesn’t require spending thousands of dollars on renovations.

Now that you have some inspiration for your own house, it’s time to get started! Remember the best way to make your home feel like a place where you can relax and enjoy life is by making small changes and improvements over time. This doesn’t mean that everything needs to be done at once, but rather that you should start with one project at a time until your entire home feels fresh again.


Easy Tips To Avoid Home Buying Blunders

Buying a home sounds easy when you are excited and enthusiastic. You probably love the idea of checking listings, visiting properties, and choosing a dream home. But there is much more to deal with when you scratch the surface. The to-do lists look painlessly long, from checking your finances to going through mortgage formalities, handling inspections, and sifting through complex paperwork. Even worse, you may end up making several mistakes that could ruin your experience and land you an unfavorable deal. Thankfully, avoiding such blunders is easy, provided you are vigilant and conscious. Here are some tips to make home-buying as error-free as possible.

Stick to your budget

Stepping your budget is one of the common mistakes people make just to get their dream property. The idea of spending beyond your means may not sound daunting in the beginning. But it often lands buyers in trouble with massive mortgage bills that disrupt their monthly budget and affect long-term savings. You may have to resell the property down the line to address the mental and financial stress. The best way to deal with the concern is by establishing a budget and sticking with it.

Remember to factor in miscellaneous expenses

Property investment is more than the upfront cost of the house. You may incur several additional expenses, such as registration charges, stamp duty, inspection costs, and agent fees. Buying a used home may be even more expensive as you find repair work after moving to it. You cannot overlook the relocation costs. Remember to factor in these miscellaneous expenses to create a realistic budget for home buying.

Avoid doing everything alone

Home buying is a complex process with legal and financial implications. You cannot expect to handle everything alone, even if you are a seasoned buyer. It is better to hire specialists for different aspects. For example, a real estate agent can help you choose the best properties according to your needs and budget. Look for a conveyancing expert because they can cover several aspects, such as property checks and documentation for ownership transfer. Finding them is easy as you can get an Instant online conveyancing quote to get them on board. You may also need advice from a mortgage specialist to sort the finances. Do not skimp on expertise because professional help can save you from stress.

Choose your home diligently

Perhaps the most valuable piece of advice is to choose your home diligently instead of jumping on the first one you like. Think beyond the space considerations and budget as factors like evolving needs with a growing family, old age, and disabilities are equally crucial. Think long-term, whether you plan to live in the house for a lifetime or expect to sell and downsize a few years later. Ditch the dream home mindset, and do your due diligence to assess a property carefully before sealing the deal.

Although it is easy to make a home-buying blunder, a little caution is enough to avoid them. Collaborating with experts does the rest to ease your journey as a buyer.

How long does it take for spray paint to dry on pvc pipe

PVC is the material most commonly used to create pipes, but what is it? PVC stands for polyvinyl chloride and it is the 3rd most used polymer in the country due to its versatility and ease of accessibility. It is a material that is very closely related to uPVC, another common polymer, which is used for different purposes. Typically, where PVC is used to make PVC pipes, uPVC is used for doors, conservatories, and windows.

The two materials also differ in how easy it is to paint them. With uPVC, professional painters can use uPVC spray paint to cover the material in primer and then in paint, and the process is relatively simple. With PVC, this is very much not the case! Regular buckets of paint and regular spray paint will not work on PVC surfaces. You have to use the right paint and make the surface of the PVC pipe properly primed first.

What paint will stick to the PVC pipe?

In order to get paint to stick to PVC pipe, you will need to use specifically formulated paint that is designed to work on plastics – like Krylon Supermaxx Spray Paint. This will usually come as spray paint and is the only paint that will adhere to the pipe. Luckily, spray paint gets a lot of coverage, so once you’ve found a good brand of exterior PVC paint, you won’t have to waste hours doing the work.

How do you make paint stick to PVC?

From what we have read, getting paint to stick to PVC pipe is no easy task, so we spoke to Revamp Spray and found that there are a few things you can do when you paint PVC to get it to work. It’s all about what you do before you start to paint PVC pipe that matters, otherwise, you’re just going to end up painting PVC again and again.

Before you begin to prepare your PVC pipe, make sure that you have the necessary safety gear on. Much of this process involves harmful particles and liquids that you want to avoid getting into your eyes, mouth and nose. You will need goggles, a ventilated mask and gloves to help protect yourself as you prime PVC pipe. Once you’ve got all of that, you should:

1. Sand the PVC pipe

Paint will stick better to a sanded than it will any usual PVC pipe, even if you’re using paint for plastic. Sanding the pipe first will also allow you to create a proper polished smooth PVC pipe by removing any blemishes and imperfections that would be exacerbated by you painting PVC.

You should use a high-grit sandpaper for this, around 220 or above. Place it in the palm of your hand and then rub it up and down the PVC pipe surface in order to remove the top layer of the PVC pipe.

2. Treat the PVC pipe surface with acetone

Once sanded, there is only one step between you and getting your spray paint out to paint PVC. This step can make or break your DIY project. By treating PVC pipe with acetone, you make it much easier for the paint to stick to PVC, its the same product often used to remove graffiti. PVC vinyl expands, and acetone makes the material swell, opening the pores within the PVC pipe and allowing it to better hold the paint for plastic. This means that as you paint PVC, your paint will stick and dry, allowing you to form a really smooth finish.

How long will the spray paint for plastic take to dry when painting PVC pipes?

When you use spray paint to paint PVC pipe, you need to make sure that you leave it to dry fully before putting it outside and exposing it to the elements. You will also need to use multiple coats of spray paint when painting PVC in order to get the depth of colour that you are after.

Between coats of spray paint, you will need to wait between 30 minutes and 1 hour. Essentially, when your spray paint on PVC is no longer tacky to the touch, you can continue on to your next layer of spray paint. Keep applying layers of spray paint until the PVC pipe is the colour you desire. Applying the paint in layers should help you to get the exact colour you want on your PVC pipe, as you can build up a depth of colour with your spray paint as you paint PVC.

Once you have painted PVC pipe, and all of your layers of plastic spray paint are dry, you should continue to leave your PVC pipes to dry for a while longer. Most spray paint would be relatively safe once the coats are dry, but to avoid damaging your new paint colour, it is often recommended that you wait for 7 days before exposing your painted PVC pipe to the world.

How to paint PVC pipe

  1. Prepare your PVC pipe by cutting the PVC into whatever shape you are after, and cleaning the surface of the PVC pipe with mild detergent and a clean rag or cloth. This will allow you to ensure you aren’t cementing anything detrimental to the material under your coats of paint.
  2. You will need to prime PVC by using sandpaper and acetone to treat your PVC pipe.
  3. Apply spray paint in long, smooth strokes. Using small strokes or irregular strokes when painting PVC pipe will damage the finish of the paint job.
  4. Once one coat of your spray paint is on the plastic surface, let the paint dry before continuing.
  5. Once dry, go back in with your plastic-specific paints for a second coat and continue on past your second coat, letting the paint dry after each until the colour matches your vision.

How to dye leather at home

While you can take leather items to a professional to be dyed, it is easy to see why many people decide to dye leather at home.

Why you should dye leather at home

Reasons to dye leather at home include:

  • Its convenient and quick
  • You don’t need to move large items
  • You save money
  • Personal satisfaction from the job
  • You can trial and error with more dye and thin layers

These are all fantastic reasons to apply the dye at home, and it is no surprise many people choose this option, the same goes for car interiors.

Products you need to dye leather

If you are preparing a shopping list or you are grabbing household items from around the home, make sure you have access to these items:

  • A leather deglazer and leather conditioner you can use a wax based conditioner)
  • A spray bottle filled with water
  • A paint brush
  • Your choice of leather dye
  • A clean cloth or sponge
  • A rag or scrap piece of fabric you can wipe excess dye with
  • Protective clothing such as gloves or an apron (you should wear gloves as a minimum)
  • A bucket or bin bag so you can dispose of items cleanly and quickly

With these items to hand, you should work more effectively.

Where should I dye leather at home?

If you are going to dye leather at home, you want to find the best possible room, and there are essential things to consider. You want space to work, proper ventilation, and ideally, you want a space that can withstand some mess. You should take steps to cover the working area, but accidents can happen in a trial and error environment. You shouldn’t dye leather in a room; you don’t want any mess.

A garage or a well-covered dining room are good examples of spaces where you can dye leather at home.

What type of leather dyes can I choose when dyeing leather at home?

There is a broad range of leather dye products, not including dyes intended for specific colours or finishes. Options to consider include:

Shoe polish is a temporary kind of leather dye, and not one you should consider when looking to change the colour of a leather product permanently. Of course, shoe polish is good to test a colour or need a temporary solution.

Alcohol-based dye makes its way into the leather’s surface, resulting in bright colours that stand out. This is a great leather dye if you want a striking finish. However, alcohol-based dyes often remove moisture from leather items, so be sure to use them in conjunction with a conditioner or finisher to keep the leather supple.

Oil-based dyes differ from alcohol-based dyes because they don’t remove moisture or liquid from leather. Oil based works best with a full or top grain leather where there isn’t a surface finish. You can still enjoy a vibrant colour with this dye.

Water-based dyes don’t draw moisture from your leather, but the finished colour isn’t as bright or as vibrant. These are often used on sofas & couches.

Applying leather dye at home

Once you know where you will dye and what dye you’ll use, it is time to start the leather dyeing process.

Prepare yourself and your workstation

You want a large table or flat surfaces to work on, and only work in a well ventilated area. It would help if you opened windows or used a fan to circulate air, ensuring the dye fumes don’t overpower you. Make sure you wear gloves and try to cover as many surfaces as you can with paper or towels.

Apply a deglazer to your leather surface

The first step is to ensure your leather surface is clear of lingering dust, dirt and debris. Wipe it off with a clean cloth or sponge; once it is dry, you can begin the preparation stage.

You should apply the deglazer, sometimes called a leather preparer, which takes the seal off the leather. This makes it easier for the leather to absorb your dye, ensuring a stronger profound impact and richer colour.

After this, dampen the leather, even vegetable tanned leather, ensuring there is an even coverage across the material.

Apply the first layer of leather dye

With a paint brush and your chosen dye, apply a thin layer of dye to the leather. It makes sense to start around the edges if you are covering a large area. There is no need to be rough or robust when you apply the dye; paint gently.

Dyeing the leather in a circular motion

If you are concerned about the appearance of brush strokes on the dye, you can use a sponge, a wool dauber, cotton swabs, soft cotton rags or cotton balls to smooth the dye over the surface for an even coat. You can even cover the cotton balls in dye and then move them around the leather in a circular motion to apply your own leather dye.

Let the dye dry

Depending on the area of leather covered, you might need to let it dry overnight. A small area might need a few hours to dry. Please allow adequate time, even though you will likely be keen to continue with the dyeing process.

Apply more coats to dyed leather

Once the leather is dry, return to it, and apply more coats, depending on how deep the colour you need to be. Remember that you cannot dye leather a lighter colour, only the original or something darker.

So, slowly apply a thin layer in coats to achieve the desired saturation. Don’t be surprised if you need several thin coats to achieve the finished leather colour you want, so have enough dye for the job. It’s often a trial and error task.

Buff the leather to create a shiny finish

Once the layers have dried, it is time to buff the material with a cloth to ensure it is shiny and looking its best, even with vegetable tanned leather. No matter the product or item you have dyed, you want dyed leather to look great, and this final touch is an excellent way to create a finished look you are proud of.

How Often Should You Repaint Your Home?

Painting a house is not an easy thing to do. Most people hire experts to do the job from start to finish. However, the cost of hiring a professional for a complete repaint is not cheap.

So when repainting your home, you want to make sure your house is in need of repainting before hiring a professional service or spending lots of your precious hours on it.

But how often should you repaint your house? What are the signs that your house needs repainting? And what affects the quality of the paint?

In this article, we’ll discuss all of these things and more.

How Often to Repaint Your Home?

There are several factors that could affect how often you should repaint your home. Factors include:

● Environment

● Location of painted walls

● Type of surface

● Quality of the application of paint

● Quality of paint used

If the paint was painted the right way on a nice, smooth and durable surface to begin with, it does not need constant repainting to maintain its colour.

Hiring a professional painter makes sure of this. Professionals can do a better job at making sure the paint lasts longer than your average Joe. So if you want long-lasting paint, we highly recommend you contact a professional.

This is, of course, provided that you frequently clean your walls and the surface isn’t exposed to dirt and other elements. In such cases, paints usually last a long time.

On average, most houses need to be repainted every 5-10 years or only as needed.

However, there are some things that exacerbate the need for repainting much faster. Some types of wood, for example, have a tendency to peel, while others may rot sooner.

In such cases, replacing the wooden walls would demand a repaint.

Another example is concrete walls. These surfaces have the tendency to crack which would need to be refilled with a compound, therefore, needing paint touch-ups to maintain the aesthetics.

For those of you who aren’t too worried about the small aesthetic issues, then you can get away with not repainting until the whole house is in need of one.

This brings us to our next discussion.

The Right Time to Repaint Your House

When You’re About to Sell or Rent Your House

Fresh paints do a wonderful job of brightening up the home and giving it a fresh start. It has the power to give a house a completely different vibe and is one of the best ways to upgrade the home, cheaply.

That said if you’re looking to sell your house, giving it a breath of new life by repainting may definitely increase its value.

In a slightly different scenario, if you decide to rent your house, giving it fresh paint will make it look new, attract potential tenants fast, and may even rent for more.

Hence, repainting a home when it’s time to sell or rent is paramount to its success.

And while you’re at it, may I recommend that you paint some areas of your exterior like the fence and deck too.

It’s Losing Its Beauty

Sometimes your house just doesn’t have the same pop that it used to when you and your family first live in it. The living room starts to feel unwelcoming, the bathroom walls look disgusting, and the kitchen walls have oil stains.

In such cases, doing a partial repaint of those areas might be a good idea to bring back the beauty of your home.

You Don’t Like the Colour

This might seem like a want than a need, but repainting your house when you don’t like the colour is a good investment.

Here’s why. Most people, especially since lots of people started working from home, are in their house most hours of the day. Isn’t it a good investment to actually love the place you’re in rather than hate it?

In another scenario, If your kids have a favourite colour (in our experience, girls will pick pink and boys blue), wouldn’t it make them happy to have it? They’re not going to be kids forever.

It’s Wearing Down

Not all paints are made the same. In the same way that no surfaces, weather conditions, and quality of application are.

There will be instances that your paint will start to fade and look dirty sooner than the estimated 5-10 years.

If you see your house has lots of cracks, or there’s peeling on the walls, or termites are taking over, then a little touch-up or renovation might be needed. These are all signs that repainting is required.

Making Sure The Paint Stays Long

Now that you’ve learned how often and when you should repaint, let’s find out how to make sure the paint stays for a long time.

● Fix the surface before painting – Never paint over old paint that is peeling, wooden walls that are rotten, and concrete that are cracked.

● Smoothen the surface before repainting – Before painting a surface, sandblast the surface to smoothen it so the paint can stick to it better.

● Clean the surface – painting over dust will surely result in the premature wearing of paint. Make sure to clean the area before you apply any paint.

● Choose the right paint – Your two main choices would either be acrylic or latex paint. Both types of paints are safe, durable and good for most surfaces. Just make sure to choose outdoor types for your exterior.

Final Thoughts

The need for repainting is different from one home to another. Some families may require that their house is always in the best shape while others may allow for the paint to wear off first before they think about repainting.

There are also some instances where the time is just right to repaint a home. Whenever you decide to repaint, it’s important to ensure the quality of your application by following the tips I shared above.

Stop Putting Improving Your Home Off And Make Some Changes Now

If you have spare money in your budget, it can quickly drain away without you ever fully knowing where it’s gone. You might spend it on your next holiday or you could spend it on little luxuries throughout the week that will benefit your entire family. This could include trips out to the restaurant or to the cinema. However, you should be spending some of this extra money on improving your home. 

When you purchase a home, you should always keep a future sale firmly in mind. After all, you’ll want to make sure that your home does sell for the right price on the market and provides you with a high level of profit. The only way to guarantee this is by making the changes that your home needs right now. In doing so, you can boost the value of the property and ensure that it’s a wonderful place to live. 

When you do this, it’s important to consider your budget. You don’t want to overspend. The good news is that there are lots of ways that you can cut costs and make tremendous improvements to your property. Here are some of the best options that you should consider for your property. 

Update The Kitchen

First, you might want to think about updating the kitchen. By updating the kitchen, you could add as much as 25% to the total value of the property. The reason for this is that the kitchen is one of the most important areas of the home for a new buyer. They want to make sure that it looks great while also providing the right practical benefits. For instance, you might want to think about adding a breakfast island to your kitchen. This can be a wonderful place to enjoy meals with your kids and it can also have a built-in hob too. Depending on the design the island could also double as additional storage space in your kitchen. 

If you want to make a smaller change to this area of your home, then you can think about changing the light fixtures. The light fixtures will completely alter the aesthetic of your kitchen and ensure that it looks incredible. You may want to look at some design blogs to get an idea of the different light fixtures that are in style right now. 

Redo The Bathroom

If your bathroom is somewhere in the home that you have been wanting to do up for a while, now is the time to make those changes. There is no reason for you to wait any longer, so you should be looking at what you want to change, and then getting it sorted. If there is more than one bathroom in your house that you want to change, we recommend starting with the main one and then working your way around the home. The main bathroom is going to be the most important, and as it’s likely the one that’s most used, it’s also probably going to be the one that needs the most improvement. 

Make The Living Space More Comfortable

In order to improve your home, you have got to think of the comfort of the living space. It might not sound like a tough goal to achieve, but it certainly can be. For example, you may want to make some simple changes such as adding some candles and blankets on the sofas to give a more cozy vibe. But, you’re also going to have to think of more basic comfort such as the temperature of the home. An example of this would be having thermal curtains so that the heat is trapped inside the home for winter, but light and flowy curtains in the summer so that the air is able to escape. 

You can also think of installing a wall-mounted air conditioner without outdoor unit to keep your home at the perfect temperature in the summer months. Take a look at some of the companies that offer this kind of service, and make a decision on whether this is going to be right for you. 

Home Exterior Is Important

It’s worth considering your home exterior when changing elements of your home. After all, people are always keen to embrace the alfresco lifestyle these days and want to spend plenty of time in the fresh air. They also want a home that they can be proud of. That’s why it’s worth changing elements to improve curb appeal. There are lots of ways that you can do this. For instance, you might want to think about investing in a beautiful new front door for your home.

You could also consider adding tropical flowers to the front of your home. There are lots of tropical flowers and plants that will grow in virtually any environment. They just need the right care and attention. This will bring a lot of color and variety to the front of your home. 

house

Convert The Attic

Do you need more space in your home? If so, then you could think about converting the attic. A change like this will essentially provide you with a brand new floor for your property. This can make a wonderful guest room or office space. You can even use this area of the master bedroom. If you are exploring this option, you should first think about how much you are going to need to spend. The price of a conversion will depend on the work required. If you already have a high home ceiling, then you can keep the costs quite low. Alternatively, you might need to think about restructuring the roof. This is always going to be quite a lot more expensive. 

On average, you should expect to pay at least ten thousand for a quality home attic conversion. Remember, if work like this does not live up to the right standard, then it is always going to have a negative impact on the value. 

Do Something A Little Different

It might be time to do something a little different with your home. Instead of improving your home so that it’s exactly the way it was before, or even just bringing it in line with modern design trends, you can go completely off track and go for something entirely new. A lot of people are too nervous to do this, and we can understand why, but it gives your home something unique that other homes don’t have.

An example of this would be if you decided that you wanted to add a water feature somewhere in your garden. It’s not a common thing to have in your home, but it looks fantastic and really makes the whole place stand out.

Make It More You

Another thing that you can do to improve your home is to make it more you. While some people might not consider this a home improvement, we do. Making your home more in tune with who you are is going to be a massively important process to making the home feel more like yours. To do this, you need to look at the design as a whole. What kind of things do you like? What kind of things make you happy to see when you walk into the home? Where are your personal effects such as the pictures on the walls and the family ornaments that have been made?

Everyone should be able to tell who lives in the home the second they walk in the door if they know you well. Once you have achieved this, then you will know that your home is a true reflection of who you are.

Fix Those Little Repairs

The final thing that we want to mention is that you should be fixing those little repairs. If you have noticed that your home needs little repairs that can be easily sorted, then you need to be getting on that as soon as possible. There is no reason for super simple repairs such as holes in the walls as they can be sorted with some DIY filler from your local store. There are going to be other times where the little repair is something like a problem with the roof that can be fixed with a few slats.

The important point is that no matter what the repair is, if it’s small enough for you to be doing yourself, then you should have it sorted as soon as you can. There is no reason to put this off other than the fact that you don’t feel like doing it, and unfortunately, this is not a good enough reason.

We hope that you have found this article helpful, and now see some of the things that you should do to make your home better right now. It’s time to stop putting off these home improvements as they have the potential to make your house much more of a home than it has ever been before. We wish you the very best of luck, and hope that you manage to create a home that you love sooner rather than later. 


How to Prepare for a Big DIY Project – 5 Things to Keep in Mind

Sometimes, it is better to manage some DIY projects in your home yourself. Handling projects yourself saves costs. Aside from this benefit, DIY helps you focus more on the task to achieve the result in your mind.

Your project may go haywire when you don’t prepare well or plan enough to handle the project better. On the other hand, you can maximize resources with the right planning. You also see the whole picture of what you have to do in your home and use the best approaches.

Proper planning helps you identify and mitigate risks that may come with the project. You don’t want to waste resources, time, or energy.

So what do you need to know to make your big home DIY project successful? In this article, you will discover new tactics to help you plan better for the upcoming project.

5 Things to Keep in Mind as You Prepare for a Big DIY Project

The top five tips to keep in mind as you plan for big DIY projects include:

1. Gather Information You Need for the Project

Most people fail on their DIY projects because they didn’t get sufficient information to make the project a success. Proper planning means you have all you need to know about the project at the tip of your fingers.

Read more about the project. Enquire from friends and do-it-yourself enthusiasts who succeeded in the task to get more information. Join a DIY community, and ask questions. Watch documentaries or videos to help out.

Since you are not an expert at this, you don’t have to fill your mind with too many details. Sometimes, performing tasks with too many details may cause the project to fail. Be able to filter all the information you get. Work with necessary information. If you have to handle a more technical task, ensure you get the help of a skilled person to school you through the entire process and tools.

Aside from gathering information on the DIY process, it would help if you learned how to handle the tools. You wouldn’t want to lose an arm because you are handling a big project yourself.

2. Budget and Start Buying

A good analysis should give you a proper estimate of the project’s cost. Then, at least you can plan without having to break your back so you can complete the project. To even make things better, start saving up as soon as you conceive the project in your mind. This way, you have enough motivation to save, so the DIY project becomes a massive success with little strain on your finances. To lessen the financial strain, get the homeowners’ liability insurance coverage. The insurance plan ensures you don’t spend so much on a big project.

Once you have tangible money, start ordering the materials you need for the project. Buying the needed resources will save extra costs if the price rises. Finally, store the materials you buy in a safe and good condition. If you don’t have enough space for big items, draft a good storage plan.

3. Improve Your Skills

Since the project is significant, you should ensure that your skills are enough to make it successful. If your skills are insufficient, get help. It is expensive to waste resources and end up with something shabby.

How do you know you have the right skills for the job? By asking the right questions. Some questions to ask yourself before you proceed include:

● Do you know enough to make the project a success?

● Do you need help with the project? If yes, at what stage do you need help? How much help do you need?

● Can you handle the project?

● How much time can you sacrifice to complete the project?

● Can you handle the project safely? Will handling the project ensure your health and that of others are safe? Will unprofessional mistakes be detrimental to life in the future?

If you answer these questions satisfactorily, you can proceed with the project. If you can’t provide positive answers to these questions, rethink your DIY decisions. Postpone the project if need be. Gather more information and learn the skills you need. If it is way beyond what you expect, get extra help. Never overestimate your skills.

4. Divide the Project into Milestones Dividing the project into milestones helps you follow the process. Splitting the project gives you a clear picture of what you have to do and when. In addition, it ensures you have the right resources to use at each successive stage of the project.

Aside from prioritizing your tasks, tools, and resources, splitting them into portions helps you focus on the task. This way, you can enforce a timeline to complete the project.

As you divide the project into milestones, keep abreast of any information. Understand if the project has a fixed time for completion. If it does, do you have enough time to handle it yourself?

You need to keep these factors in mind, reducing laxity when you need to put in more effort.

5. Categorize the Project Based on the Complexity of the Stages

Analyze all activities you need to engage in the project. Take note of repairs, areas to change, and new ideas you can add to beautify the process. After you take note of the changes, group the activities into sections based on the complexity of the task, that is, how much work or resources you have to put in.

Group the tasks into simple, average, or complex. Proper grouping will help with delegation to other hands if need be. In addition, it will help you know what part of the project will consume more or less time.

If you are not yet a pro with tricky tasks, never try to handle them yourself. Instead, leave those parts out while doing others yourself, so an expert handles them.

Bonus: Have a DIY List

Having a list of all you need on the project is essential to complete the project. Creating a list helps you not to leave anything out. Organize your processes, tools, and extra resources into lists. Document everything that will come in handy.

Final Thoughts

Preparing for a big DIY project shouldn’t worry you so much. Though you need to know more to make it a big success, consider it another DIY task you handle often. Never fret over it. Fretting will make you underrate your skill and perform below expectations.

Don’t keep these tips in mind alone. Instead, work with them on your next DIY project. With these tips, you will have a smooth sailing project, regardless of its complexity.

6 Household Problems to Solve Before Going On Vacation

If there’s one thing every household looks forward to every year, it’s the chance to get away for a few nights, a week, or even longer for their vacation. Whether you travel across the oceans or get out of the city and shack up in your cabin by the lake, a vacation gives everyone the chance to relax. 

But, you don’t want to come back to a house that looks like a bull charged through it, nor do you want to risk break-ins or other types of damage. Before you go on vacation, there are several essential household problems you need to solve, and here they are. 

Home Security 

Going on vacation is the prime time for burglars to try to gain access to your home, especially if you make it obvious you’re not in the house. You can get your neighbors to keep a close eye on your property, but you can’t expect them to do this all the time. 

There are steps you can take to protect your property and increase home security while you’re away. One long-term solution is to replace your windows and upgrade them to something sturdier. If you don’t have time to wait, you can purchase timed lights which will activate periodically to conjure the illusion that someone is home. 

Infestations 

Hopefully, you never need to deal with infestations in your home. The problem is that, in many cases, it can be too late before you realize there is a nest of ants, a hive of bees, or a den of bigger critters who have shacked up in your home. 

But, there are signals to look for that can keep your home hygienic and infestation-free. Marks on the floor, droppings and noises in the walls could all point to pest infestations. You don’t want to let them run wild while you’re away, so booking a Pest Exterminator to solve the problem is essential. 

Dripping Taps and Leaky Pipes 

Similarly, dripping taps and leaky pipes can cause significant household problems, and if you allow them to drip for too long, you could cause rot, mold, humidity, and more. 

It’s wise to search around your house to identify any damp areas and get these fixed before jetting off. You can also look under the sink for puddles. If you’re unable to fix these immediately, you can place a large bucket beneath to catch the water and locate your internal stop tap to switch the water off at the source. 

Switch Off Appliances 

No matter where you are, you’ve likely experienced soaring energy bills, and you shouldn’t have to spend money on energy you’re not using. The problem is vampire appliances and standby charges, which consume small but noticeable amounts of energy just by items being plugged in. 

This habit of wasting energy can drain your bank account and also affect overall energy consumption, which could damage the environment. Like switching off your water tap, go around the house, and unplug everything you can, such as the TV or speakers. However, you can keep the refrigerator and freezer plugged in to prevent food wastage. 

Keeping the Plants Alive 

If you love having plants in the house, you don’t want to come back to see them brown and wilted. Arranging to have your plants cared for before you leave can save you a lot of stress, so speak to friends or family and have them come over. 

If you can’t arrange this, you can water them before you leave, especially if you have plants that don’t need too much water. If the opposite is true, a drip bottle inserted into the soil can provide a steady stream of moisture without overwatering your favorite plants. 

Cleaning 

No one wants to come back to a messy home. So, even if you feel too busy packing and arranging other vacation details, cleaning before you leave is still beneficial. 

You don’t need to deep clean the house, but cleaning the dishes and bathroom, changing the sheets, and sweeping and vacuuming the floors means you come back to a bright and welcoming household. As you may be a little exhausted after a full day (or more) of travel, you can just relax and reminisce on your vacation with your family. 

Stress-Free Vacation 

The last thing you want is to have your vacation ruined because you’re worried you didn’t switch the water off, close the windows, or left a pile of dirty dishes in the sink. If you solve all of these issues before you lock your door, you can enjoy a stress-free vacation and return to a clean and secure house.