Sweet Thursday: Beautiful Valentine Cookies

Here’s a last minute Valentine cookie recipe from Martha Stewart. I’ve seen that a lot of bloggers out there don’t really celebrate Valentine’s Day or don’t spend a lot of money on gifts. Well, in lew of gifts you can also make your family or significant other an extra special treat. Arrange these in a gift basket or platter, add sticks to make a cookie bouquet like the ones I posted on yesterday, or simply have your family eat them straight off the baking sheet. Either way this recipe is a good choice for Valentine’s Day. This recipe can be used to make plain shortbread cookies or jam cookies, and after Valentines is over, just get out some other cookie cutters to make these cookies for any and all occasions.

Ingredients:
1 cup (2 sticks) unsalted butter
2 cups sugar
2 large eggs
4 2/3 cups all-purpose flour, plus more for dusting
1 teaspoon baking soda
1/4 teaspoon salt
1/4 cup buttermilk
1/2 cup pale-pink or white sanding sugar (optional)
Petal dust in pink, orange, and violet tones (optional)
2/3 cup apricot or strawberry jam, slightly warmed (optional)

Directions
In bowl of electric mixer fitted with the paddle attachment, cream butter and sugar until fluffy, about 4 minutes. Add eggs, one at a time, beating well after each. Sift flour, baking soda, and salt into large bowl. On low speed, gradually add flour mixture to mixer bowl, alternating with buttermilk, until combined. Wrap dough in plastic; chill until firm, 1 hour or overnight.
To color white sanding sugar, if using: Place a few tablespoons in a small bowl. Mix in petal dust with a toothpick, a bit at a time, until desired shade is reached. Colored sanding sugar will last indefinitely.
Heat oven with two racks centered to 350 degrees. Line 2 baking sheets with parchment paper. On lightly floured surface, roll chilled dough 1/8 inch thick. Cut out hearts using any 1- to 3 1/2-inch heart cookie cutters. If desired, cut centers out of some hearts. Transfer with spatula to baking sheets. Chill for 30 minutes. Sprinkle with sanding sugar, if using. Bake until just golden but not too brown, about 10 minutes. Transfer cookies to rack. Continue with dough; reroll scraps.
To make sandwich hearts: Brush bottom heart lightly with jam; cover with a second heart with center cut out; jam will adhere hearts. Fill cut-out area with more jam. Cookies will keep, in an airtight container, at room temperature for 1 week.

Beautiful Cookie Bouquets

There are so many great gift ideas out there for Valentine’s Day. While some are partial to flowers, and others love candy and sweets, still others love a little bit of both, but how about this: a cookie bouquet! I found several tasty and beautiful examples. You can find these and other gifts at the links that I’ve provided below. And even if you don’t want to shell out the extra money to buy from these sites, they could still give you a good idea to create your own cookie bouquet or gift basket. All you need is a decorative container and a little tissue paper and ribbon to create a beautiful gift.

Cookiebouquets.com
gourmet-cookie-bouquets.com
cookiesbydesign.com/


Recipe of the Week: Sweet as Kisses Pie

Here we have another great Nabisco recipe. I searched and searched for a good recipe to feature this week. I found a couple several days ago, but I must have forgotten to bookmark them. Finally after searching several sites and finding nothing that I wanted to post, I ran across this delightful pie recipe. This pie is similar to other I’ve made, in that it’s base is cream cheese and cool whip (always a good combination). It’s tasty, a little on the light side (especially if you use reduced fat/sugar ingredients), and it’s with white, red, and pink color scheme, it is perfect for Valentine’s Day. And to top it off, it’s very easy!

Ingredients:
1 pkg. (8 oz.) Cream Cheese, softened
1/3 cup sugar
1 tub (8 oz.) Cool Whip Whipped Topping, thawed, divided
1 cup cherry pie filling
1 HONEY MAID Graham Pie Crust (6 oz.)
Preparation:
MIX cream cheese and sugar with electric mixer on medium speed until well blended. Gently stir in 2 cups of the whipped topping.
ADD pie filling. Cut through batter with knife several times for marble effect.
POUR into crust; spread with remaining whipped topping. Freeze at least 3 hours or overnight. Let stand 10 minutes before cutting into 8 slices.

My Tips:

-Fruit lovers can top this pie with extra pieces of fruit of fruit topping.
-Try this recipe using other kinds of pie feeling such as strawberry or blueberry.
-For kids, try topping with sprinkles and other decoration.
-For kids who aren’t fans of cherry, try substituting something they do like, such as a favorite candy bar.

Sweet Thursday: Valentine Treats That Say, "I Love You!"

With Valentine’s Day coming up, I wanted to throw in an extra Sweet Thursday Post. I meant to post this hours ago, but I got busy with some paper work & housework, and the time just totally got away from me, but at least I got a lot of important things done. Well, for this post I’ve chosen 2 very sweet Valentine treats: cupcakes and cookies. I truly love both of these desserts. These would be great to take to a school party or give to friends and coworkers or to that special someone in your life. And you could use these ideas for other occasions as well. With desserts like these, who needs those little candy hearts?
Ingredients:
1 package (18-1/4 ounces) white cake mix
1/2 cup butter, softened
1/2 cup shortening
1 teaspoon vanilla extract
1/8 teaspoon butter flavoring, optional
4 cups confectioners’ sugar
2 tablespoons milk
1 to 2 drops red food coloring, optional
1 to 2 drops yellow food coloring, optional
1 to 2 drops blue food coloring, optional
Directions: Prepare cake mix according to package directions. Place paper or foil liners in a heart-shaped or standard muffin tin. Fill cups half full of batter. Bake according to package directions for cupcakes. Cool for 10 minutes; remove from pans to wire racks to cool completely.
For frosting, cream butter and shortening in a small mixing bowl. Add vanilla and butter flavoring if desired. Add sugar, 1 cup at a time, beating well after each addition. Beat in milk until light and fluffy. Divide frosting into fourths; place in flour separate bowls. Leave one bowl untinted. Add food coloring to the other three bowls; stir until well blended. Frost cupcakes. Pipe untinted frosting around edges and decorate tops with Valentine phrases. Yield: 28 cupcakes.

Valentine Cookies

Ingredients
1-1/4 cups all-purpose flour
1/2 teaspoon baking powder
Dash salt
1/2 cup granulated sugar
1/3 cup shortening
1 egg
1/2 teaspoon vanilla
3 drops oil of cinnamon (optional)
1/4 cup hard cinnamon candies, finely crushed

Directions
1. In a small bowl combine flour, baking powder, and salt; set aside. In a medium bowl beat sugar and shortening with an electric mixer on medium speed until fluffy. Add the egg, vanilla, and oil of cinnamon, if desired; beat well. Add flour mixture; beat well. Cover and chill in the refrigerator about 2 hours or until firm.
2. Cut a 10×8-inch heart pattern from paper. Halve dough. Line 2 cookie sheets with foil. Place half of the dough on each cookie sheet; roll into 10×8-inch rectangles. With pattern, cut dough into heart shapes. Reserve scraps. (If dough seems too soft, freeze 30 minutes or until firm.) Use alphabet- and heart-shaped cutters to cut out a message from each cookie. Remove dough from cutters.
3. Spoon candy into cutouts to fill holes to level of the dough. Bake in a 375 degree F oven for 10 to 12 minutes or until candy is melted and cookies are done. Cool on cookie sheets. Peel foil from cookies. Reroll dough scraps; cut with 3-inch cookie cutters. Place on ungreased cookie sheet. Bake in the 375 degree F oven for 10 to 12 minutes or until done. Cool on pan. Makes 2 large and 6 small cookies (18 servings).


Recipe of the Week: Chocolate and Cherries Fudge Torte

I’m a little later than usual on posting my recipe of the week, but I think this week’s recipe should be well worth the wait. I plan on posting some Valentine recipes over the next couple of weeks, and this is the first one. It was a hard choice this week; there is so much stuff out there! This recipe comes from Hersheys. Normally I’d have some kind of comment, but I think this one speaks for itself.

Ingredients:
1/2 cup (1 stick) butter or margarine, melted
1-1/4 cups granulated sugar
1 teaspoon vanilla extract
2 eggs
2/3 cup all-purpose flour
1/2 cup HERSHEY’S Cocoa
1/4 teaspoon baking powder
1/4 teaspoon salt
1 package (8 oz.) cream cheese, softened
1 cup powdered sugar
1/2 cup chilled whipping cream
1 can (21 oz.) cherry pie filling, chilled
1-3/4 cups (10-oz. pkg.) HERSHEY’S MINI KISSES Brand Milk Chocolates
Directions:
1. Heat oven to 350°F. Grease bottom only of 9-inch springform pan, or line 9-inch round cake pan with foil; grease bottom of foil.
2. Stir together melted butter, granulated sugar and vanilla in large bowl. Add eggs; using spoon, beat well. Stir together flour, cocoa, baking powder and salt; gradually add to egg mixture, beating with spoon until well blended. Spread batter into prepared pan.
3. Bake 25 to 30 minutes or until cake is set. (Cake is fudgey and will not test done.) Remove from oven; cool completely in pan on wire rack.
4. Beat cream cheese and powdered sugar in medium bowl until well blended. Beat cream until stiff; gradually fold into cream cheese mixture, blending well. Spread over top of torte; refrigerate several hours or until set. With knife loosen cake from side of pan; remove side of pan. (Or, lift torte out of pan, using foil; remove foil.).
5. Just before serving, put chocolates in 6-inch-wide heart outline in center of cake. Fill heart shape with cherries from pie filling; put chocolates all around outside edge. Serve cold, cut into wedges, with remaining pie filling. Cover; refrigerate leftover dessert. 10 to 12 servings.

Sweet Thursday: Super Bowl Sunday Treats

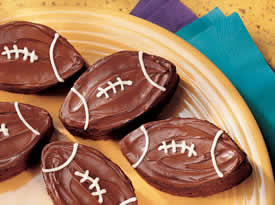
As promised, here are some sweet snacks for Super Bowl Sunday. Personally, I’ve been in a baking mood lately. Last week I made some brownies, and a few days ago I baked a cake, and for Super Bowl Sunday, this weekend I’ll probably make some football cookies. I have some frozen cookie dough that we ordered from a school kid, and several weeks ago I bought a huge set of cookie cutters, and I haven’t yet found the time to try them out, so it seems like a good time to do so. (although I wouldn’t mind having a pie or a cheesecake this weekend either….hmm. Well, I’ll let you know how it goes.)
Anyway as usual, links to the original source are underneath the picture. And I’ve also included the recipe for Chocolately Football Bites from Kraft. This recipe reminds me of Cocoa Pebbles/Rice Krispie treats, except it’s made with corn syrup instead of marshmallows. And this is another good recipe that you could easily change, using a different cereal or simply molding the snacks into a different shape or using different decoration. Enjoy!

flickr – mysimplysweet

6 squares BAKER’S Semi-Sweet Baking Chocolate
1/2 cup light corn syrup
1 Tbsp. butter or margarine
1/2 tsp. vanilla
4 cups POST Cocoa PEBBLES Cereal
White decorating gel
MICROWAVE chocolate, corn syrup and butter in large microwaveable bowl on HIGH 2-1/2 min., stirring after 1-1/2 min. Blend in vanilla.
ADD cereal; mix well. Cool 10 min. Shape into 18 (3-inch-long) football shapes with lightly moistened hands. Place on large sheet of wax paper; cool completely.
USE decorating gel to add “lacings” to “footballs.” Let stand until gel is firm.

Sweet Thursday: Mini Almond Bundt Cakes

Thi is a recipe I found the other day on the Martha Stewart site. Mini bundt cakes are so cute, and the icing and almond slices really add a lot to the look (and taste) of this snack. In fact it doesn’t get any easier than this to decorate a cake. I also think this would make a beautiful dessert as one large bundt cake, and it would definitely be great to serve to guests or take to a party.
Makes 6
10 tablespoons unsalted butter, room temperature, plus more for pans
6 tablespoons sliced almonds
1/3 cup coarsely chopped almonds
5 tablespoons packed light-brown sugar
1 teaspoon ground cinnamon
1/8 teaspoon freshly grated nutmeg
1 1/2 cups all-purpose flour
1 teaspoon baking powder
1/2 teaspoon baking soda
1/4 teaspoon salt
3/4 cup granulated sugar
1 large egg
1 tablespoon pure vanilla extract
3/4 cup sour cream, or plain yogur
2 cups sifted confectioners’ sugar
3 to 4 tablespoons milk
Directions:
Preheat oven to 350 degrees. Generously butter six mini Bundt pans; set aside. Spread sliced almonds out on a baking pan, and toast until golden brown. Transfer nuts to a bowl to cool.

In a medium bowl, combine chopped almonds, light-brown sugar, cinnamon, and nutmeg; set aside. In another medium bowl, sift together flour, baking powder, baking soda, and salt; set aside.

In the bowl of an electric mixer, combine 6 tablespoons butter and granulated sugar. Beat on medium speed until light and fluffy, about 3 minutes. Add egg; beat until combined. Add 1 teaspoon vanilla, and beat until smooth. Add 1/3 of reserved flour mixture and half of sour cream; beat to combine. Repeat. Add final third of flour mixture, and beat to combine.
Fill each Bundt pan with 3 tablespoons batter, and spread evenly with a small offset spatula or spoon. Sprinkle each with 2 tablespoons of reserved almond-spice mixture. Top with additional 3 tablespoons batter; the batter should come to within 1/2 inch of the rims of the pans.
Bake until cakes are golden brown and a cake tester inserted into the center comes out clean, about 20 minutes. Transfer cakes to a wire rack to cool completely. Unmold cakes. Place cakes, flat sides down, on a wire rack placed over a baking pan.
Melt remaining 4 tablespoons butter over medium-high heat until color turns nut brown, about 5 minutes. Pour butter into a medium bowl, leaving behind any dark sediment. Stir in confectioners’ sugar, remaining 2 teaspoons vanilla, and 3 tablespoons milk until smooth; add an additional tablespoon milk, if necessary, so glaze is pourable. Drizzle glaze over cakes, and sprinkle with toasted almonds. Serve.
Tip – For one large bundt, use a 10 inch bundt pan and bake for 45 to 50 minutes

Recipe of the Week: Slow Cooker Hot Fudge Sundae Cake

There’s nothing like a fresh, warm piece of cake or cobbler to satisfy your hunger on a cold winter’s day. I was digging through my cookbooks and internet files for the perfect wintery dessert when I ran across this Hot Fudge Sundae cake from Betty Crocker. The name of the dessert alone made me hungry and the picture was simply mouth watering. And the actual prep time is only 15 minutes! (plus baking time of course) I just had to share this one with you!
1 cup all-purpose flour
1/2 cup granulated sugar
2 tablespoons baking cocoa
2 teaspoons baking powder
1/2 teaspoon salt
1/2 cup milk
2 tablespoons vegetable oil
1 teaspoon vanilla
1/2 cup chopped nuts
3/4 cup packed brown sugar
1/4 cup baking cocoa
1 1/2 cups hot water

1. Spray inside of 2- to 3 1/2-quart slow cooker with cooking spray. Mix flour, granulated sugar, 2 tablespoons cocoa, the baking powder and salt in medium bowl. Stir in milk, oil and vanilla until smooth. Stir in nuts. Spread batter evenly in slow cooker.
2. Mix brown sugar and 1/4 cup cocoa in small bowl. Stir in hot water until smooth. Pour evenly over batter in slow cooker.
3. Cover and cook on high heat setting 2 hours to 2 hours 30 minutes or until toothpick inserted in center comes out clean.

4. Turn off slow cooker. Let cake stand uncovered 30 to 40 minutes to cool slightly before serving. Spoon warm cake into dessert dishes. Spoon sauce over top.
Note: This recipe was tested in slow cookers with heating elements in the side and bottom of the cooker, not in cookers that stand only on a heated base. For slow cookers with just a heated base, follow the manufacturer’s directions for layering ingredients and choosing a temperature.

Recipe of the Week: Rudolph Cupcakes


Here’s another favorite from Taste of Home. These cupcakes will be loved by kids of all ages, and they are very easy to make and decorate! In fact, this would be a great last minute dessert item for you to prepare, and it’s something fun that your kids could help with.

Ingredients:
1 package (18-1/4 ounces) cake mix of your choice
1 can (16 ounces) chocolate frosting
48 animal crackers
24 miniature marshmallows, halved
48 miniature chocolate chips or raisins
24 red jelly beans

Directions: Prepare and bake cake according to package directions for cupcakes, using foil or paper-lined muffin cups. Cool for 10 minutes before removing from pans to wire racks to cool completely. Frost cupcake tops. Insert two animal crackers into each cupcake for antlers. For the eyes, place two marshmallow halves, cut side up, with a chocolate chip in the center of each. Add a jelly bean for nose. Yield: 2 dozen.

My Suggestions – If you’re a fan of the Rudolph movie, you could make cupcakes of Rudolph’s girlfriend Clairice by use white frosting, and add a piece of red twizzlers to make a bow.

Pretzels could also be used for ears, and you could use a number of candies for the nose including M&Ms, Skittles, and Red Hots.

Chocolate Bon Bons

Bon Bon Ingredients:
2 lbs. confectioners’ sugar
2 sticks butter, softened
1 can sweetened condensed milk
1 tsp. vanilla
1 qt. chopped pecans
1 c. coconut (optional)

Coating Ingredients:
9 oz. semi-sweet chocolate chips (approx. 1 1/2 bags)
1 bar paraffin wax

Directions:
Sift sugar into a bowl; cream in butter. Add milk and vanilla; stir until smooth and creamy. Fold in nuts and coconut. Refrigerate until firm. Roll into balls. stick toothpicks in each ball (for dipping) and refrigerate again until firm (about an hour or so). Melt chocolate and wax in double boiler. Dip bon bons in chocolate mixture, and set out on wax paper. Let dry completely.

*Tips*

– Sticking the toothpicks into the balls before they are refrigerated (rather than sticking the toothpicks in just before dipping) will help the balls to stay on the toothpick during the dipping process. If you stick the balls with the toothpick just before dip them, they will be more likely to fall into the chocolate, and you’ll have to fish them out with a spoon, which can be very frustrating.

-Upon removing the toothpicks, you’ll probably be able to see very noticeable holes from the toothpick and any chocolate that was attached to the toothpick. For this, I recommend using any left over chocolate (or make more if needed), and spoon it over all the holes.

-Be sure to use semi-sweet chocolate chips and not milk chocolate, or else the mixture will not turn out right.