Celebrate St. Patrick’s Day with these Fun Finds

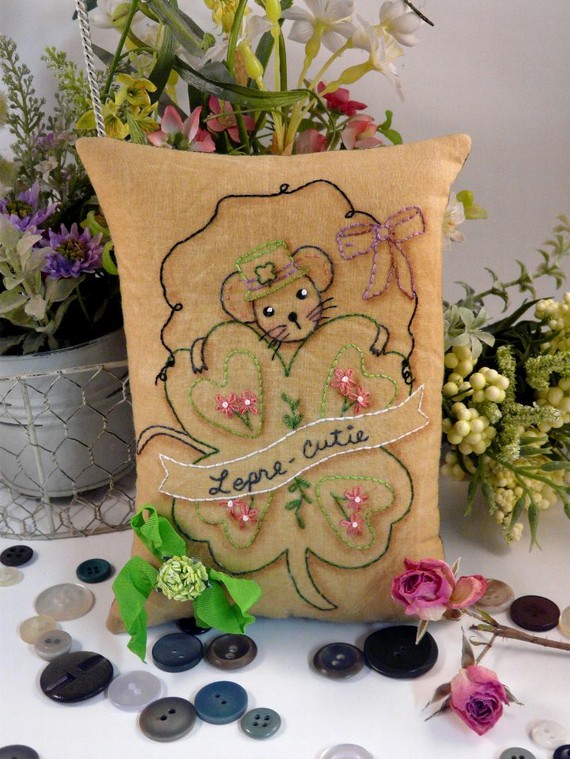
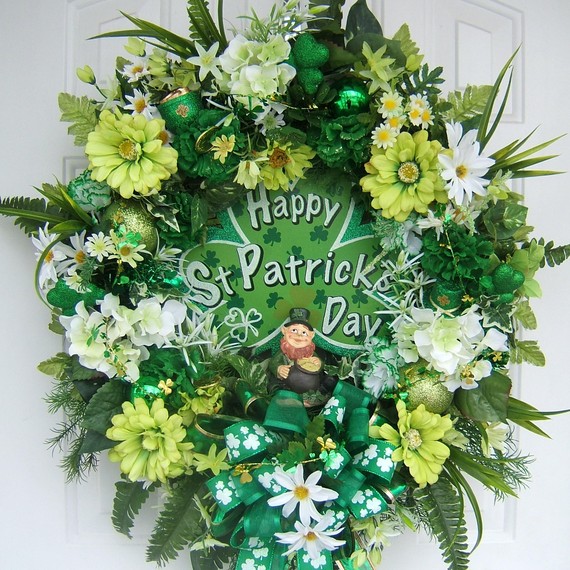
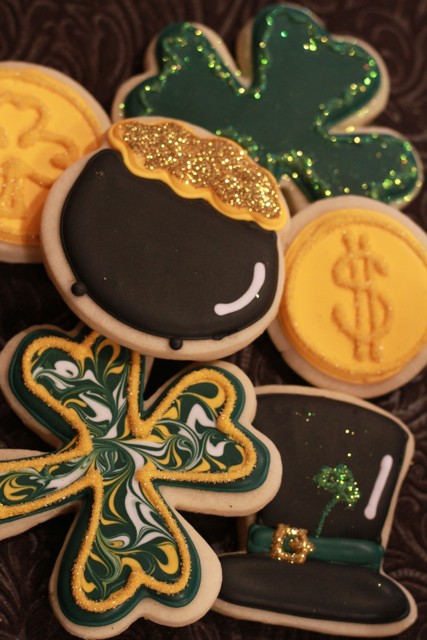
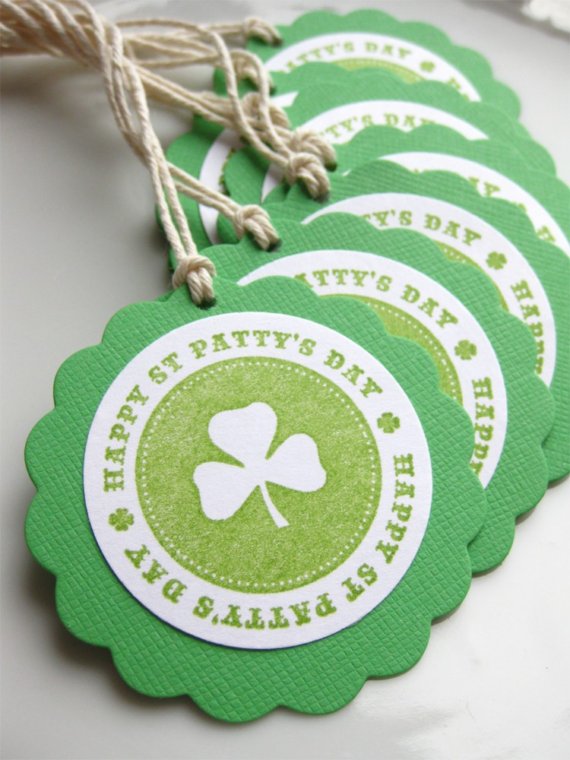
I just love looking around on etsy and have recently started creating my own treasuries.  I created a really fun treasury last week called Celebrate St. Patrick’s Day. It’s filled with adorable items that will help you celebrate the holiday:  cupcake toppers, cookies, banners, and fun decor!
Today I’m sharing just a few of the items from this treasury.

Looking for more? Check out the rest of the items in this treasury.

I’m linking up to these parties.

Photobucket
Disclosure:  None of the shops featured in this post are paid sponsors. I hand selected all the items for this treasury on Etsy based on my own opinions. Photos are owned by the shop owners they are linked to.

Nursery and Kids Decor at Gypsy Lane Designs

I’m really happy to welcome back Gypsy Lane Designs as a sponsor to my blog.  If you’re new to my blog and aren’t familiar with this shop, let me tell you all about it.  It is owned by Rachel who is an artist and art teacher.

Gypsy Lane Designs features fresh, bright & beautiful artwork for Baby & Home.  If you’re looking for adorable, unique, and personalized items for your child’s room, you should definitely check out Gypsy Lane.  They have custom artwork, name paintings, and name blocks, which also make great birthday and shower gifts.
Gypsy Lane also specializes in custom paintings of pets. (We can’t forget to celebrate the furry little ones in our lives!)

I was intrigued by how Rachel came to develop her fabulous line of children’s artwork:

Gypsy Lane Designs began when I thought I would finally try my hand at creating paintings for the masses. My shop first housed mostly travel watercolors and custom pet portraits. As countless numbers of my friends have recently had babies, I began getting some requests for custom nursery work. My shop has organically grown into a haven of hand-painted and original designs for baby.

I have been having a blast creating personalized nursery designs for my Etsy customers. I love making my children’s designs beautiful, completely unique, whimsical and delicate. I find inspiration every day in my art classroom as I watch my student’s active imaginations. I absolutely love doing custom work and strive to make my custom artwork interactions as easy, fun and painless for you as possible.

From cars, planes, and  animals, to flowers, butterflies, and princesses, Gypsy Lane Designs can make the perfect custom wall art for your child’s room that creates an atmosphere of whimsy and wonder every time your child walks in!

Connect with Gypsy Lane Designs
Rachel’s Blog: Gypsy Lane Designs

Please join me in support of this lovely artist and fabulous etsy shop  and check out Gypsy Lane Designs today.

Photobucket

Disclosure: Gypsy Lane Designs is a paid sponsor on my blog.  If you have a business and you’d like for me to advertise for you, please check out my PR page for details.

Red Vignette and Valentine Garland

Today I’m sharing this cute display from my kitchen.  I’m in the process of doing a quasi-makeover in my kitchen.  For a while I’ve felt like my kitchen was having an identity crisis, and I decided that I’m going to make the predominate color in the room be red.
After Christmas I was taking down my decor, and trying to decide what to do with the top of this cabinet.  It’s very tall, and you can’t really see what’s on top of it very well, so it doesn’t need anything too showy, if you know what I mean. But it needed something.  Anyway, as I was putting my Christmas decorations away, I decided to place these red & white candles on top of this cabinet, and the vignette grew from there!

The above picture is how I had planned for it to look for most of the year. The candles are actually Christmas candles, but from the ground you can’t really tell.  Then I made the arrangement in the middle using some berry garland that I had.  And the cups were already on top of the cabinet.  I just filled them with red paper shreds so they would match.  And then I added the shiny red garland.  It’s actually Valentine garland, but again, from the ground you can’t really tell. 

And now for the finishing touch to make this vignette perfect for Valentine’s Day!  This adorable Valentine Heart garland was actually made by the super talented Liz of Hoosier Homemade.  Last year around this time, she had an assortment of giveaways. This garland was one of the prizes, and I was the lucky winner! 
Isn’t it the cutest! And you know how I said that you can’t see the top of the cabinet very well anyway, so it doesn’t really need too much stuff.  Well, now with all the red, it’s actually quite eye catching! Who knew!

So what do you think?

I’m linking up at these parties.

Photobucket

Valentine Cupcake Decor

Being on a budget, when it comes time to decorate for a holiday or change up our everyday home decor, I often find myself using things that I already have in new ways.
This year for Valentine’s Day I created this cute display for the kitchen counter.

The display includes 2 Valentine’s Day mugs and 2 wine glass, both filled with pink and green Christmas balls.  And in the center I have my Valentine cupcake plate that my husband got me at Hobby Lobby a couple of years ago.  In front of that I have three cupcake ornaments that I got this Christmas.  And in the very front, I just used some Valentine’s Day napkins to add a border and some extra color to the display.

Got any cheap decor ideas for Valentine’s Day? 

Do you like to use old things in new ways for your decor? 

I’m linking this post up to these linky parties.

Photobucket

Berry Heart Wreath

With Valentine’s Day only a month away, (Wow, this month is going fast!) I thought it would great to share this really cute wreath I have on my door.  No, sadly, I didn’t make this.  I actually ordered it a few years back.  I was shopping around and I found a few things similar to it at Shop Wiki if you’d like to take a look.
Anyway, when we moved I packed it up, and I just got it out of our outbuilding this past fall.  So this is our first time to use it.  I really love using bright colors like red in the winter time, even after Christmas.  It really brightens things up and adds a lot of warmth.
What do you guys think?
Looking the wreath over, I see that it actually wouldn’t be hard to make one like this either.  You could easily purchase a round twig wreath at Hobby Lobby.  Then purchase a piece of berry garland, and then weave it through the wreath.  Then add just a little hot glue to hold the garland in place and fluff it out as desired.

I attempted to take some pictures of how the pieces of garland are woven through the wreath.  I’m not really sure how good you can see it though.

I also bought a piece of garland to match this wreath, and last week I actually used it on a few projects which I’m really excited to share with you in the coming weeks. So stay tuned!

I’m linking up to these fun craft and decor parties!

Photobucket

SSH’s Best in 2010: Projects

At the end of each year I like to revisit my posts from the year and highlight some of my favorites. I’ve never been a really crafty person, but this year I began trying my hand at Mod Podge and some other craft projects. Today we take a look at some of the things that I made throughout the year.

Next week I’ll be sharing Best in 2010: Food, so please come back and check it out!
I’m linking up this week to these linky parties.

Photobucket

Christmas Wreath Ideas

HollyBloggyButton1

Hope you enjoy these wreaths from last week’s events.  Wreaths are one of my favorite decor items, so it’s been a real treat to see everyone’s ideas.  They’re all so unique and creative!

Pretty Paper Wreath from Whipper Berry

Fabric Ball Wreath from My House of L

Embroidery Hoop Wreath from Silly Precious Piggies

Winter Wreath from Life with Liane

Christmas Ribbon Wreath from Calico and Cupcakes

Poinsetta Wreath from Fast Daze

Photobucket

Christmas Kitchen Tour {Holly Bloggy Decor Party}

Here’s the continuation of my home tour for the Decor Party at Shabby Chic Cottage

By the way, don’t forget to stop back by my blog tomorrow for a Christmas Recipe Party!

For this part of the tour, we start with the fridge, which is topped off by my little kitchen tree. Last year it seemed to be everyone’s favorite thing in my home tour (and my fave too), so it makes a return this year!

I added some cards to the fridge just to give it some color.  And I bought the Christmas Countdown Sign at the Dollar Tree last year for 50% off.  I added some magnets with a little hot glue, and it was perfect for the fridge.

This is one of my favorite displays for this year.  I had the cake place and the balls in cups last year.  Then I got the rainbow at the Dollar Tree (again for 50% off).  I had no idea what I’d do with the rainbow tree, until I found these adorable cupcake ornaments at K-Mart a couple of weeks ago.
 I used this rainbow garland above all the cabinets in the kitchen.

A bunch of different plates, figurines, etc. always seem to find there way on the counter this time of year.

The Christmas Tree Plate is one of my favorite pieces.  Hubby bought it for me from Cracker Barrel. 

The tour wouldn’t be complete without a picture of my Mouse Tree! 

And here’s the dining rom table.  It’s the same tablecloth from last year, but the I added a bunch of stuff to the center.

More balls in cups and cone trees!  And if you check out my Christmas Craft post from yesterday you can see how I created the sign.

And that’s it for the kitchen.  If you haven’t seen the living room tour, please check that out too.  And don’t forget to come back here tomorrow for the Christmas Recipe Party!

Also, linking up at these parties.

Photobucket

Christmas Living Room Tour {Holly Bloggy Decor Party}


Wednesday is Day 3 of the Holly Bloggy Event, and we’re sharing decorations and Home Tours.  Be sure to go over to The Shabby Chic Cottage to share yours!  Also, come back here to Simply Sweet Home tomorrow for a Christmas Recipe Party!

I had a lot of stuff I wanted to share for this year, so I’ve actually decided to divide my tour up into two posts.  There will be one for the living room and one for the kitchen/dining room.

First I wanted to share this cute Teddy Bear set.  I got these at Hallmark a few years ago but I’ve never actually gotten them out till now. They were made to commemorate the100th birthday of the teddy bear.  
These are more Hallmark creations.  I put these near our front door so they can give our guests a warm welcome.

Cone trees and a Christmas Flower Arrangement! (Try to ignore the stereo.  It doesn’t really go with anything in the room, let alone with the Christmas stuff, but it’s kind of hard to hide. lol.)

If you visit regularly, you’ve already seen this wreath.  I have it hanging on the door of our coat closet. 

I always hang our stockings on my “treasure cabinet.”
Happily I got 2 new cat stockings on sale last year after Christmas at Cracker Barrel. I also got the candy canes for half price at Dollar Tree!

One of my favorite things as of late is the fabric I used to cover the coffee table.

Back to the “treasure cabinet.”   I decided to share my Rudolph figurines.  This is my third year to do a home tour on my blog, and I don’t think I’ve ever shared them.  My best friend from elementary to high school bought me these several years ago because it was always one of my favorite movies!

Last in this room is the snow buddies and snowman candle set. 

I especially love this candle set. I always love blue and silver together!

Please check out my Kitchen Tour—coming up next!

Don’t forget to link up your decor at The Shabby Chic Cottage. I’m also linking up at parties.

Photobucket

Christmas Wall Art {Holly Bloggy Christmas Crafts}

Today we are sharing Christmas Crafts for the Holly Bloggy Christmas. You can link up your project with Nicholette and Vanessa at Craft Envy.

I think you’ll find my project very interesting. I had created this really cute Christmas display in my kitchen, but unfortunately it was set right in front of this apple sign, which as cute as it is, has nothing to do with Christmas. I didn’t really want to take it down, and I didn’t have anything I could replace it with either. So I got to thinking of ways that I could cover it up temporarily during the Christmas season. (After all, how can I share my cute Christmas display with my bloggy friends if there’s a picture behind it that doesn’t even match. Haha!)
So after going through a few ideas in my head, I came up with this idea that resulted in the piece of art that you see here. In my tutorial, you’ll see how I created this temporary piece of art with my favorite office supply (tape), but I’ll also give you some instructions to help you create a more permanent (and I would also say, a bit more conventional) piece of Christmas art!

What You Need:
Wall Art, Sign, or Picture Frame
Fabric or scrapbook paper
Ribbon
Christmas Balls
Garland
Scissors
Glue, tape, and/or hot glue
Wire & wire cutters (optional)
Step 1 – Find a piece of art to cover. This may be something that’s already in your house, which you will cover temporarily. Or you can find something to cover permanently. A picture frame or old piece of art that you don’t want would be great. And you can always find something cheap to use from the thrift store. It doesn’t matter what it looks like because you are going to cover it anyway.

Step 2 – Measure your fabric or scrapbook paper to fit the center of your frame or piece of art. Then attach it to the piece of art. Use mod podge or glue stick to create a permanent piece of art or use tape to create something temporary.

Step 3 – Next add your garland. For my particular piece, I put the garland around the brown vine on my sign. To attach it to the vine, it used little pieces of wire and tied it around the garland and the vine. But more than likely you’re piece will not have this vine. So your best option would be to use hot glue to bond the garland to the frame itself. (But if you’re like me and don’t want to permanently alter your piece of art, I’d suggest skipping this)

Step 4 – Cut out some ribbon. This will be used to hang the balls on your piece of art. You’ll need to cut them in varying lengths. You’ll want some of the balls to hang near the middle, while some will be higher, and others will be lower. Use your piece of art to get a good idea of what sizes you need.
Step 5 – Now loop the ribbons through the balls. To attach them you can either tie a small knot or you can use hot glue or tape to affix the ribbon to itself once it is looped through.

Step 6 – Attach the balls to your piece of art. Again for my temporary piece, I simply used tape to attach the ribbon to the frame. And I was able to place it in such a way that you can’t even tell that it’s taped. But if you want something permanent, you should attach the ribbons with hot glue.

Now you should have a fun piece of Christmas wall art that you can use year after year (or just for this year)!
I’m also linking up to these weekly parties.

Photobucket