Waffles with Syrup and Peanut Butter

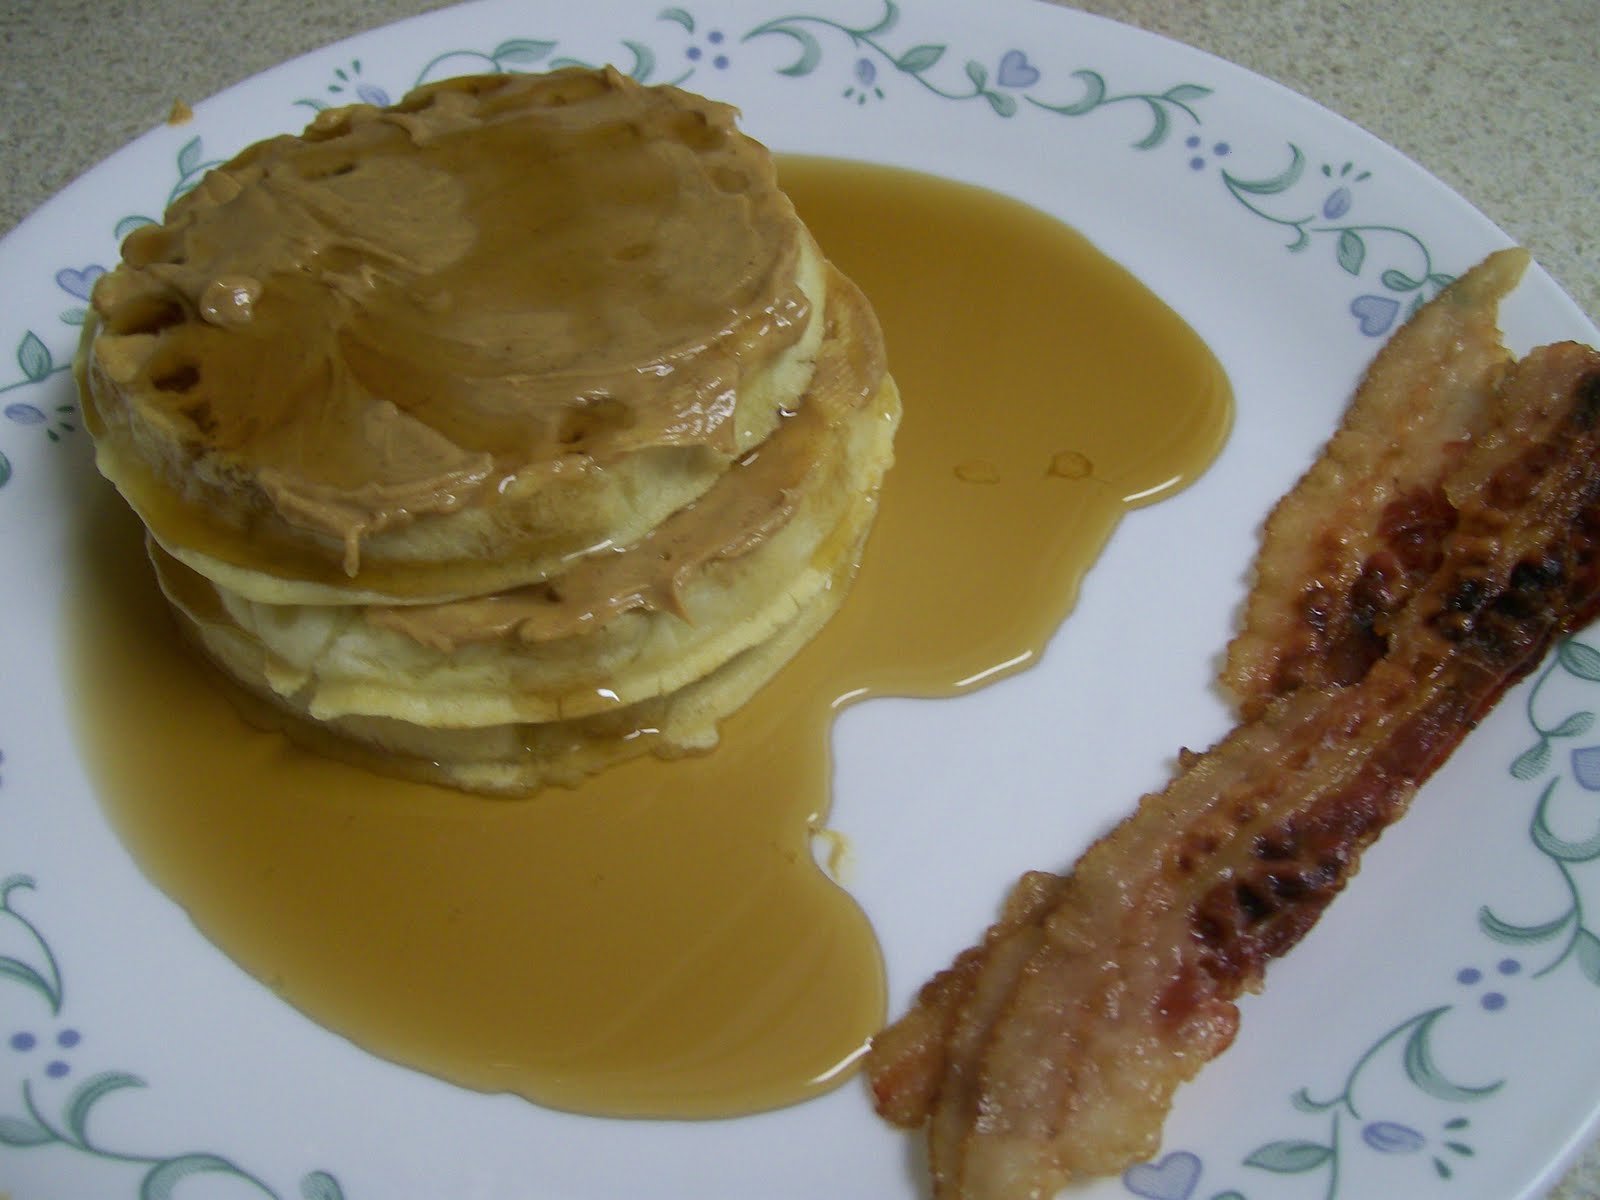
My husband’s birthday is on Monday.  We’ll be going out to eat for dinner, but for breakfast I’ll be making one of his favorites.  One thing that he absolutely loves is waffles (or pancakes), specifically with peanut butter on top!
Before we go any further, I must ask a question or two. Has anyone ever heard of this?  Has anyone ever had this?  Is anyone out there a “Waffles/Pancakes with Peanut Butter” fan?  If you are, you have to leave a comment because my husband will totally get a kick out of it! Truly! 
He absolutely loves this stuff, and he loves to recommend it to people!  And he loves it even more when he finds someone who likes it or when  he can get someone to try it out, and they like it.

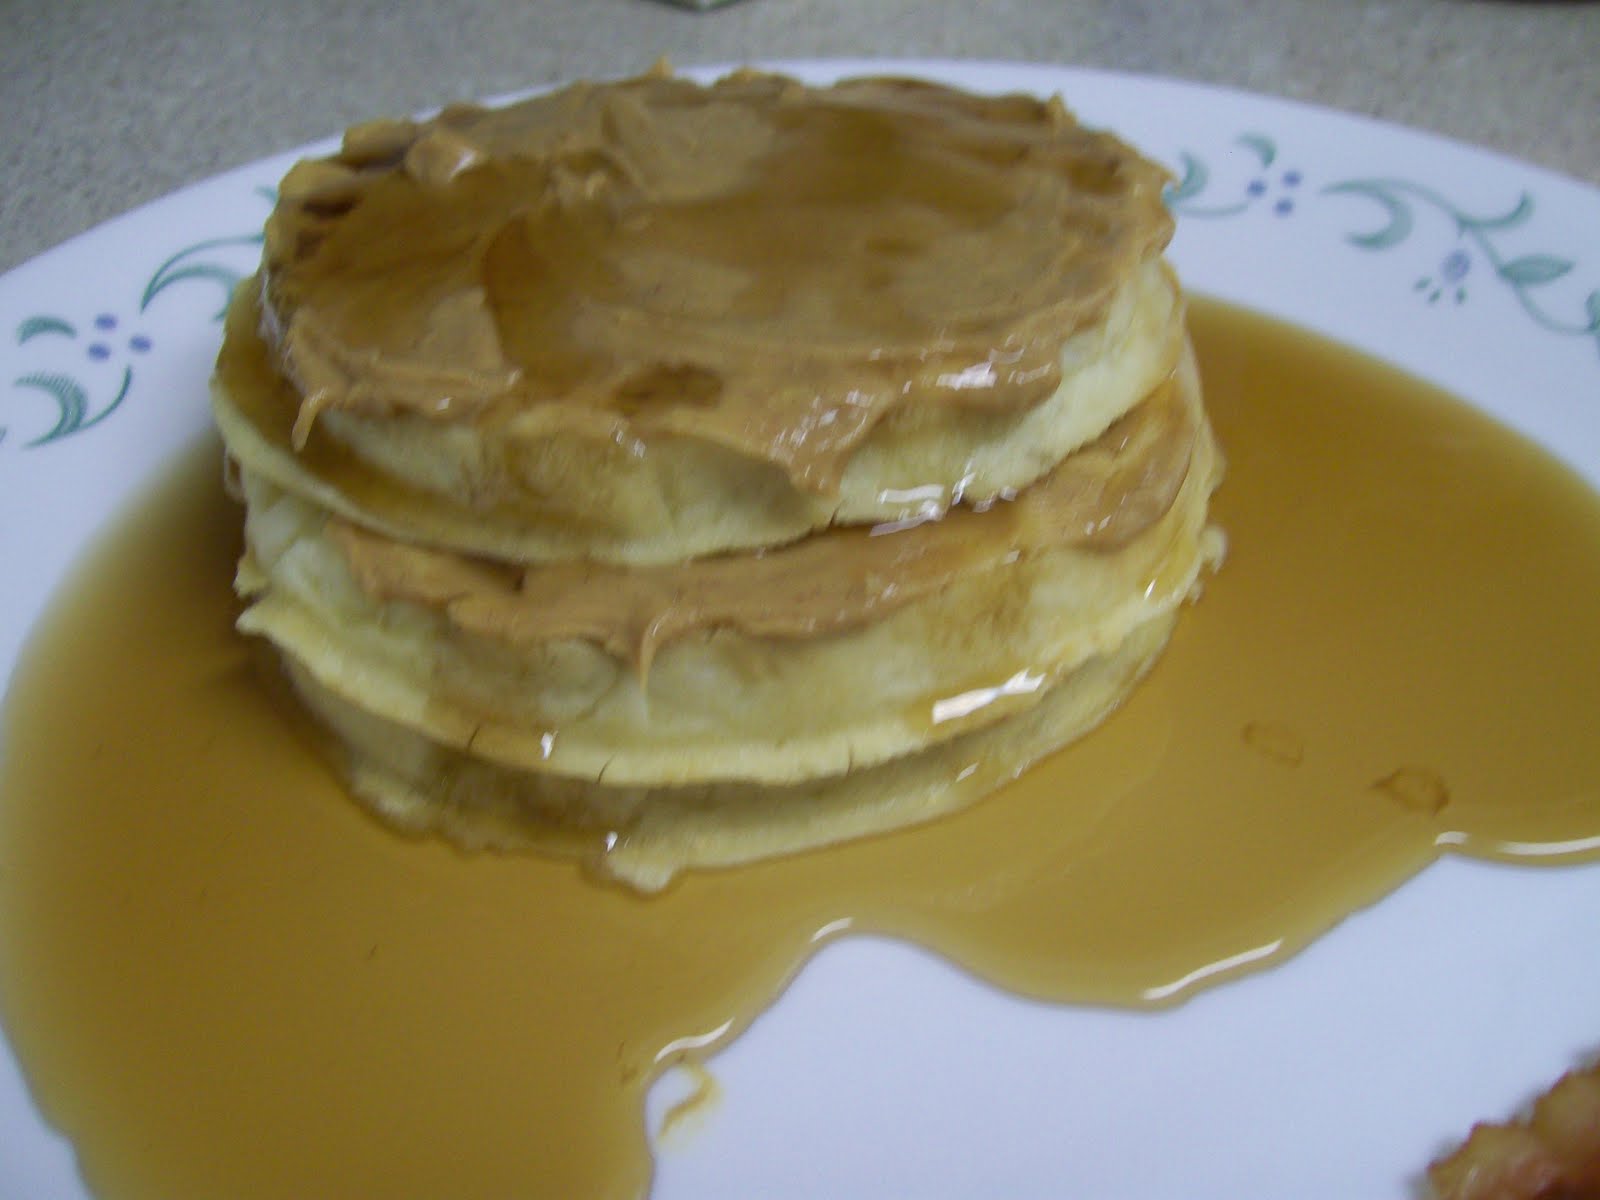
No actual recipe goes with this.  Just make your waffles or pancakes, and spread (or glob) a little peanut butter on each one.  Then top with syrup. Very easy!  And besides the great taste, the other great thing about this is that it gives you some extra protein to start out your day, and I’d say it’s probably a lot healthier than using that old butter I’m always having.
And since I’m not sharing a recipe, instead I’ve got a quick story about the peanut butter.  My husband likes this stuff so much that he will actually carry a small jar of peanut butter into the Cracker Barrel  or IHOP for breakfast! And he is very proud of it!
In fact, we’d only been dating a few months when he asked me to smuggle a jar of peanut butter in to the Cracker Barrel.   And just to show how in love (or how crazy) I was, I did it! And I’m here to tell you now that I would not do something like that even that for myself!  I would be way too embarrassed! 
And believe me, you do get some strange looks from the waiter and people at the tables around you when you pull a peanut jar out of your purse!  One waiter even gave a shocked and puzzled look when he walked by and saw some strange substance on hubby’s pancakes.  He was relieved to find it was just peanut butter!
So this should stand as a testimony of how loving and dedicated I am!  Or maybe it’s just a testimony about how much my husband loves peanut butter on his waffles and pancakes! 
This post is sponsored by Petite Rouge. Are you looking for the perfect finishing touch? Petite Rouge has it. Simple, elegant blossoms to brighten up any outfit. Dainty enough for your smallest princess. Sophisticated enough for your growing girls. Clip on a headband or wear alone. 

Photobucket
If you’d like to sponsor some posts on my blog, just send me an email for details!

Sunflower Peep Cake

Photo Credit: Taste of Home

As I was looking through my collection of recipe photos for something to post this week, nothing really inspired me, and since I’m running a little late on the post anyway, I decided I’d just look for something cute from an outside source.  I immediately thought of my husband’s birthday, which is next week!  For those of you who are new and do not know, I have to always make a yellow cake with chocolate icing for his birthday.  It’s his favorite.  It’s what he likes.  End of story! 
Don’t get me wrong! It’s actually one of my favorites too!  But I just can’t blog about the same cake over and over! So for today’s post I thought it would be fun to share an alternative to the plain yellow cake with chocolate icing.  I remember seeing this Sunflower Peep Cake along time ago on Taste of Home.  I can’t believe I never shared it before because it is so cute!
I don’t think I’ll be making one of these next week, as I’m certain that hubby’s birthday is a Peep-Free Zone, but it’s fun to think about just the same!  Hope you enjoy!

Recipe for Sunflower Peep Cake:

Ingredients:
1 package (18-1/4 ounces) yellow cake mix
2 cans (16 ounces each) chocolate frosting
19 yellow chick Peeps candies
1-1/2 cups semisweet chocolate chips

Directions:
Prepare and bake cake according to package directions, using two greased and waxed paper-lined 9-in. round baking pans. Cool for 10 minutes before removing from pans to wire racks to cool completely; carefully remove waxed paper.
Level tops of cakes. Spread frosting between layers and over the top and sides of cake.
Without separating Peeps and curving slightly to fit, arrange chicks around edge of cake for sunflower petals. For sunflower seeds, arrange chocolate chips in center of cake.
Linking up at these parties.

This post is sponsored by Petite Rouge. Are you looking for the perfect finishing touch? Petite Rouge has it. Simple, elegant blossoms to brighten up any outfit. Dainty enough for your smallest princess. Sophisticated enough for your growing girls. Clip on a headband or wear alone. 

Photobucket

If you’d like to sponsor some posts on Simply Sweet Home, please check out my PR page.

Chocolate Chip Cheesecake Cupcakes

I originally shared these cupcakes last year as a guest post for the Cupcake Carnival at Attempting Creative.  At first I wasn’t sure what I’d make for the event, but after a lot of cupcake brainstorming, I decided to combine two of my favorite flavors which are chocolate and cheesecake.  The end product was a batch of yummy Chocolate Chip Cheesecake Cupcakes!
I found the recipe for the cupcake somewhere online, and then for the cheesecake topping  I just threw in a little of this and a little of that, and then a little more of this and that, until I had the perfect taste and consistency that I wanted. Hope you enjoy!
Chocolate Cupcake Recipe:
Ingredients:
1 cup sugar
1 1/2 cups flour
1 teaspoon salt
1 teaspoon baking soda
1/3 cup cocoa powder
1/2 cup vegetable oil
1 cup water (or milk)
1 teaspoon vinegar
1/4 – 1/2 cup chocolate chips (optional)
Directions: Preheat oven to 350.  Mix all your dry ingredients together (except chocolate chips).  Add wet ingredients.  Beat together on low speed for about a minute.  Use a spoon to scrape down the batter off the sides.  Mix for about a minute on medium speed.  Fold in chocolate chips, if using.  If you aren’t using cupcake liners, spray your muffin tin with cooking spray.  Fill your muffin cups about 2/3 of the way full with batter.  Bake for 25 minutes.  (My recipe book says the recipe will yield 20 cupcakes, but I was only able to make 16.)

Chocolate Chip Cheesecake Topping Recipe:
Ingredients:
1 16 oz. coolwhip (thawed)
2 8oz. packages cream cheese (softened)
4 tablespoons sugar
1/4-1/2 cup chocolate chips

Directions: Place cream cheese in the microwave for about 30-45 seconds to soften. (Be sure to check it in 15 second increments and stir if needed.) Add cool whip a little bit at a time. (I added about 4 oz. then stirred, then another 4 oz. and so on.) Blend well together using a spoon or an electric mixer on low. Add sugar and mix well. (Icing should be fairly thick yet creamy, similar to cannoili cream) If you’re not using immediately, you may refrigerate, but don’t let it set in the fridge for too long, or it will thicken like a cheesecake and it will be more difficult to pipe it).


Decorating:
Make sure cupcakes are cooled before frosting. If you’d like your cupcakes to be cream filled, poke a hole in the middle, about half way through the cupcake. (I used a handle of a wooden spoon.) I wasn’t sure how much icing I’d need for decorating, so  I used extra cool whip for the filling, however, I now know that you should have enough icing to frost the cupcakes and to use for filling if you so desire. To do the filling, I just used a small spoon, and dropped the filling in and around the hole.
Next place your icing in a piping bag or a ziploc and apply to cupcakes. Or use a spoon to spread the frosting on the cupcakes. Decorate with chocolate chips. Store in the refrigerator until ready to serve.

I’m linking up to these parties.
Photobucket

Super Fast Buffalo Chicken Sandwich

I’m always looking for quick and easy things that I can make for lunch, and one of my husband’s favorite things to eat at any fast food place is chicken sandwiches, so we eat a lot of those.  We used to go to Checkers for lunch a lot because they were only about two minutes from our house, and they have a lot of good sandwiches there.  One of my favorites is their buffalo chicken sandwich.  It’s one of the best buffalo chicken sandwiches I’ve had (even in comparison to sit down restaurants), and it’s only $1, so that’s a super value to me.
But you my have noticed that I said, we “used to” got to Checkers, and they “were” two minutes from our house.  I use the past tense because for some reason they closed the location last year.  I’m not sure why.  It looked like they had a steady business; they were also in a good location, and the food was always good there.  But alas, for whatever reason, they closed, so I can no longer order my precious buffalo sandwich, unless we want to drive out of town for about 30 minutes.  And as a result, my poor husband has to endure my whining about Checkers (of all things) whenever we drive by the old location.
If you were wondering why I’m telling you about this strange obsession with Checkers, it’s because their buffalo chicken sandwich was the inspiration for the buffalo chicken sandwich that I’m sharing with you this week.

Recipe for Super Fast Buffalo Chicken Sandwiches

Ingredients:
Frozen Chicken Patties
Ranch or Bleu Cheese Dressing
Buns
Lettuce (optional)

Directions: 
Cook chicken patties as directed.  (The ones I used can be cooked in the microwave for about a minute per patty).  Pour buffalo sauce into a bowl. (I used Franks)  Dip the patties into the sauce on top and bottom.  Place on bun.  Top the chicken patty with salad dressing and then top with lettuce if desired.  Serve with chips or fries.
Tips:  I bought the chicken patties pictured here at Aldi.  They come in box of 4 for just $1.99.  A great deal!  Aldi also has some Southern Style Chicken patties.  I can’t remember the cost of these, but they are really good too, and they actually remind me a lot of the Southern Style sandwich at McDonalds.

So since I seem to be in the mood to talk about fast food today, I feel that I should ask everyone a question: What is your favorite fast food place?  And what do you like to order when you go there? I’d love for you to share your answers in the comments!
 

I’m linking up at these parties.

Photobucket

Lime Green Punch

I went to a baby shower for my niece a few weeks ago, and I thought this punch was just the cutest!  It has to be the first time I’ve ever used the word cute to describe a drink! 

And I really wish I had come up with this idea to throw the ducks in there, but alas! I did not! Oh well.  But at least I can credit for taking the picture!

And to top off this cuteness, the punch was also quite tasty!  I have to admit, when it comes to punch and other fruity drinks, I’m quite picky.  I either like it, or I hate it.  But this was really yummy, and it was so simple tasting that I think anyone would love it.  And I learned that’s also quite simple to make with only two ingredients! Yay!

Recipe for Lime Punch:

Ingredients:
1/2 gallon lime sherbet
1 (2 liter) Sprite or 7-up

Directions:  Spoon out sherbet into large punch bowl and pour sprite over it.  Mix and serve immediately.  Chill additional punch in the refrigerator or freezer.
Tips:  While browsing different punch recipes, I saw different variations where they used a gallon of sherbet to one bottle of Sprite and even 2 bottles of Sprite to the half gallon  of sherbet.  So I’d suggest doing a trial run of this so you can play with and see how you like it best before serving it at a party.
Add Ins:  Cooks.com has lots of versions of this where they add in everything from frozen limeade and pineapple juice to vodka.  I also love the look of Paula Deen’s recipe, if you’re looking for something a little more “adult” yet non-alcholic.

I’m linking up at these parties.

Photobucket

Frozen Mint Cups

I was in the mood for something minty, when I put on my thinking cap and came up with these Frozen Mint Cups.  These are really sweet and yummy without being too rich, and they are very easy to make.  So if you’re kids like chocolate mint, you may want to consider making something like this for St. Patrick’s Day (or just make them for yourself, either way).  Hope you enjoy!

Recipe for Frozen Mint Cups:

Ingredients:
1 8oz whipped topping
2 teaspoons mint extract
a few drops food coloring
36 chocolate mint cookies

Directions:  Add mint extract to whipped topping. Mix well to distribute the flavor.  Add a few drops of food coloring and stir in. Add more if you like, to get your desired hue.  Take about 24 chocolate mint cookies and crush them in a food processor, or place in a ziplok bag and crush with a rolling pin or other kitchen utensil. 
Line a muffin tin with cupcake wrappers. (This recipe makes about 12.)  Pour the crushed cookies into cupcake liners.  You’ll want to use almost all the crushed cookies, leaving just enought to garnish the top of your mint cups.  Next spoon your whipped topping mixture evenly into each mufin cup.  Garnish with remaining crushed cookies, and then stick an uncrushed cookie in the center of each cup.  Chill in the freezer until ready to serve. 

I’m linking up at these parties.

Photobucket

Meatball Subs and Publix Italian Days Giveaway

Stir up authentic Italian flavors and bring your family together around the dinner table during Italian Days at Publix! Now you can share the taste of a home-cooked Italian meal in the comfort of your own kitchen without spending a fortune.
From February 17th through March 2nd, visit your local Publix to take advantage of the great savings on some of your favorite General Mills brands such as Progresso, Green Giant, Pillsbury, Muir Glen and Totino´s, and save $5 when you purchase 20 participating products.
While visiting Italian Days at Publix, you can also enter the Publix Italian Days Sweepstakes, sponsored by General Mills, for a chance to win one of four grand prizes of $10,000 worth of free groceries or one of 200 $100 Publix gift cards being given as prizes.
There are three easy ways to enter for a chance to win the Sweepstakes. Enter via phone, mail or at ClickCallMail.com – a convenient one-stop website, where you´ll also be able to download great coupon savings on some of your favorite General Mills brands and other great offers from Publix.
Here´s how it works:
Click – Stay up to date with the latest General Mills promotions happening at Publix by visiting ClickCallMail.com. Once you´re registered and logged in, you can participate in any current promotions.
Call – If you´d prefer to enter the sweepstakes and participate in other promotions via telephone, feel free to call the General Mills/Publix hotline, at 1.800.627.6059, and be sure to say that you want to enter the Publix Italian Days Sweepstakes. Please be sure to provide your complete contact information (Full name/address/zip code/phone #).
Mail – If you prefer to participate via mail-in entry, print and mail your complete contact information (Full Name/address/zip code/phone #) to P.O. Box 43425 Atlanta, GA 30336 and be sure to write “Publix Italian Days Sweepstakes” on the outside of the envelope.

I absolutely love meatball subs! I found this yummy recipe for them at Pillsbury.com.  It features just a couple of the participating products featured in Publix Italian days. Give it a try!

Recipe for Italian Meatball Subs

Ingredients:
1/2 lb. ground beef
1/2 lb. bulk Italian pork sausage
1/4 cup Progresso® Plain Bread Crumbs
1 small onion, chopped
1 egg
1 (15-oz.) can pizza sauce
2 cans (11 oz each) Pillsbury® refrigerated crusty French loaf
4 oz. (1 cup) shredded mozzarella cheese
Directions: Bake bread as directed on package. In medium bowl, combine ground beef, sausage, bread crumbs, onion and egg; mix well. Shape into 16 (1 1/2-inch) balls.
In medium skillet, cook meatballs over medium heat for 5 minutes or until browned, turning frequently. Drain. Add pizza sauce. Reduce heat; cover and simmer 12 to 15 minutes or until meatballs are thoroughly cooked.
Slice each loaf open, sandwich-style. Place 8 meatballs in each loaf. Spoon sauce over meatballs. Cut loaves in half to make four sandwiches. Sprinkle with cheese.

Win it! One Simply Sweet Home reader will a $25 Publix giftcard to help you buy the participating Italian Days products.

Mandatory Entry:  To win, you must be a follower of my blog. And leave a comment telling me what your favorite Italian food you like to serve to your family. Deadline: March 7

Extra Entries: Leave a comment for each.

-1 if you follow @SimplySweetHome on Twitter.
-1 if  you subscribe to Simply Sweet Home via email.
-1 for subscribing to my RSS feeds through Feedburner.
-1 for sharing this giveaway on Twitter or Facebook. 
(Sample Tweet:  I want to win a $25 Publix giftcard!  http://bit.ly/gBihQs @SimplySweetHome )  (Limit one tweet entry per day.)

Photobucket

Disclosure: General Mills gave me one gift card to keep and one to giveaway, as part of the MyBlogSpark program. The opinions are my own. If you’d like sponsor a review or giveaway on my blog, please see my PR page for details.

Bean Soup

Come join Soup-a-Palooza with Tidy Mom and Dine and Dish sponsored by Bush Beans, Hip HostessPillsbury, and Westminster Crackers.

For this event, I’m sharing my bean soup.  This is comfort food at its best, simply perfect for this time of year, and it’s extremely easy to make with only few ingredients.

Recipe for 15 Bean Soup

Ingredients:
1lb smoked sausage (or ham hocks)
1 bag 15 Bean Soup (I use Hurst’s brand)
Salt and pepper
water
Directions:
Before cooking, dump out beans on to a plate and sort, removing any stones and debri.  Pour into a strainer and rinse.

Traditional /Cooking Method Directions:
Soaking: Place beans in a large pot, cover with 2 quarts of water. Allow beans to soak overnight or at least 8 hours. After soaking, drain water, add 2 quarts of water and meat. Bring beans to boil, reduce heat and simmer uncovered for 2 1/2 hours to 3 hours. Add contents of ham packet (from your bean soup bag) and add salt and pepper to taste about 30 minutes before cooking is complete.
Quickcook Method Directions:
Place rinsed beans in a pot with 3 quarts of water.  Bring to a rapid boil. Reduce heat, cover and continue boiling 1 1/2 to 2 hours. Stir occasionally to prevent sticking. About 30 minutes before cooking is completed add ham packet and salt and pepper to season.

Tips/Suggestions:

To spice this recipe up, the Hurst’s package recommends you add 1 cup of chopped onion, one 15 oz. can of diced or stewed tomatoes, 1 tsp chili powder, juice of one lemon, and a clove of minced garlic about 30 minutes before cooking is complete.  Growing up, we never had all that stuff in our bean soup, but I’m sure it’s quite tasty and flavorful.

And if you don’t have time to stand over the stove stirring and watching the soup cook, try making this in the crock pot.  Just cook for the same length of time as it takes for other beans.

Tidy Mom

I’m also linking up at these parties.

Photobucket

Strawberry Cookie Cups

I love taking recipes that we love and making them just a little different by adding or changing an ingredient, or even just changing the cooking method or overall presentation.  Last week I shared my strawberry cake mix cookies that I made for Valentine’s Day, and this week I’ve got some other sweet creations that I made using the same recipe: Strawberry Cookie Cups!
Recipe for Strawberry Cookie Cups:
Ingredients:
1 Strawberry Cake Mix (18.5 oz)
1 egg
1/3 cup water
1/3 cup oil
Directions: Mix ingredients together with spoon or electric mixer. Line a muffin tin with paper muffin cups. Use a cookie scoop to place a dough ball in each cup. (For mine, I used one scoop for each cup, but if you want them to rise to the top like cupcakes, use 2 scoops.  If using a mini tin, one scoop should do fine.  If you don’t have a cookie scoop, use a spoon or your hands to create a 2 inch balls for the large cupcakes.)
Bake for about 15 minutes. Then decorate as desired. For my cups, I left some plain, while others are topped with either sprinkles, coconut flakes, or a Hershey Kiss.  You could also frost these like cupcakes, even though they’re not exactly cake like.  Just wait for them to cool before frosting.

I’m linking up at these parties.

Photobucket

Strawberry Cake Cookies

Have I mentioned to you that I love cake mix cookies?  Yeah! I think I have!  And I think before it’s all over with, I’m probably going to make every flavor of cake mix cookie available to me.  It’s know it sounds like a tough task, but I think I’m up to the challenge! LOL.
With Valentine’s Day just around the corner, it seemed like the perfect time to try out some Strawberry Cookies.  I thought the pink would be fantastically festive for the holiday.  And once they were baked, I thought what could I add to really make them scream, “Happy Valentine’s Day!”  My answer: Chocolate! Of course!  Hope you enjoy!

Recipe for Strawberry Cake Cookies:

Ingredients:
1 Strawberry Cake Mix (18.5 oz)
1 egg
1/3 cup water
1/3 cup oil

Directions:  Mix ingredients together with spoon or electric mixer.  Refrigerate for 20 minutes or so to keep dough from sticking to your hands. (If dough is still sticky, refrigerate a few minutes more.)  Roll into one inch balls and place on a non stick cookie sheet, lined with parchment paper or sprayed with cooking spray.   Bake at 350 for about 15 minutes.  Edges should be lightly browned.

Decorating/Toppings: 
Ingredients:
Candy/Sugar Sprinkles
Almond Bark, Chocolate Chips, or a Chocolate Bar
To decorate the cookies, I immediately poured just a small amount of red candy sprinkles on them right after I took them out of the oven.  And usually I mix a spoon full sprinkles in with the actually dough before making, but I didn’t do that this time. 
For the topping, I just took a couple of squares of almond bark and heated in the microwave for about a minute and half.  Don’t forget to take the chocolate out every 15 seconds to stir, in order to prevent scorching.  Then just drizzle the chocolate on.  I was in a hurry so I just used a spoon and shook it back and forth to create a drizzled effect.  For a more professional look, you can use a piping bag. And if you don’t have this you can put the chocolate in a ziplok bag with a tiny whole cut in the corner.
And here’s a picture of some of the cookies that I kept plain. And I have to tell you, if you really want just a simple tasting, sweet treat, without all the frills, these plain strawberry cookies are just delightful!

I’m linking up at these parties..

Photobucket