White Chocolate Chip Pink Lemonade Bars and the Pillsbury #BakeOff

Pillsbury Bake-off

Do you love to bake? Pillsbury is hosting their 47th Annual Bake-Off Contest. Now through May 8, you can enter your recipes for the chance to win $1 million!   Visit their website to learn more about the contest categories, sponsoring brands, and rules.

I love to bake, and I was very excited when the folks at Pillsbury sent me a box of baking supplies, complete with Watkins Vanilla, Pillsbury Flour, Reynolds cupcake liners, foil, parchment paper, and more!  In conjunction with the Pillsbury Bake-Off, and the celebration of spring, I decided to make some White Chocolate Chip Pink Lemonade Bars!

These bars are sweet and delicious!  Their lemon flavor and lovely pink color make them a perfect spring treat, and they are also very easy to make, using just a few ingredients, including Pillsbury Pink Lemonade Cake Mix!  Hope you enjoy! [Read more…]

Friday Favorites – Week 212 – with 5 Easter Treats

friday favorites
Welcome to another fun edition of Friday Favorites.  This week we have a group of really cute Easter treats.  Any of these would be perfect for parties or just simple Easter snack. Hope you enjoy! [Read more…]

Friday Favorites – Week 210 – Featuring Homemade Easter Candy

friday favorites
Happy Friday! And welcome to Friday Favorites. I’m so excited that spring is upon us. Today we’re celebrating the coming of spring with some homemade Easter candy! Hope you enjoy! [Read more…]

Hop Down The Bunny Trail with Hershey’s

Hersheys Easter Logo


 Today on behalf of Hershey’s, I’m inviting you to hop down the bunny trail! Hershey’s celebrates Easter everywhere with a yummy lineup of goodies, and they also offer tons of fun and inspiration on their website.  Hop over to the Hershey’s site for fun recipes, crafts, tutorials, and party ideas.  They also have printable coloring pages and stickers for the kids, as well wallpaper, ecards, and more!


[Read more…]

Easter Chick Food Ideas

Well, as you can see I’ve gotten moved over to my new home on WordPress! Yay! (More on that later!)

Today I’ve got some fun Easter foods to share with you from around the blogosphere, but not just any Easter foods, Easter Chick foods!  I just adore chicks! They are so cute, and they are the perfect symbol for springtime.  Hope you enjoy!

[Read more…]

Peanut Butter Cracker Balls

I just love peanut butter candy! Last year around Easter I shared a recipe for Homemade Peanut Butter Cups.  And this Easter I’ve got another peanut butter treat!
This is one that I just threw together as an experiment one night.  It’s based on this traditional peanut butter cookie/candy recipe that I shared back in January. And I think you’ll find it’s the perfect sweet and salty combo candy!
Photobucket
Recipe for Crunchy Peanut Butter Balls:
Ingredients:
1 cup Ritz or Townhouse crackers, crushed
2/3 cup peanut butter
3-4 blocks almond bark
a few drops food coloring (optional)
sprinkles (optional)
Directions:  Place crackers inside a zipper bag and crush using a rolling pin, meat tenderizer, your hands, or anything else you want to use. (Sorry I can’t remember how many crackers I used. I just counted out a few and poured the crumbs into a measuring cup.)
Next place 2/3 cup peanut butter inside a bowl.  Add cracker crumbs and mix until well combined.  Chill in the refrigerator or freezer for 15 minutes.  This will help to keep the peanut butter from sticking to your hands as much, though you may want to put some flour powdered sugar on your hands before rolling.
After rolling back into balls, place back into freezer for another 15-20 minutes.
Next prepare your almond bark according to package directions. I use the microwave, stopping in 15-30 seconds increments to stir.  Once the chocolate is melted, add food coloring 2-3 drops at a time, stirring, and then adding drops again until you get your desired color.
Finally dip your balls in the almond bark using a spoon or candy dipper and immediately add sprinkles after dipping.
Place balls on parchment paper and let dry.  Makes 24 balls.
Photobucket
Photobucket

I’m linking up at Tidy Mom and these parties.

Fun Easter Wreaths

Easter is just around the corner! (Yeah! I really feel like it’s sneaking up on us this year!)

So I got to browsing around yesterday for some Easter wreaths to share with you guys.

I found all of these on the great and wonderful source that is Pinterest! (Follow Me!) 


If you’ve got any spring or Easter projects, don’t forget to come by and link them up for Friday Favorites so I can feature you!

Photobucket
Easter Peep Wreath from Our Best Bites

Photobucket 
Sweet Easter Wreath from till death do us part
 Photobucket
Easter Wreath with Tulle, Ribbon, and Sequin Eggs from debbie does creations
Photobucket
Easter Bunny Wreath from Ever Blooming Originals
Photobucket
Chick Wreath – Guest Post at Craftaholics Anonymous. 
Wreath was made by Design Editor.
Photobucket
Vintage Easter Wreath from Treasured Heirlooms 
Chocolate Easter Wreath from  The Baker’s Daugher
Photobucket
Easter Bunny Wreath with Carrots from The Tattered Cottage
Photobucket
Balloon Yarn Wreath Tutorial from ErikaJean 
Photobucket
Crochet Easter Egg Wreath Pattern from favecrafts

Photobucket
I’m linking up at Tidy Mom and these parties.


Rice Krispie Treat Nests with Easter Peeps

Rice Krispie Treat Nests with Easter Peeps
Today I’ve got an amazingly simple and fun treat! It’s a great take on a classic favorite, The Rice Krispie Treat, with some fun Easter ingredients added in to create a festive and fun edible party favor that everyone will enjoy!
Photobucket
So I was thinking, what could be more fun for Easter than a marshmallow peep? How about marshmallow peeps perched upon their very own Rice Krispie Treat Nest?  I made a batch of these the other day for my husband to carry to work, and they went over very well! (I only wish the photos were a little better, but I was totally rushed!)
Photobucket

 
Rice Krispy Treat Nests with Easter Peeps
 

What You’ll Need: 

6 Cups Rice Krispies
1 Bag Marshmallows
3 Tablespoon stick butter, sliced.
15 Marshmallow Peeps
1 Bag Jelly Beans
Muffin Tin
Directions: Melt together marshmallow and butter in the microwave or on the stove top on low heat. Add Rice Krispies and stir together.  Spoon treat mixture into individual muffin cups. You should have enough to fill about 15 cups. Top each nest with 3 to 5 Jelly Beans. Next top each nest with a peep. You may need to press the peep down to get it to stay atop the next.  Chill in the refrigerator or freezer for a few minutes. Then using a spoon or spatula carefully remove the nests from the muffin tins.
Place on a fun serving tray or place in treat bags for a fun party treat!
Photobucket
Tip:  Don’t like Peeps?  Serve just the nest with a few eggs on top as shown below.
 
Photobucket
Tip: I found these adorable treat bags at Wal-mart. They were $1.47 for 20 bags, and the treats fit perfectly inside.  They also looked super cute, and it made them very portable!
Photobucket
Photobucket

I’m linking up at Tidy Mom and these parties.

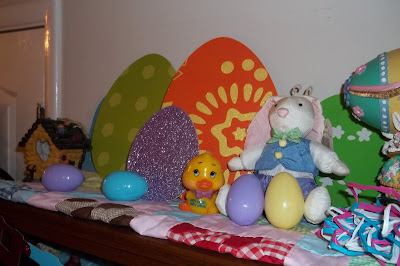
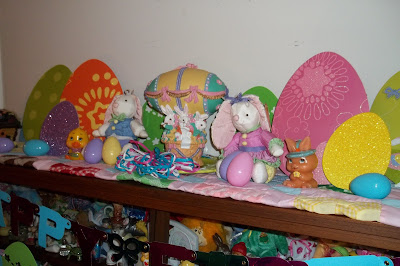
My Easter Vignettes

I’ve been meaning to share my Easter Decor for weeks, but I guess the week before the holiday is better late than never, right?  I had the hardest time deciding how to decorate!  For one thing, some of my cutest pieces are packed up in storage, and I decided against getting them out, and then I also have some really cute glass eggs in my “treasure cabinet” that I’ve collected in the past few years, and oddly enough, I didn’t use those either!
So at first I was working with just a few different things that didn’t seem to go to together in one display, but I managed to throw some more things into the mix to make it work and actually made 3 displays. 

This is on top of the fridge.  I used a pink runner, and then in the center, there is a flower adorned wishing well with a glittery Easter sign.

My mom gave me this glass Easter basket either last year or the year before.  It was probably a Hallmark or Cracker Barrel find, as those are two of her favorite places!  And it is just super cute in person!
And I just threw this bird house up there because it’s springy and went with the color scheme.
Growing up, we always had a bunch of “country rabbits” like these.  I’ve been thinking of getting rid of them because I don’t have a place for them, but I figured I could at least use them for Easter! 
And that’s a Beatrix Potter tin in the center! My mom and dad collected tins when I was kid, and this one’s from their collection. It’s dated 1992.
And if you checked about my Easter Egg Banner last week, you probably noticed all the stuff on top of my treasure cabinet.

I actually keep this “runner” (it’s not actually a runner) on top of the cabinet all year round, except at Christmas.  It was on the end of my bed when it was a kid, and I’ve always loved it.

Actually come to think of it, I’ve had most of this stuff since I was little, except for all the egg pictures.  But I think they all came together quite nicely! What do you think?

I’m linking up here.

This post is sponsored by Petite Rouge. Are you looking for the perfect finishing touch? Petite Rouge has it. Simple, elegant blossoms to brighten up any outfit. Dainty enough for your smallest princess. Sophisticated enough for your growing girls. Clip on a headband or wear alone. 

Photobucket

Homemade Peanut Butter Cups

I’m really excited to bring you this week’s recipe!  It is a homemade version of one of my all time favorite candies—the peanut butter cup!
I first saw this recipe in Taste of Home magazine a few years ago, and I marked the page but never got around to trying the recipe. (This tends to happen a lot with me.)  But a few days ago, I was wanting to make some kind of new spring/Easter treat, so I started looking through my old magazines, and found these again.  I had all the ingredients I needed, and they were pretty easy to make, so I decided to give it a whirl!
I have to warn, these things are very tasty!  They remind me of the gourmet peanut butter cups that you order, except they’re much cheaper, and the peanut butter is more sweet, almost like a Reese Cup!  And since these are so easy to make, I’d say if you make them once, you’ll probably be tempted to make them again and again.  So don’t say I didn’t warn you!  Hope you enjoy!
Recipe for Homemade Peanut Butter Cups:
Ingredients:
1 cup creamy peanut butter, divided
4-1/2 teaspoons butter, softened
1/2 cup confectioners’ sugar
1/2 teaspoon salt
2 cups (12 ounces) semisweet chocolate chips
4 milk chocolate candy bars (1.55 ounces each), coarsely chopped
Colored sprinkles, optional
Directions:  In a small bowl, combine 1/2 cup peanut butter, butter, confectioners’ sugar and salt until smooth; set aside.
In a microwave, melt the chocolate chips, candy bars and remaining peanut butter; stir until smooth.
Drop teaspoonfuls of chocolate mixture into paper-lined miniature muffin cups. (I didn’t have any miniatures, so I used the regular sized cups and started with about a tablespoon of chocolate in each cup, but I recommend making miniatures, because these things are rich!)
Top each with about a teaspoonful of peanut butter mixture. (For the regular sized cups, I actually used a cookie scoop to measure, so it was just under a tablespoon of peanut butter.  Then I rolled it into a ball See pic below.)
Then top with another teaspoonful of chocolate mixture. (tablespoon for regular size cups)
For fun and extra added cuteness, decorate with sprinkles! Refrigerate until set. Store in an airtight container.
This makes 3 dozen minature cups, and anywhere from 12 to 18 regular sized cups, depending on how you distribute the ingredients and how big you make the cups.
This post is sponsored by Petite Rouge. Are you looking for the perfect finishing touch? Petite Rouge has it. Simple, elegant blossoms to brighten up any outfit. Dainty enough for your smallest princess. Sophisticated enough for your growing girls. Clip on a headband or wear alone.

I’m linking up at these weekly linky parties.

Photobucket
If you’d like to sponsor some posts on Simply Sweet Home, please email me for details.