Archives for 2009

Five Star Sweets

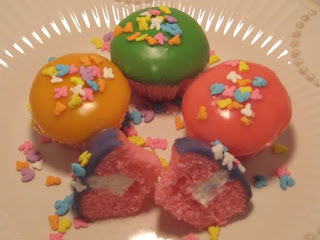
Did you know that you can purchase homemade desserts and sweets on Etsy? I just found a wonderful sweet shop called Five Star Sweets, which offers a ton of tantalizing treats to tempt your tummy and satisfy your sweet tooth.

Laura, the owner of Five Star Sweets, has been creating gourmet sweets and gift baskets for over 15 years for family, friends, neighbors, and co-workers. After finding Etsy, she decided to begin selling her sweets online, and she’s very excited about her new shop. (And you’ll be excited too, once you see all the yummy things she’s baking up!)

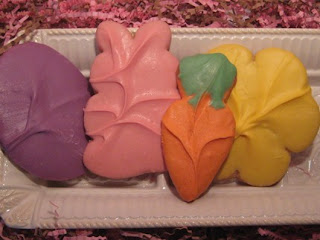
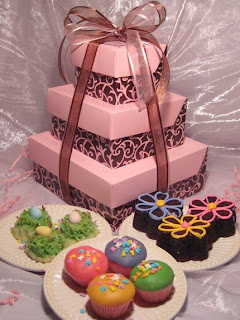
Currently she’s offering an array of lovely Easter Sweets. Her Easter Parade Gift Tower (pictured above) includes 6 Flower Power Brownies, a dozen Easter Parade Babycakes, and 4 Birds Nests Macaroons. And if cookies are your weakness, you can try her Short Bread Cookie Parade (seen below).


All of her sweets are made to order and created with the finest all natural ingredients. Five Star Sweets takes special orders for corporate gifts, bridal and baby showers, tea parties, holiday themes and birthdays. Laura also creates custom gift baskets with the items of your choice and will even gift wrap your item. And her desserts come in high quality decorative bags and gift boxes that you’ll be proud to send to your friends and family.

Head over to Five Star Sweets today and treat yourself.

-Jerri


Sweet Thursday Reminder and Lavender Cottage Giveaway Winner

Hey everyone. First I want to remind you that I’ll be posting my Easter Edition of Sweet Thursday next week. So far I’ve found some really cute items to share with you. If you’re making any Easter treats that you’d like to share with us, simply email me at simplysweethome@hotmail.com and I’ll include you in the round-up. I’m also planning to post some Easter craft ideas next week, so if you any of those you’d like to share, I invite you to send in your link for that as well.

Now onto our giveaway results: I want to thank everyone who entered our Lavender Cottage jewelry giveaway. I’m happy to say that we had over 200 entries! This is really great because the more entries we have, the more likely we’ll be able to get sponsors for future giveaways.

I also want to take this time to thank Cheryl for providing our lovely giveaway prize and thank everyone who helped to promote our giveaway on their own blogs and Twitter.

The winner was selected by a random drawing. And my hubby was our special guest “drawing person.” (So if you didn’t win, you may direct your frustration at him… Just kidding!)

The name he drew out was Jill of Frugal Plus and Points & Prizes. Congratulations Jill!


-Jerri

Organizing Round-Up: Pictures

Organizing Blog

This month’s project for the Organizing Round-Up was definitely something I had been putting off for a while: Pictures and Memorabilia. I had a ton of pictures without a permanant home, and I also had a ton of scrapbook supplies and just….junk to go through. So while I was putting pictures into books, I felt it was the perfect time to go through this stuff too.

I started with a box full of pictures:

And a small drawer full of pictures:


And here’s a couple more stacks…


I went through all the pictures and placed them in order by date, and I’ve now tucked them away in these books:

The “doubles,” including a bunch of extra wedding photos were placed in this blue box, which is much smaller than the brown one from the top. And they were all placed in order with the envelopes labeled.

Now for the challenge. I give you the drawers of death. In these drawers was a combination of scrapbook paper, stickers, empty photo albums, greeting cards, office supplies, keepsake items from birthday parties and other events, even a few cds, and some other stuff. They’ve been hiding out in my closet (of all places) for the last two years, and it was time for this stuff to go!

(I took pictures of the three individual drawers as well as the contents of the blue box on top, but you really couldn’t tell much about them, so I’m leaving these out of the post.)

This set of drawers was completely emptyed! It’s a miracle! It had been a cluttered mess for about 2 years, and I finally tackled it. (Now I’m using this set of drawers to store some of my clothes. Yay!)

Now I know your wondering what happened to the contents. First of all, there were a few really nice albums that were empty. So I removed these and placed them on a bookshelf in my office for future use.

The few keepsakes items I had were placed in a little plastic shoebox. The greeting cards were filed away in my file cabinet. (Eventually I’m going to put the cards in a book and possibly use some of them for projects.)

And the office supplies and a lot of the other items were either thrown away, placed in the yard sale box, or moved to various locations in my office. (In fact, at this time, I also took the opportunity to organize my extra/reserve office supplies, which I’ll have to share at a later time.)

I also had a whole shoebox of these little photo books that come with your prints. Over half of these had photos in them until last year when I decided to put them into large albums. Now I have no use for these, so I placed them in the yard sale box.


And all my scrapbooking supplies are now in this more compact 12X12 3-drawer bin.


Head over to Org Junkie to see how others organized their pictures and memorbilia. And don’t forget to read my post on Picture Organizing Tips.

-Jerri


Picture Organizing Tips

Over the years, photos have been the hardest thing for me to organize. I’m great at organizing my digital photos with folders, sub-folders, and sub-sub-folders. But actual pictures have been a problem for a number of reasons, largely because I’m always changing my mind about the format that I want to organize them in. (Album? Scrapbook? Both?)
In 2007 I finally decided that I would place all my prints in traditional photo albums, and whenever we have kids I’ll continue to do this, but I’m also planning to create scrapbooks using only the best photos from each special occasion.

I’m still not a photo organizing expert, but I was able to come up with a list of basic organizing tips for anyone like me who has been challenged in the past by photo organization.

————————————-

Tips for Dealing with Tangible Photos:

  • Choose a system and stick to it. Decide if you want to use albums, scrapbooks, or both, and make it a commitment to stick to the system you choose.
  • Before you start to organize your photos into books, decide how you want to organize the photos and the books. (Is there a theme? Will you have a scrapbook for each kid? Will you be organizing your books by year? How many events do you want to be contained in the book? How many pictures do you have versus the space available in your albums?)
  • Place limits on how many pictures you print from each event.
  • Place photos in album or scrapbook as soon as possible to avoid accumulating stacks of pictures.
  • Plan a day each week or each month to have a scrapbooking session. This can be as short as an hour or even just 30 minutes! Put it on your calendar like a a regular appointment and make it a priority. If you plan regular sessions, it will prevent you from accumulating massive stacks of pictures to organize.
  • Write dates and other relevenat information on the back of photos. Even if you have the best memory, you may not always remember everything. Plus, your kids will have the photos long after you’re gone and they may want this information.
  • Date and label your albums.
  • If you keep doubles or extra copies of photos, be sure that these are organized in a photo box. I keep mine in the original envelopes they come in, and I label the packets and place them in order by date into the photo boxes.

Dealing with Digital Photos

  • Plan times to upload pictures from your digital camera.
  • Don’t let too much time pass between uploads or you will be overwhelmed when you start to organize your photos.
  • Immediately place your newly uploaded photos into folders and sub-folders.
  • Delete bad or unnessesary photos before or after uploading.
  • Always keep an extra thumb drive on hand, in case your current one gets full.
  • If you’re using photos for your website or a project, upload them to photobucket, flickr, or another photo site. This way you can access them anytime, and you can delete them from your computer or thumb drive, leaving more space for your family photos.

-Jerri


—————
I’m linking this post to WFMW at We Are That Family

Menu Monday for March 30

I’m starting to coordinate my menus around my husband’s new ever-changing work schedule a little better. Items that take a while to cook are being prepared on his off days or when he’s on day shift, and on the days he’s on night shift, I’ve been fixing leftovers or something that I’ve made ahead the night before while he was working. It’s taking a little more time to plan these days, but I’m adjusting well so far.

And you may have noticed that for the past couple of weeks the number of dinners I’m cooking has decreased. My husband’s trying to diet a little. No, we’re not totally changing our menus…I’m kind of a picky eater myself, and my husband doesn’t go for what he calls….I believe it was “fancy fru-fru” food. So the only major changes that we’re making is to add more fruit into his diet and more green vegetables, and we’re starting to limit his portion sizes. And the great thing about this is that we have leftovers that I can pack into his lunches or have for another dinner. We’ve always had some leftovers, but now the casseroles and things that I make seem to be lasting even longer….which is awesome!

Here’s our menu for this week:

Breakfasts: fruit, cereal, yogurt, Monkey Bread, English Muffin Sandwiches
Lunches: grilled chicken salad, tuna sandwich, Ravioli, leftovers

Dinners:
Monday – leftovers from last week
Tuesday – Red Beans & Rice, corn, rolls
Wednesday – Meat & Potato Casserole
Thursday – Lemon Pepper Chicken, broccoli, rice
Friday – Leftovers
Saturday – Roast Chicken, potatoes, and carrots.
Sunday – leftovers

Visit Org Junkie for more menus, recipes, and fun.


-Jerri


Honest Scrap Award

Mary Beth from Dunkin Cooking The Semi-Homemade Way has given me the Honest Scrap Award. Thank you so much, Mary Beth, for thinking of me.

Here are the rules of the award: Choose at least 8 blogs that you find brilliant in content or design. Show the 8 winners names and links on your blog, then leave them a comment that they too have been given the Honest Scrap award. Then everyone must list at least 10 honest things about themselves.

So here we go…10 Honest Things About Me

1. My husband and I first met in Dramatic literature class. It was love at first sight for both of us, though it took several months before we ever went on our first date. We’ve been inseparable ever since, and I’m thankful for every day that we share together.
2. I’m a very shy and quiet person (except around my husband and good friends).
3. I love singing. In high school my favorite activity was chorus.
4. I’m a big country music fan. My favorite artists are Keith Urban, Tim McGraw, and Rascal Flatts.
5. I’m a big Care Bears fan….the 80s and 90s version, not necessarily the new show.
6. I have a growing obsession with cupcake stuff.
7. I love shopping for clothes, especially new tops, and I also love pajama pants with cute colors and designs. (And I confess, I have way more clothes than I need.)
8. I’ve just started making my own bracelets and earrings—I’ll let you know if I’m going to sell these on etsy.
9. Despite all these *bubbly* facts, I’m actually a very serious person. I follow politics and current events very closely (….in fact, the news is on right now as I type), and I’m very passionate about my beliefs.
10. …And I love my cats!

Now I have to Nominate 8 Blogs for this Award. Here are my choices:

Ruby Lane

Lynn’s Kitchen Adventures

Inside the White Picket Fence

The Cozy Country Home

This Southern Girls Nest

Candy Hearts and Paper Flowers

Jean Stockdale, Standing Near the Cross Ministries

The Adventures of Miss V

Congrats! Keep up the great work you guys!


-Jerri


Umecrafts Felt Patterns & Tutorials

Umecrafts Felt Patterns & Tutorials is the newest sponsor at Simply Sweet Home, and today I want to introduce you to this great shop.

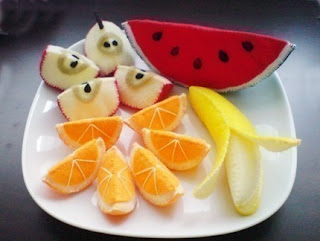
Felt crafts are all the rage right now, and Umecrafts sells the cutest felt patterns and tutorials available. Whether you want to create felt crafts for the kids, give them as gifts, make and sell them, or add them to your home decore, you’ll love the patterns at Umecrafts.

Jeannette is the owner and creator of all the original patterns at Umecrafts. She sells an array of lovely felt food patterns, as well as a felt tea set, felt balls, and even a miniature felt doll house. She has patterns for all skill levels, and she takes custom orders.


Umecrafts offers special sales and promotions, as well as a Buy 5 Get 1 Free Deal. Simply purchase 6 or more patterns in ONE single order, and the pattern with the highest price will be refunded as the free pattern. (Promo NOT APPLICABLE for items on SALE).

You can also get some free patterns and felt tips at Jeanette’s blog Lit’l Brown Bird, and Jeanette offers Free MACAROON PATTERNS when you join her mailing list. Just email her at jeanette.lin (at) gmail.com with the heading “MAILING LIST” and your name.

Whether you’re a veteran crafter or a curious beginner, if you’ve been wanting to join in on the felt food craze, head on over to Umecrafts and take a look around!


-Jerri

Best of Simply Sweet Home

It’s been a while since I posted a collection of links from a year ago, so this seemed like a good time to do it. By the way, my husband highly recommends the Easter Egg posts. Back in January he was asking me if I was going to post a link to the Easter egg post…so I’m posting it.

He’s very supportive of the blog and he loves that I’m doing it. But he only visits my blog occasionally, and of all the posts I’ve done, the Easter eggs seem to have stuck in his mind the most, other than all the food posts, of course!

In this edition, I’ve also included a couple of other recipes and a couple of cleaning posts.


-Jerri

Recipe of the Week: Buffalo Chicken Fingers

I’m always getting questions about the buffalo chicken fingers on my menus. Sometimes we purchase these from a local resturant and sometimes I make my own. They’re actually just like regular chicken fingers except that you add buffalo sauce.

Method for Cooking Buffalo Chicken Fingers:
-You can buy frozen chicken fingers that are already breaded or you can buy boneless skinless chicken fingers (or buy breasts and cut them into fingers yourself) and cover them in the breading of your choice.

-Then choose your cooking method. They can be fried on the stove or deep fried, or you can bake them.

-Then after they’ve cooked you simply dip them in a little buffalo sauce. The sauce can be found at your local grocery store. Frank’s is the most popular brand, but I’ve also used Moore’s. And you can find these in hot or mild. You can also make your own sauce (and I’m sorry to say that I can’t recommend a recipe to you because I’ve never made my own sauce).

-After dipping they are ready to serve. Or if you choose, after dipping you can place them in the oven for about five minutes so that the sauce is warm.

-Then serve them with ranch of bleu cheese dressing and celery sticks. They are also great with french fries and Texas toast, or (as my picture indicates) fried pickles.

Tips – If you don’t like buffalo, you can dip these in barbecue, chipotle, honey mustard, or another flavor of your choice.

-You can also use the buffalo sauce on grilled or baked fingers without breading.


Here’s a recipe for the plain breaded chicken fingers:

2 tablespoons butter or margarine
1/2 cup all-purpose flour
1/2 teaspoon garlic salt (or regular salt)
1 teaspoon pepper
1 1/2 pounds boneless skinless chicken breasts, cut crosswise into 1 1/2-inch strips

1. Heat oven to 425ºF. Melt butter in rectangular pan, 13x9x2 inches, in oven.
2. Mix flour, salt, and pepper. Coat chicken with flour mixture. Toss with melted butter in pan.
3. Bake uncovered 15 minutes. Turn chicken strips; bake 10 to 15 minutes longer or until no longer pink in center.

Options: You can leave the butter out, and cook these in the deep fryer or on the stove top in oil. You can also try dipping the chicken in a mixture of milk and egg before dipping in the flour mixture, or spread mayo on the chicken before dipping. *
———————————–
Please visit the following sites for more great recipes & other ideas:
Tempt My Tummy Tuesday is hosted by Blessed With Grace.
Homemaker Mondays is hosted by
11th Heaven’s Homemade Haven.
Making A Happy Home Monday is hosted by
As For Me and My House….
Kitchen Tip
Tuesdays is hosted by Tammy’s Recipes
Make Something Monday is hosted by
Go Graham Go! and Jolly Mom
Tasty Tuesday is hosted by
Forever Wherever.
I Am Blissfully Domestic is hosted by Blissfully Domestic.

-Jerri

Menu Plan Monday for March 23

Breakfasts: waffles, honey buns, cereal, Carnation Instant Breakfast, yogurt
Lunches: Bacon & Egg Sandwich, turkey sandwich, tuna sandwich, leftovers

Dinners:
Monday- Pepper Chicken & Sour Cream Gravy, peas, & rice
Tuesday – Meat Loaf (new recipe), peas, mashed potatoes, biscuits
Wednesday – Chicken Lasagna (new recipe) & Italian Bread
Thursday – Leftovers (from Mon & Tues)
Friday – Chicken Fingers
Saturday – Leftovers (from Wed & Fri)
Sunday – Creamy Chicken Soup & Biscuits

Visit Org Junkie for more menus, recipes, and fun.


-Jerri