Creamy Swiss Chicken Bake

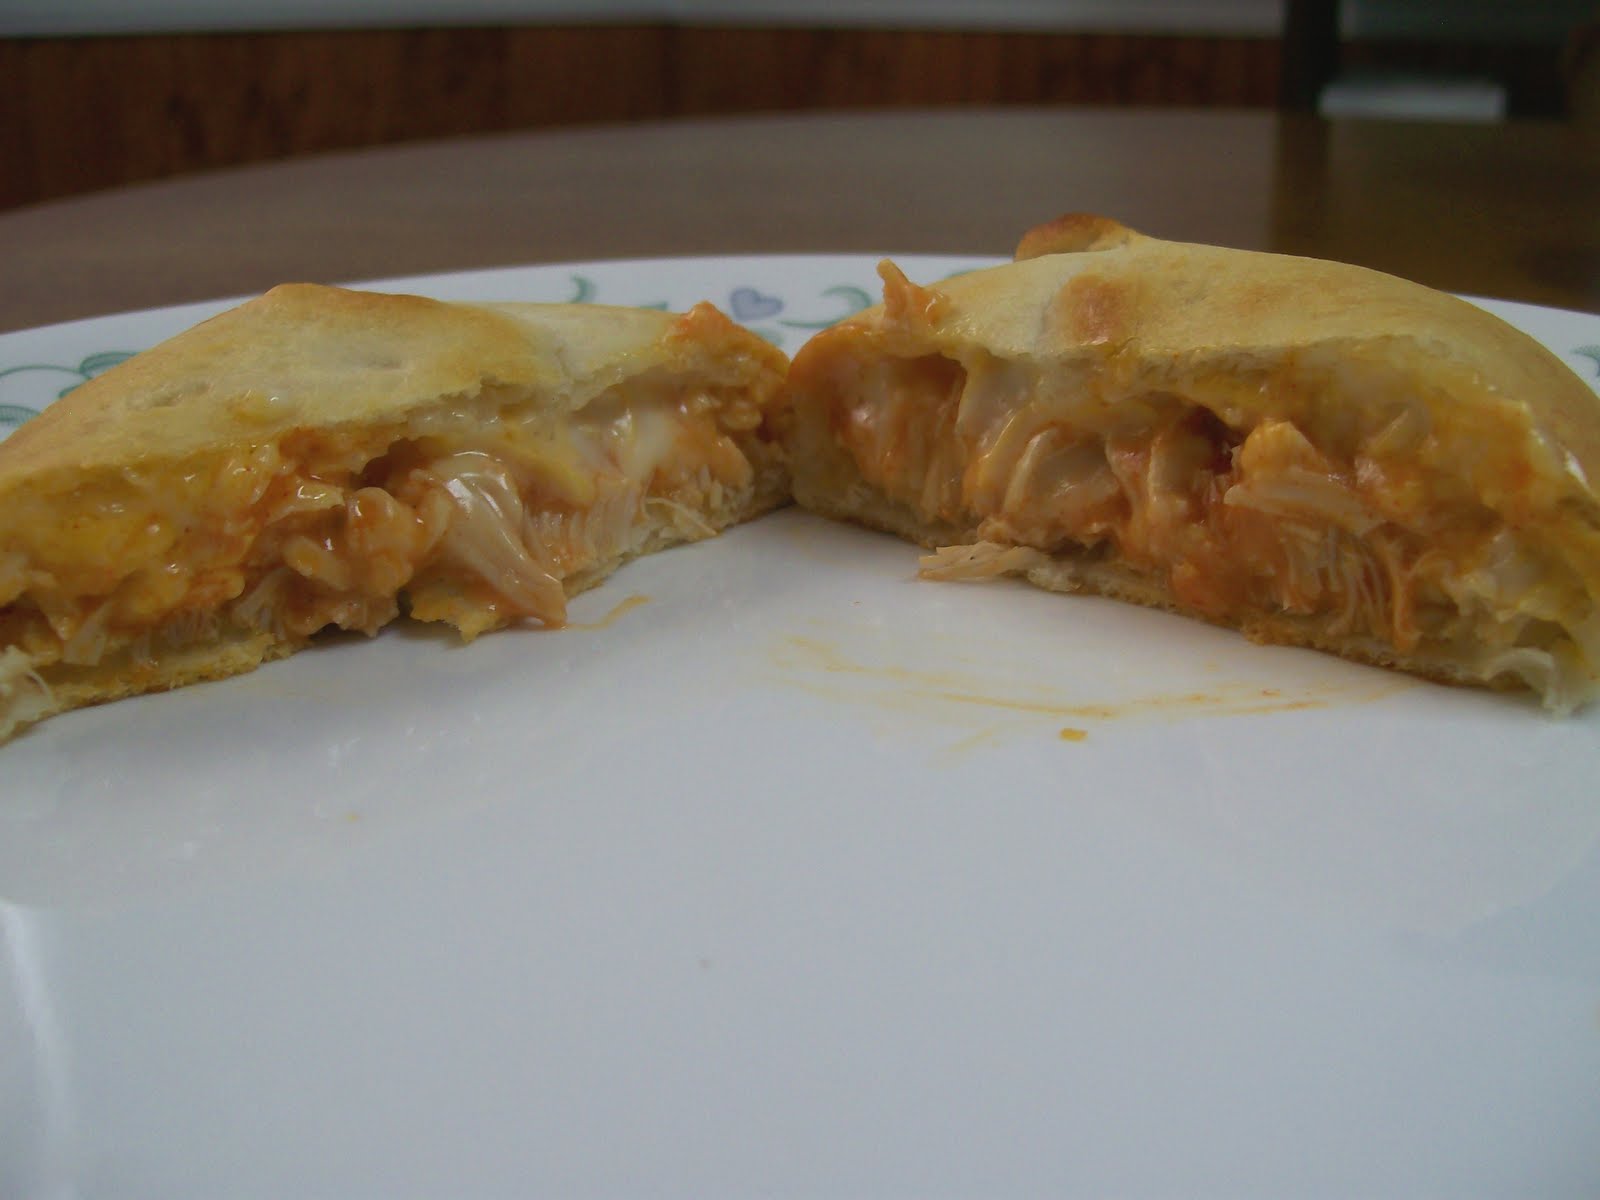
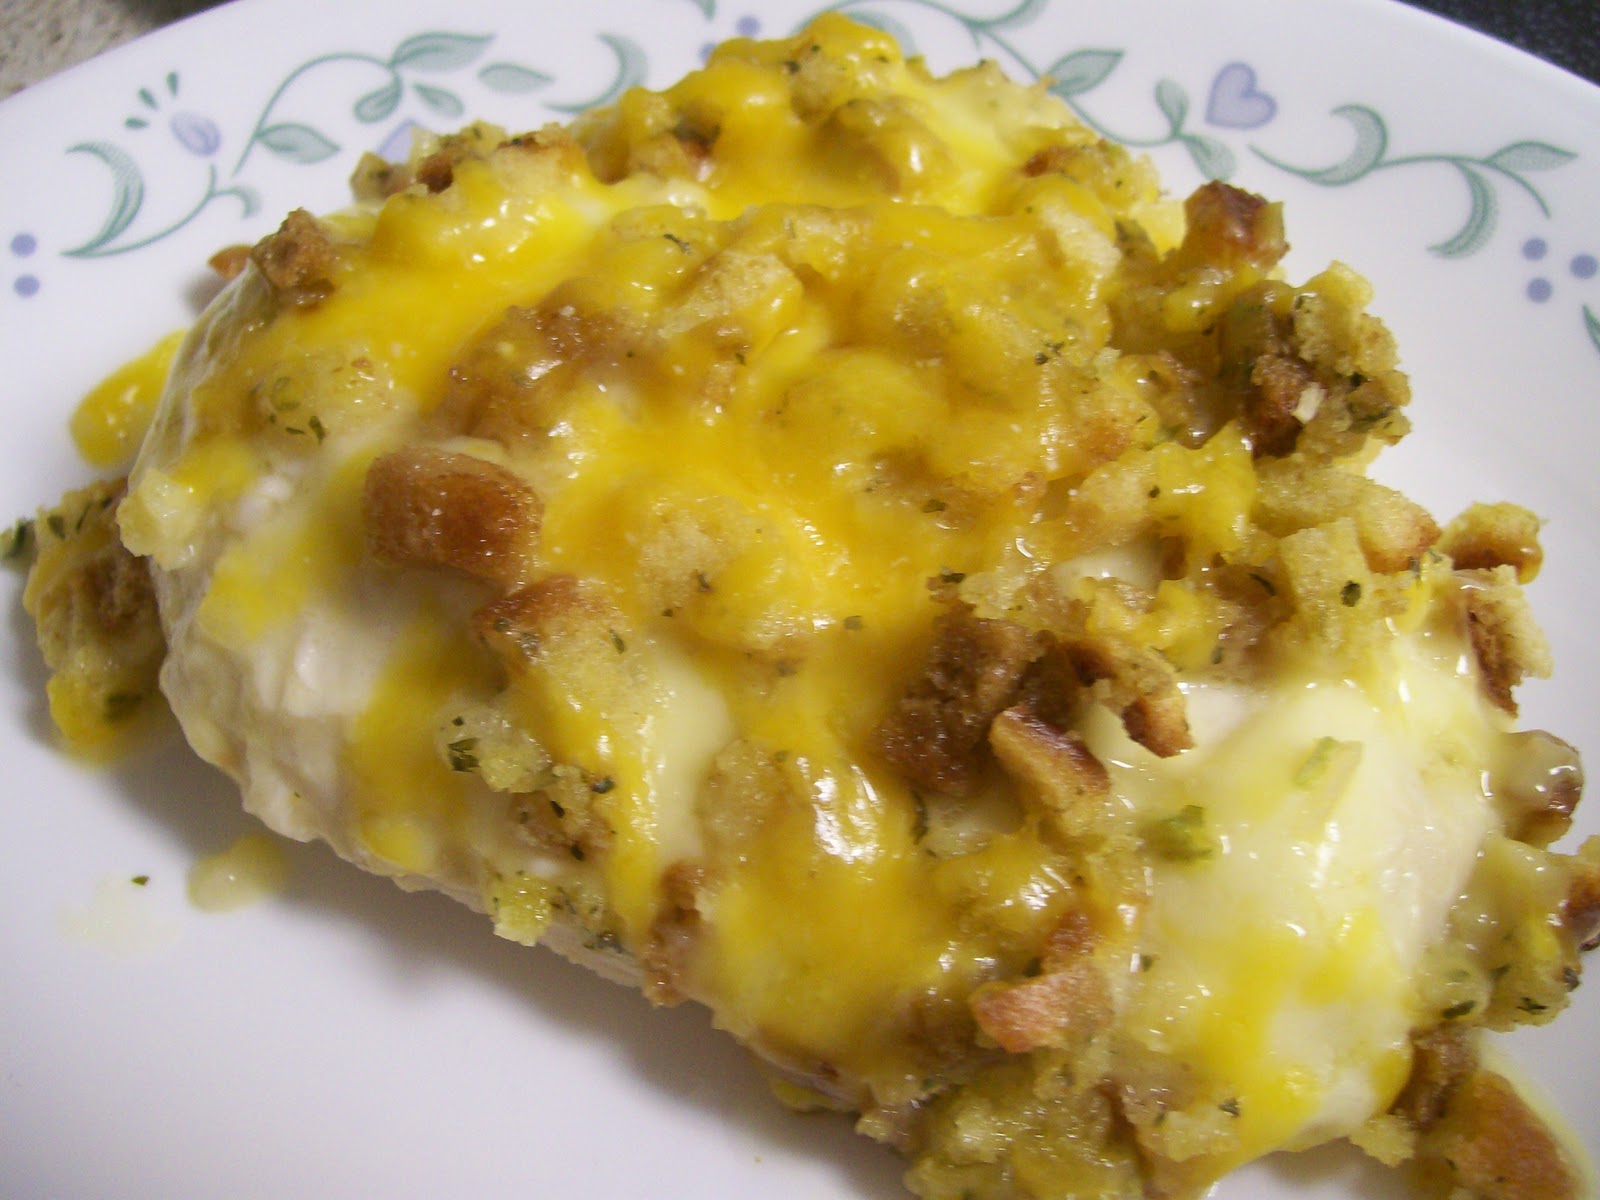
We eat a lot of chicken at our house, so I’m always looking for ways to change it up with different flavors.   This recipe brings a lot of great flavors together using only a few ingredients.  And it proves once again, what an amazing invention stuffing mix is!  It’s also hot and creamy, which makes it the perfect comfort food for a cool fall evening.

Don’t forget to come by tomorrow and enter my 3-yr blogiversary giveaway!

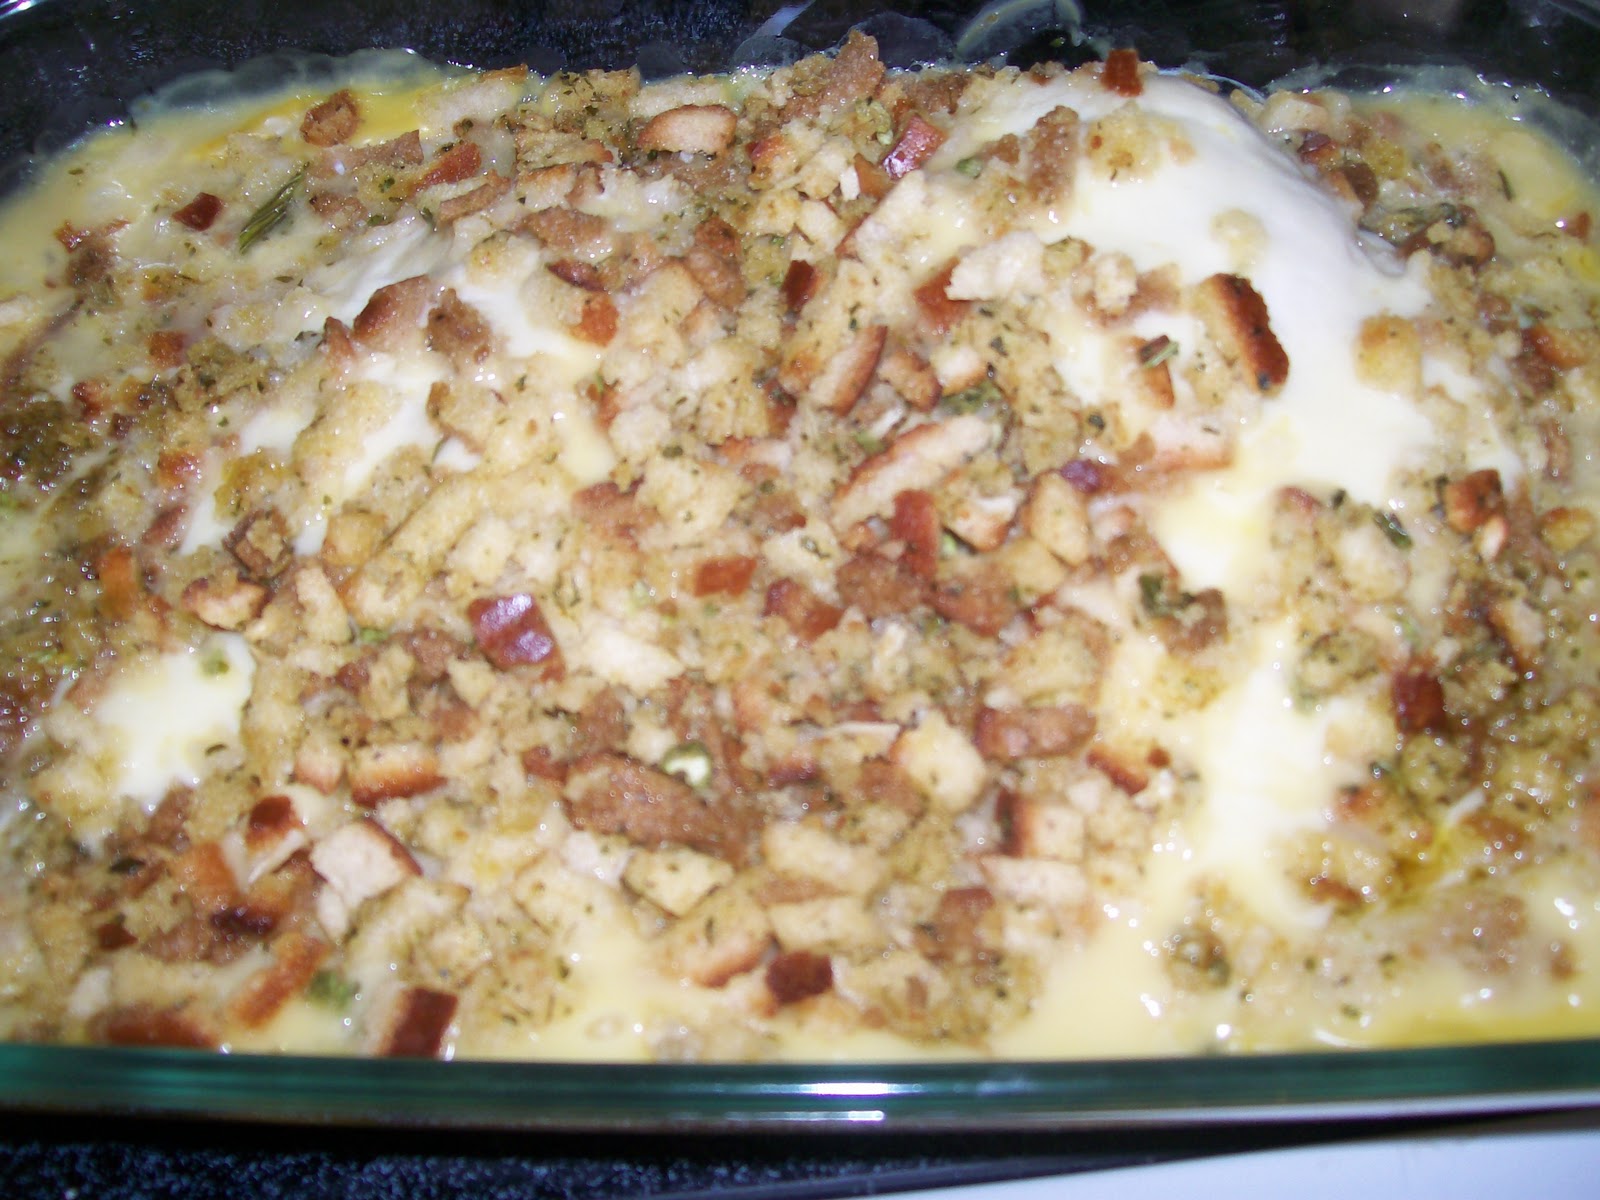
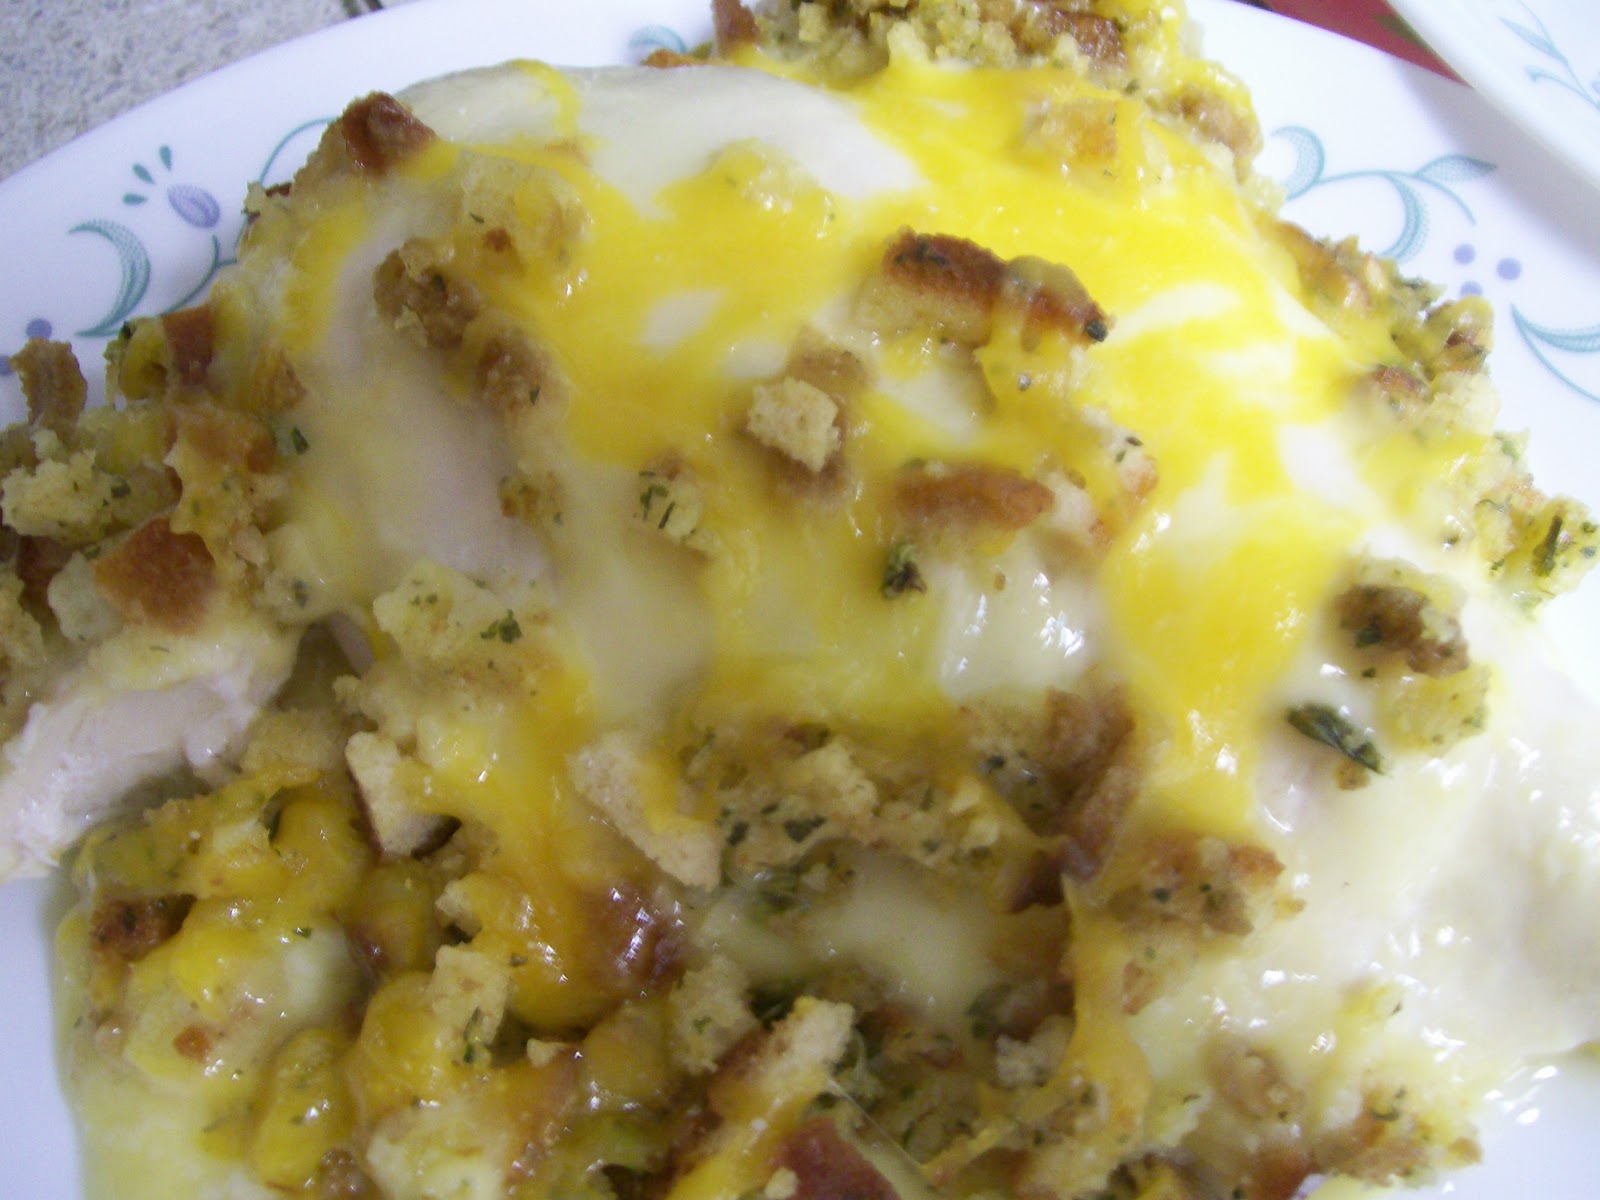
Recipe for Creamy Swiss Chicken Bake:
Ingredients:
4 boneless skinless chicken breasts
8 Swiss cheese slices
1 (10.5 oz) can condensed cream of chicken soup
1/4 cup white wine or apple juice
1/4 cup butter or margarine, melted
1 cup herb seasoned stuffing mix, crushed
cheddar cheese (this wasn’t in the original recipe but I added it on top)
Directions: Spray a 13×9-inch baking dish with cooking spray. Place chicken breasts in bottom of prepared pan. Cover with cheese slices. In a small bowl, combine the soup and white wine or apple juice; mix well. Pour or spoon mixture over chicken. In a separate small bowl, combine the melted butter and stuffing mix; sprinkle over soup mixture. Bake at 325 degrees F for 35 to 40 minutes or until meat is no longer pink. Makes 4 servings.

Linking up this week at these fabulous parties.

Photobucket

Homemade Samoa Cookies

I see so many recipes each week that I want to try.  Right now I’ve got a huge Word document full of recipes that I’ve found on various blogs and websites. And hopefully I’ll get around to trying them all one day! This week I’m sharing a yummy recipe that I found a few months ago over at Santa’s Gift Shoppe.  When I saw this recipe, I immediately knew that I had to try it, because my husband just loves Samoas!  And let me tell you, these cookies did not dissapoint.  I’m not even fan of Samoas. (I’m a Thin Mint girl!) But I just loved these!

Reminder: Don’t forget the Sweet Thursday Cookie Round-up is this week.  Come by and link up your cookie recipes.  Linky will be posted some time on Wednesday night!

Recipe for Homemade Samoa Cookies
Ingredients:
Shortbread Cookies:
1 cup butter, softened
1/2 cup sugar
2 cups flour
]1/4 tsp baking powder
1/2 tsp vanilla extract
Up to 2 tbsp milk (Only use if too dry!)

Coconut-Caramel Topping
3 cups shredded coconut
12 oz. caramel cubes
1/4 tsp salt
3 tbsp milk

Chocolate Drizzle & Chocolate Bottom
8 oz. semisweet chocolate chips
Cookie Directions:  Cream together butter and sugar.  Mix in flour, baking powder and salt. Then add vanilla.  Only add milk if the dough is too dry and won’t stick together. (Add additional flour if dough is too sticky.)  Roll out dough and cut with round cookie cutters or roll dough into balls and flatten between hands.  Bake cookies at 350 degrees for 11-13 minutes.
Topping Directions: After all your cookies are baked, spread coconut evenly onto a parchment-lined baking sheet (preferably one with sides) and toast for 20 minutes, stirring every 5 minutes, until coconut is golden brown.  Set aside and let cool on baking sheet.
Unwrap caramels and place in a large microwave-safe bowl with milk and salt.  Cook on high for 3-4 minutes, stopping to stir a few times to help caramel melt.  When smoth and creamy, fold in toasted coconut with spatula.  Use an offset spatula to spread topping onto cookies. (I just used a spoon.)  If the caramel gets too firm, just place it in the microwave for a few seconds to remelt.
Chocolate Directions:  While topping sets up, melt chocolate in a small bowl, for 1-2 minutes stirring every 15 seconds to prevent scorching. To get the chocolate on the bootom of the cookies, you can either dip the cookies in the chocolate, or take each cookie and spoon the chocolate onto the bottom of the cookies.  (I found it easier to spoon the chocolate on.) Place cookies on wax paper and place in the freezer for a few minutes to set.

Use remaining chocolate (or melt more chocolate if neccessary) and place in a piping bag or a Ziploc bag with the corner snipped off and drizzle on cookies in a back and forth motion for desired effect. Allow chocolate to set, and get ready to serve!

Check out my sidebar or my Parties Page to see the fabulous sites I link up to each week!

Photobucket

Shortbread Cookies

Even though I’m a total chocolate lover and I’m always finding new and exciting recipes to experiment with, sometimes I just like something simple and plain.  As a child, it thrilled my soul when I’d get to eat homemade teacakes.  They were so simple….no chocolate candies, frostings, or sprinkles involved, yet they were so yummy!  So today I’m paying tribute to that simpler time and that simpler taste with these delicious shortbread cookies.
Reminder – If you have a cookie recipe you’d like featured for this month’s cookie round-up, please email me.  Bars are welcome too!

Recipe for Shortbread Cookies:
Ingredients:
1 cup butter (2 sticks), softened
1/2 cup sugar
2 cups flour
1/4 tsp baking powder
1/2 tsp salt
1/2 tsp vanilla extract
If dough is too dry, add up 2 tbsp milk. (I didn’t do this.)

Directions: Mix together all your dry ingredients. Then add butter and vanilla extract.  Mix well. Add milk if dough is too dry.  Roll out in to dough balls or use a cookie cutter.  Bake at 350 degrees for 11-13 minutes. 
Note – Be careful that you do not overbake these. Even cooking them a couple of minutes too long could make them brown and hard, and they won’t taste nearly as good, so keep watch as these are baking.
Tip – If you’re not looking for something simple, you can always put frosting on these. In fact, they’d be great for sandwich cookies too. Or you could add anything else you like.  In a couple of weeks, I’ll also be sharing something else that you can do with these shortbread cookies.  (You’ll definitely be excited, so stay tuned!)

Check out my sidebar or my Party Page to see all the fabulous places where I’m linking up.

Photobucket

Buffalo Chicken Calzones

I have always loved calzones, stuffed sandwiches, Hot Pockets, or whatever you wish to call them.  There’s no telling how many Ham & Cheese pockets I’ve eaten over the years for lunch or for a snack!  Hubby, on the other hand, isn’t much of fan.  However, when I saw this recipe over at Tidy Mom, I just new it was one calzone that he would approve of.
I made a few changes to the recipe and gave it a try.  At first my husband had a negative response when I told him I was trying a new recipe for calzones, but when I told him it was buffalo chicken calzones, he quickly changed his tune. And of course, he loved it.  Now this recipe is a new favorite at our house!
Recipe for Buffalo Chicken Calzones:
Ingredients:
1 can of refrigerated pizza dough (Pillsbury works best. I used the Thin, Crispy type that comes in the long tube.)
1 can of chicken breast (or use one or two boneless chicken breasts, cooked and chopped)
Buffalo Sauce (I like Frank’s)
Ranch Dressing (alternatively you could use bleu cheese dressing)
Shredded Cheddar Cheese
Directions:  Drain the water off your chicken.  Place in a small bowl.  Add buffalo sauce and ranch dressing.  I didn’t meausure;  I just put a little of each end.  The amount will depend on just how spicy you want the calzones to be.  (Just keep  in mind that you want the mixture to be of the same consistency of a tuna or chicken salad, not runny.) Next add your cheese.  Again, I just threw some in.  I’d say it was about 1/3 or 1/2 cup.  Mix well.
Next roll out your pizza dough on to a baking sheet.  I rolled it out on top of a piece of parchment paper to prevent sticking.  Take a knife and cut your dough into fours as shown below.  (Note: The first time I made this I used an off brand pizza crust, and I was only able to cut the dough into threes, otherwise they would have been too small.  This also meant that I had a little bit of the chicken mixture left over.  This is why I recommend the Pillsbury crust.)
Spoon your chicken mixture on to each piece.  You need to place it on one side so that you can easily fold it over to make the calzone, but place it about 1/2 to 3/4 of an inch away from the edge so the stuffing doesn’t fall out.  Now take the side that isn’t covered in the chicken mixture and fold it over.  Use a fork or your hands to seal the calzone on each side.  Bake according to the directions on your pizza crust and serve!

Berry Pina Colada Cake

I don’t know about you, but around here it is still very much the summer season, despite school being back in session, high school football starting this week, and so forth. I laughed today when the weather guy on the radio said, “Much cooler and less humid today. High of 94.” (I know we all long for the days when it’s only 94 degrees outside!)  As you can imagine, a cool treat would really hit the spot about now!


I discovered this recipe back in July. Each year my hubby’s family celebrates the 4th of July by having a family reunion, complete with seafood gumbo, fried chicken, potato salad, and of course—dessert!  Today I’m sharing one of the yummies that was served at this year’s event!
Don’t forget to come by here on Thursday and share a fruity dessert with us for Sweet Thursday!

Recipe for Berry Pina Colada Cake:


Ingredients
1 yellow cake mix
3 eggs
1/3 cup oil
1 to 1 1/3 cups water (depending on brand you’re using)
1 16 oz. can pineapple juice
1 8 oz. tub whipped topping
1 bag flaked (or frozen) coconut
1 package strawberries, fresh or frozen
1 package blueberries, fresh or frozen

Directions: Mix together cake mix, oil, water, and eggs.  Bake as directed on box. Let cake cool completely. Use a utensil to poke holes in cake. (A wooden spoon, skewer or other round utensil works best.) Then pour your pineapple juice over the entire cake.  Next spread your whipped topping over the cake, and sprinkle your coconut over the top.  Finally arrange your strawberries and blueberries on top of the cake as desire.  Let chill in the fridge. Serve cold.

I’m linking up with some fabulous ladies at these linky parties!

-Jerri

Bacon Cheeseburger Pizza with a Twist!

It’s over a hundred degrees here and very humid and has been this way now for weeks! It’s been so hot for so long that the grass is brown.   Even our neighbors who ordinarily mow every week (often twice a week….no lie!) and who have the TruGreen guys come out once a month to ensure they have the greenest lawn in the neighborhood……yes, even they have brown grass now!
Needless to say, the last thing I want to do is heat up the house by cooking.  But sometimes it’s just unavoidable. So I’ve been trying to do a lot of stove top meals, and if I do use the oven, I’m trying not to cook anything that takes over 30 minutes to bake.  So pizza is a great option!
Here’s a bacon cheeseburger pizza that I made with a slight twist that I think adults and kids will like.  My only regret was that I didn’t have enough cheese to top it off as I normaly would, but it was still quite tasty. 

Recipe for Bacon Cheeseburger Pizza

Ingredients:
1 refrigerated pizza crust.
1 lb hamburger meat
several pieces of bacon, crumbled (or bacon bits)
shredded cheddar cheese
ketchup
mustard
1 small onion, chopped (optional)
1 tomato,chopped or sliced (optional)

Directions:  Brown your hamburger meat and cook bacon in a skillet on the stove. (To save time, I use precooked bacon. Or you can also use bacon bits.)  Drain the fat and set aside.  Roll out your pizza dough on a pizza pan or baking dish.  If you do any prebaking on your pizza crust, do it at this time.  In a small bowl, mix together your ketchup and mustard. (I didn’t measure it out; I just started mixing until I got the consistency and amount I needed.)  Spoon out your ketchup and mustard mixture on to crust. Next chop up your onion and tomato if using, and add all toppings to your pizza as desired. (I like to do a layer of cheese, followed by other toppings, and then another layer of cheese on top.)  Bake pizza as directed on crust package, and serve!

Linking up at these parties.
-Jerri

Instant Yogurt Smoothies

I’ve been drinking Carnation Instant Breakfast drinks for almost 15 years now.  It was always such a perfectly delicious and quick snack to drink on the way to work or school.  Usually I drink the milk chocolate, but I actually love all the flavors. 
Over the past year I’ve also developed a love for Yoplait’s Yoplus Yogurt.  Strawberry is my favorite flavor, but I also enjoy the raspberry and the strawberry banana.   So I decided to combine these two breakfast treats into one quick and easy smoothie.  The result was sweet and delicious!
If you have a fruity treat to share with us, please send it in to me for Sweet Thursday by August 25.

Recipe for Yogurt Smoothie:

Ingredients:
1 4oz yogurt
3/4 cup milk
1 envelope Carnation Instant Breakfast mix (I used vanilla flavored.)

Directions: Blend together your milk and yogurt. Then add drink mix and blend to smooth. Makes one medium size smoothie. For an extra fruity, extra thick smoothie, add 1 to 2 oz.of fruit.

*Tip: This would also be a great smoothie to make with Whey Protein Powder or other powered drink mixes you may have on hand.

I’m linking up to these fabulous parties!

-Jerri

BBQ Stuffed Potatoes

Previously I’ve written about Big Bob Gibson’s barbeque on this blog.  It is a local restaurant here in my town, but you may have seen them on shows like Paula Deen, Rachel Ray, and The Today Show.  Or you may have seen their book: Big Bob Gibson’s BBQ Book: Recipes and Secrets from a Legendary Barbecue Joint
Anyway, we go to their restaurant about once a month for one of their famous Barbeque Stuffed Potatoes (like the one pictured above).  These things are so good!  And they’re huge! (I’ve never been able to eat a whole one in one sitting.) They’re so great that my husband says that people shouldn’t come to this area without trying it out.
I also attempt to make my own BBQ potatoes from time to time, although mine aren’t nearly as good as Big Bob’s. But still, it’s a good alternative when you can’t have the real thing. So if you ever have any pulled pork, beef, chicken, or turkey on hand, you should give this a try!

How to Make BBQ Stuffed Potatoes:

Ingredients:
Baking Potatoes
Butter/Margarine
Shredded Cheddar Cheese
Sour Cream
Bacon Bits
Chives
Meat Choice, shredded (Pulled Pork, Chicken, Turkey, or Roast Beef)

Directions:  Cook your meat choice in a crock pot. (I usually just cook it in a little Dale’s Sauce (& water of course).  And I know sometimes my dad just seasons with salt/pepper and adds a little Coke.) You can also cook in a smoker if you have one, which would actually taste better and be more authentic.
Wrap your potatoes in foil and bake in the oven till done.  When done, pull back foil and cut potato down the middle. Add your butter, followed by your sour cream, cheese, bacon bits, and chives.  Finally top with your cooked meat. 

You also top your potato with barbeque sauce if you wish. We buy Big Bob’s red sauce, which is on sale at their website, and that’s what my husband puts on his potatoes. (I eat mine “plain”, although I do love their white sauce on grilled chicken!)

I’m linking up at It’s a Blog Party, Blessed with Grace, Crazy Jayz  and some of these linky parties.

-Jerri

French Vanilla Mousse

French Vanilla Mousse
With the theme of this week’s Sweet Thursday event being summer desserts, I decided to make something cool and creamy. This recipe was originally for chocolate mousse, but I decided to try it in vanilla first, because I just love vanilla during the summer time. It was also my idea to add Nila wafers as a garnish, and in my opinion they were a perfect choice!  This mousse was very yummy, very fluffy, and VERY sweet!
I think this would definitely be good using a number of flavors. (Chocolate is definitely at the top of my list to try next!)  And I also think this would be a great recipe to add bananas to, for a fluffy banana pudding, or you may even consider adding other fruits like strawberry (perhaps layered together with pound cake for a lovely trifle….yum!)
So anyway, in case you can’t tell, I definitely would recommend this recipe to you, not just because it was so delicious, but also because there’s so much you can do with it!
French Vanilla Mousse Prep
Recipe for French Vanilla Mousse
Ingredients:
1 (14 oz.) can Sweetened Condensed Milk
1 cup cold water
1 (4-serving size) package French vanilla instant pudding mix
1 (8 oz.) container frozen light whipped topping, thawed
Nila Wafers (or other cookies to garnish with)
Directions: Whisk sweetened condensed milk and water in large bowl. Add pudding mix. Whisk 2 minutes or until well blended. Chill 5 minutes.  Fold in whipped topping. Spoon into serving dishes. Chill. Garnish as desired. (I layered with Nila wafers.)
Vanilla Mousse
Photobucket

Szechuan Sweet & Sour BBQ Chicken (& Lawry’s Giveaway)

I don’t know anyone who doesn’t love summer grilling season!  Where I live, every weekend there’s some grilling going on in our neighborhood.  I know because we can smell it from our front porch!  Now Lawry’s is making the summer grilling season even more exciting with their new marinades.  Flavors include:
-Applewood & Plum – Juicy plums accent smoky applewood and add flair to all-American barbecue.
-Cilantro & Lime – Cutting across the diverse cuisines, this bright and zingy pair is a refreshing taste of summertime.
-Rosemary & Fig – Figs are an unexpected and regionally inspired match for aromatic rosemary.
-Chipotle & Maple – This culinary comingling deliver a fresh take on smoky, spicy and sweet.
-Brown Sugar & Bourbon – This duo brings a delicious dose of Southern charm to the patio.
-Cinnamon & Coffee – Bold and confident – with just the right edge of bitterness.
-Red Chili Sauce & Mango – The flavor of mango takes hot or sweet red chili sauce far beyond mere “condiment status.”
-Tuscan Sun Dried Tomato – Featuring extra virgin olive oil, sun dried tomatoes, sweet red bell peppers, and a blend of herbs and spices.
-Szechuan Sweet & Sour BBQ – features Chinese five spice blend with a touch of Szechuan heat.
Recently I got to try two of Lawry’s newest flavors: Szechuan Sweet & Sour BBQ and Tuscan Sun Dried Tomato. Not only are these marinades delicious, but they have a very unique taste.
I was very excited to serve the Szechuan Sweet & Sour BBQ Chicken to my husband last week. I’ve never made any chicken quite like this, and it was very well received. The marinade features a Chinese five spice blend, ginger, sesame oil, and red pepper. Just imagine the best sweet and sour chicken from your favorite local Chinese joint and then add a spicy kick and your back yard grill! The result is yummy!
As you can see from the photos, I served our chicken over a bed of Asian style rice and vegetables. This was perfect for a quick and inexpensive gourmet meal.  And I love that these are 30 minute marinades, so I don’t have to worry about doing the marinading the day before.  (Perfect if you sometimes have to throw something together at the last minute!)
I’m very excited to be trying the Tuscan Sun-Dried Tomato next and will be posting the food as soon I’ve made it. For this purpses of this post, I’ve gotten a taste of the marinade already. It’s an oil and vinegar based marinade, infused with sun-dried tomatoes, sweet red peppers, and a blend of herbs and spices, including rosemary and oregano. Yum! I’ll let you know how it turns out on food, but I can already tell you, if the taste of the marinade alone is any indication of how it will be on cooked meat, we are in for another super-delicious meal!

Win it!  One Simply Sweet Home reader will win a Lawry´s Get Grilling Kit. The kit includes: 
  •  Both of the new Lawry´s marinades: Tuscan  Sun-Dried Tomato and Szechuan Sweet & Sour BBQ
  • Lawry’s Seasoning Salt
  • A set of skewers.
  • Pyrex marinating dish.
Giveaway closed. Congrats to Rene at Three Boys and an Old Lady!

I’m happy to link up each week to some fabulous blog parties.
-Jerri
Disclosure:  The opinions in this post are my own.  For hosting this give away I received a Lawry’s prize pack like the one being given away.  I was not paid to post.  Lawry´s products, information and additional prize pack to give away are provided by Lawry´s through MyBlogSpark.