Pumpkin Bread

Fall weather is finally in the air around our house!  It really makes me crave the tastes of fall and all those great Thanksgiving classics!
Today I’m sharing a little taste of fall. I made a little tray of fall goodies for my husband to carry to work last week, and the Pumpkin Bread was a very popular treat. Hope you enjoy!


Recipe for Pumpkin Bread:
1 1/2 cups sugar
2 eggs, slightly beaten
1/2 cup oil
1 cup pumpkin
1 3/4 cups flour
1 tsp baking soda
1/4 tsp baking powder
1 tsp salt
1/2 tsp cinnamon
1/2 tsp. cloves
1/2 tsp nutmeg
1/4 tsp allspice
1/3 cup water
1/2 cup nuts (optional)

Directions: Mix sugar, eggs, oil, and pumpkin in a bowl.  Add dry ingredients and water in the order listed above. Mix well. Stir in nuts (if using). Pour into a greased and floured loaf pan and bake at 350 degrees for 1 hour or longer if needed. Makes one loaf.

Tip: For a sweet dessert bread, top with a little cream cheese frosting. Yum!


Photobucket

I’m linking up at Tidy Mom and these parties.

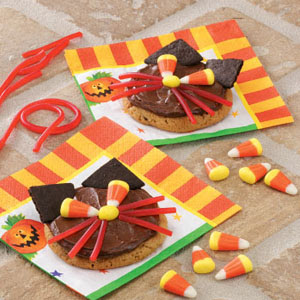
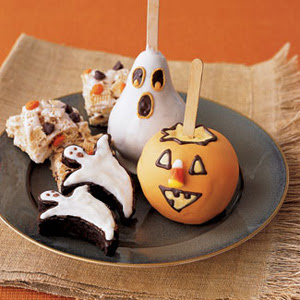
Fun Halloween Sweets

Photo Credit: Taste of Home
Can you believe that Halloween is just a couple of weeks away? Whew…how time flies! Today I’ve got an array of fun sweets and treats to help inspire your creativity this Halloween!

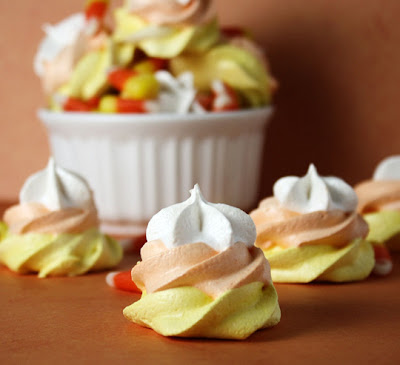
Candy Corn Meringues from The Kitchn

Gingerbread Skeletons from Family Fun

Skeleton Cupcakes from Women’s Day
Sugar Ghost Cupcakes from Taste of Home

Trick or Treat Sweets from Good Housekeeping

Photobucket

I’m linking up at Tidy Mom and these parties.

Orange Dream Parfaits


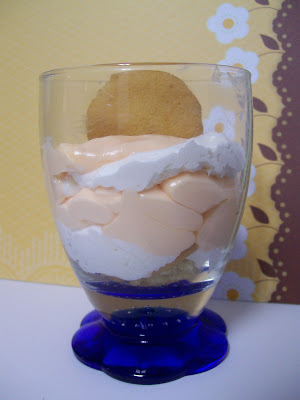
Since orange is the quintessential fall and Halloween color, it seemed like the perfect week for me to share these Orange Dream Parfaits.  Previously I’ve shared my Orange Dream Pie, one of my husband’s favorite desserts.  This is basically that same recipe in parfait form, and it’s super delicious!

Recipe for Orange Dream Parfaits:
Ingredients:
Nila Wafers or Graham Crackers
2/3 cup boiling water
1 pkg. (3 oz.) orange gelatin
1 package (8 oz) Cream Cheese
1 tub (16 oz) Whipped Topping
Directions:  Heat water to boiling. Pour into a bowl.  Add gelatin mix. Stir 2 minutes. until completely dissolved. Cool for 5 minutes.   Pour into blender. (You must use a blender.  A mixer will cause mixture to splatter.) Place softened cream cheese in blender, and blend well.  Pour into large bowl.  Slowly add  8 oz of whipped topping. (The other half of the container will be used to layer with in the parfaits). Blend well.
Crush half a box of Nilla wafers (or other cookies of your choice).  Layer cookies, orange mixture, and whipped topping into cups.  Garnish with additional cookies and serve.


Photobucket
I’m linking up at Tidy Mom and these parties.

Satisfy Your Sweet Tooth: Nicole’s Homemade Treats

I’m excited to welcome back Nicole’s Homemade Treats as a sponsor to my blog!  As you all know, I have a huge sweet tooth, so this shop is right up my alley!

Nicole is a stay at home mom of two boys and a military spouse. And she has spent many hours trying to get her treats “just right!”

Nicole’s Homemade Treats is an LLC operating out of New York State. All the products are prepared in a fully licensed kitchen. NYS Dept. of Agriculture #31AAAA

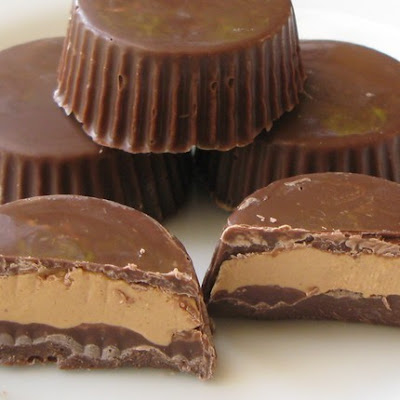
Nicole’s shop features everything from organic chocolate bars and Rocky Road Candy to my favorite peanut butter cups, and just about every chocolate truffle or cluster that you can imagine!

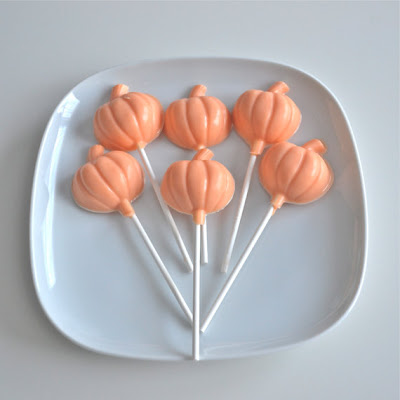
And right now Nicole has some amazing fall treats in stock like these Chocolate Pumpkin Lollipops. Aren’t they adorable?

And Nicole also has these amazing gourmet candy apples and pears, one the quintessential fall treats!

Don’t these look positively divine and scrumptious? I think so!

And besides the gourmet apples and pears, there’s a lot of other fruit and chocolate treats.

And another treat that I found positively scrumptious and festive for fall was this White Belgian Chocolate Hazelnuts and Dried Apricot Mediants candy:

And as if all all the candies and sweets aren’t enough, Nicole’s Homemade Treats also offers homemade sauces.

And if you’re looking for something a little less sweet but just as delicious, check out her baked granola and fruit & nut mixes!

The treats are prepared in small batches, to preserve the taste and quality of the product, and to ensure that there is no waste. It takes about 5-7 days to produce your order. But Nicole PROMISES – they will be worth the wait! Go by Nicole’s Homemade Treats and place your order today!

Photobucket

I’m linking up at Tidy Mom and these parties.

Pudding Cookies

One of the great things about hosting my linky party is that it gives me a chance to get recipes and ideas that I might not have otherwise found through regular blog surfing or hopping through links at other parties.  One blog that always shows up to the party with some standout eats and treats is Chef in Training. Back in July, they linked up these Pudding Cookies, which I made almost immediately.  And they were just scrumptious!

Recipe for Pudding Cookies:


Ingredients:
1 1/2 sticks butter (3/4 cup)
3/4 cup brown sugar
1/4 cup sugar
1 (3.4 oz) package instant vanilla pudding
1 tsp vanilla
2 eggs
1 tsp baking soda
2 1/4 cups flour
1-2 cups chocolate chips

Directions: Preheat oven to 350 F. Mix flour and baking soda together. Set aside.

In a large bowl, cream butter and sugars together. Add in pudding package and beat until well blended. Add eggs and vanilla. Add flour mixture slowly until well incorporated. Add chocolate chips or other add-in.

Roll into 1 inch balls and place on greased baking sheet. Bake at 350 F for 8-12 minutes.

Photobucket

I’m linking up at Tidy Mom and these parties.

Chocolate Mousse

With this current heat wave, you can’t have enough cool, no bake desserts!  The other day I made this super yummy chocolate mousse!  It’s perfect if you’re hungry for something rich and chocolately but you’re not in the mood to cook!  Enjoy!


Recipe for Chocolate Mousse
Ingredients:
1 (14 oz.) can Sweetened Condensed Milk
1 cup cold water
1 (4-serving size) package Chocolate instant pudding mix
1 (8 oz.) container frozen light whipped topping, thawed
Oreos (or other cookies to garnish with)
Directions: Whisk sweetened condensed milk and water in large bowl. Add pudding mix. Whisk 2 minutes or until well blended. Chill 5 minutes.  Fold in whipped topping. Spoon into serving dishes. Chill. Garnish as desired. 

This post is sponsored by The Trendy Boutique.  The place for trendy, fun, and affordable shopping!  Check out everything they have to offer from watches to photo jewelry and hand stamped jewelry.  And even design your very own flip flops and hand bags!  Find all the accessories you need  for summer and back to school!

Photobucket


I’m linking up at Tidy Mom and these parties.

Lemon Pudding Pound Cake

Lemon is such an amazing flavor for summer time! As a kid, lemon desserts were always my favorite!  Since getting married I haven’t tried many recipes of the lemon persuasion, as my hubby’s not a fan.  But then several months ago, I had a slice of this lemon cake at a potluck, and I was totally wishing I could take the whole thing home with me!
Since then I’ve been on a search for the perfect lemon pound cake.  I decided to start with this recipe.  I’ve seen it on several sites but most recently over at Tidy Mom.  And I think I’ve already found my perfect lemon pound cake.  (Hubby even tried it and loved it! So…Hooray! We have a winner!)

Recipe for Lemon Pudding Pound Cake:
Cake Ingredients:
1 box lemon instant pudding mix (4 serving size)
1 box yellow cake mix
4 eggs
1 cup water
1/2 cup oil
Glaze Ingredients: 
2-3 tablespoons lemon juice
1 cup powdered sugar
Directions:  Spray pan with cooking spray.  You can use a 9×13 or bundnt.  Preheat oven to 350.  Combine all cake ingredients and mix for 2 minutes and medium speed.  Pour into pan and bake. For a 9×13 cake bake for 30-35.  For a bundt, bake 35-40 minutes.
Let cake cool completely.  Then whisk together powdered sugar and lemon juice until smooth.  Drizzle over cake.  Serve and enjoy!

I’m linking up over these great blogs.

This post is sponsored by Cutie Patootie Creations. Why settle for the same “cookie cutter” party invites, when you can have something custom created for you?  Cutie Patooties has unique invitations in a variety of fun styles and themes.  And they have all the matching decorations and supplies you need to get your party on! Check out Cutie Patootie Creations today, and get started planning your perfect party!

Photobucket

Homemade Fudgesicles

I am super excited to share this new recipe with you.  I originally found it over at Joy in My Kitchen, a simply wonderful recipe blog!
And you know how it is with recipes like this; you say, “Okay. This looks good, but does it taste like the stuff we get at the store?”  My answer for this one is, “Yes!”

I’m sure someone out there could tell a difference in the taste, but I have to say that I (and even my husband, the fudgesicle fanatic) were amazed at how good these were and how close they were to the fudgsicles we know and love!  So check out the recipe and go make some this week!


Recipe for Homemade Fudgesicles:

Ingredients:
3/8 cup sugar
1 1/2 tablespoon flour
1 1/2 tablespoon cocoa
2 cups milk

Directions:  Combine the flour, sugar, and cocoa in a sauce pan, and whisk to combine.  Add milk slowly, and whisk to combine over medium heat.
Heat until mixture thickens, about 2-4 minutes over medium heat, stirring constantly with a spatula. (Note: It never got thick for me, even after 5 minutes or so, so I just removed it, and it still turned out great.)
Pour mixture into a measuring cup, or something with a spout so that it’s easy to pour into a popsicle mold.
Pour into molds (We made 7 popsicles).  Freeze overnight, and enjoy!


By the way, the popsicle tray is a Kidco Healthy Snack Frozen Treat Tray, and you get them on Amazon.  They worked out very well, and in my opinion it’s a perfect size for kids (and adults) of all ages.


This post is sponsored by The Trendy Boutique.  The place for trendy, fun, and affordable shopping!  Check out everything they have to offer from watches to photo jewelry and hand stamped jewelry.  And even design your very own flip flops and hand bags!  Find all the accessories you need  for summer and back to school!
Photobucket

Fiber One Brownie Review and Giveaway

Don’t you just love healthy snacks that also taste good? I know I do!  I’ve seen commercials in the past for Fiber One Bars and Yogurts, which are supposed to be very healthy and tasty  And now Fiber One has a new product we can all indulge in: Brownies!

Rather than focusing on the foods you can´t have – Fiber One® is giving you the opportunity to eat what you love without the guilt. New Fiber One® 90 Calorie Brownies are moist, chewy treats that let you have what you crave while helping you stay on track with your balanced diet. With 5 grams of fiber, which is 20 percent of the Daily Value of Fiber, the new brownies are a smart snacking choice.
With new Fiber One 90-Calorie Brownies, you can have an unbelievably satisfying and wholesome treat in two delicious flavors. The Chocolate Fudge brownies are made with chocolate-flavored chips and topped with a dark chocolate-flavored drizzle, and the Chocolate Peanut Butter variety contains peanut butter chips topped with a peanut butter drizzle.


My Thoughts:  I can honestly say that I LOVE these brownies!  They’re so dark, decadent, and delicious!  And I love that each brownie is 20 percent of your daily value of fiber.  As someone who doesn’t always eat a lot of foods rich in fiber (ahem), I love the idea of supplementing my fiber intake with a brownie! (Much better and easier than a pill or a drink!) 
And since these brownies are super yummy, you can actually enjoy it as a snack, while at the same time doing something good for yourself. So it’s a win-win! I’ll definitely buy these in the future, and I think I’ll even try the Fiber One bars and yogurts now!

Connect: Have you tried the Fiber One 90-Calorie Brownies? Visit Fiber One on Facebook and let them know what you think!
Buy it! Fiber One 90-Calorie Brownies are now available at your local store. For a limited time, get $1.75 off with this Coupon.

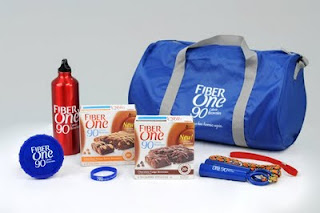
Win it!  One Simply Sweet Home reader will win a Fiber One Brownie Prize Pack, which includes the following:
  • Box of Chocolate Fudge Brownies
  • Box of Chocolate Peanut Butter brownies
  • Fiber One 90-Calorie Brownie themed duffel bag
  • Jump rope
  • Water bottle
  • Snack case
  • Headband
  • Bracelet

How to Enter! You must use the Rafflecopter form below to enter. If you have trouble seeing the form, you may enter by leaving a comment on this post.


Photobucket


Disclosure:  Prize pack and product information were provided by General Mills through MyBlogSpark.  I also received a prize pack for review purposes.  The opinions are my own.

Orange Cream Shakes

It’s super hot and humid here!  Lucky for me, I’m an indoor girl! hehe. But I still like to eat my cool summer snacks!  And I’ve had a super craving for ice cream lately.  Maybe it’s because the ice cream man drives by our house every day!
This week I’m sharing a wonderfully yummy recipe that came to me via my lovely bloggy friend Chaya of Chaya’s Comfy Cook Blog. Seriously, I made this almost immediately after I saw it!
If you love Orange Dreamsicles, Push-ups or anything like that, you’re sure to love these Orange Cream Shakes!

Recipe for Orange Cream Shakes:

Ingredients:

4 cups vanilla ice cream or frozen yogurt
2 cups orange juice
4 tablespoons milk
6 tablespoons sugar or agave
2 teaspoons pure vanilla extract

Directions:  Place all ingredients in blender.  Blend until smooth.


I’m linking up at these parties.

Photobucket