This shop has been compensated by Collective Bias, Inc. and its advertiser. All opinions are mine alone. #ReadySetSnack #CollectiveBias

Fall is such a fun time! Each year I look forward to seeing all the fun decor in stores and online, and I love breaking out my own decorations! Fall also brings a lot of great opportunity to make great snacks and treats, from football food to Halloween goodies! Today I’m excited to share a fun tutorial on how to make Scarecrow Pudding Cups using Hershey’s Ready to Eat Pudding.
These pudding cups are a great treat that you can make and serve at your child’s Halloween party or other fall events. And it is also a great activity that moms can do with kids, or elementary teachers can do with their students. Just give everyone a pudding cup and a plate of ingredients, and then let them go crazy!
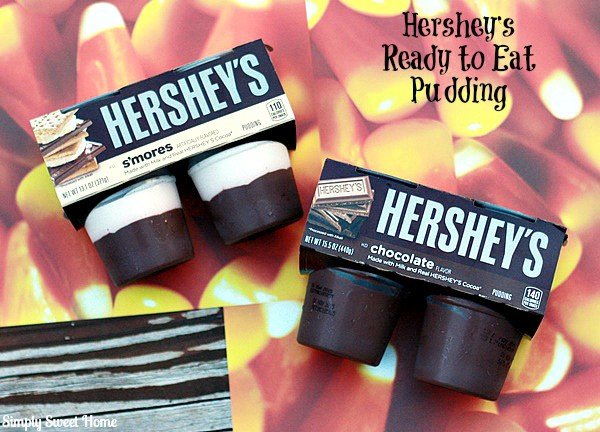
Hershey’s Ready to Eat Pudding come in packs of 4. I picked up a package of the Chocolate flavor and the S’mores flavor!
Not only are these puddings an essential for today’s activity, but they are also something great to keep in the fridge for when your kids (or Mom) needs a quick snack!
You can find Hershey’s Ready to Eat Pudding is available at Walmart.
You can find it in the dairy section, near the milk and yogurt products. Look for the special signage, calling attention to the new S’mores flavor!
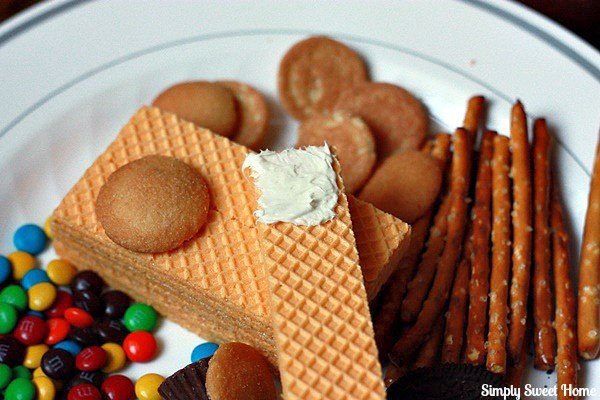
You can use just about any kind of cookies, candies, and snacks to make these adorable Scarecrow Pudding Cups. Here’s a list of what I used:
-Hershey’s Chocolate Pudding Cups
-Canned “Whipped” Frosting. (I used cream cheese flavor, but you can use any flavor you like.)
-Vanilla Cream Wafers
-Chocolate Cream Sandwiches
-Mini Vanilla Wafers or other Mini Cookie
-Mini Peanut Butter Cups
-Mini Candy Coated Chocolates
-Pretzel Sticks
To begin, take your chocolate cream sandwich cookies. Separate the cookies and remove the cream. These crumble the cookies and place them on top of the pudding cup to make “dirt.” One whole cookie (2 sides) should make just enough crumbs to cover the top of the pudding cup.
Next you will make and decorate the scarecrows that you will stick inside the pudding cups, using the whipped frosting as your “adhesive.”
I suggest the “whipped” frosting because it is extra fluffy and way easier to spread and work with than regular frosting, which usually needs to be microwaved if you want to spread it.
Now I will briefly take you through the step-by-step process of how I made each of the 3 scarecrow cups above.
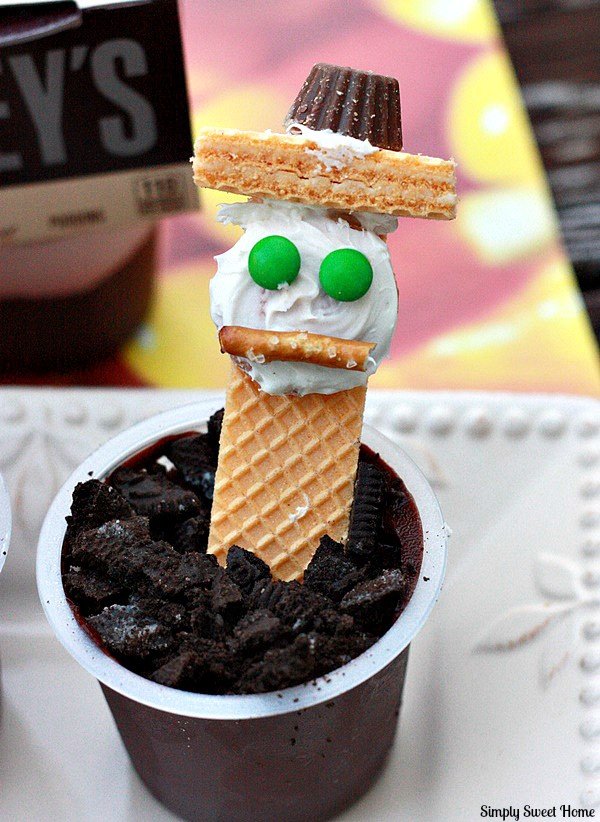
For our first scarecrow, you need to take one vanilla cream wafer, and place just a little bit of frosting near the top of one side (as show 2 pics above). This is will be where the scarecrow’s “head” will be placed. Then frost one vanilla wafer and place it on the vanilla cream wafer.
Then cut another vanilla cream wafer in half, and use frosting to adhere it to the top of the other cream wafer as shown. This is the brim of the scarecrow’s hat. Then frost the bottom of a mini peanut butter cup and place it on top of the cookie hat.
Now add the pieces for the face, using 2 candy coated chocolates and half a pretzel stick. Now your ready to stick this inside the pudding cup!
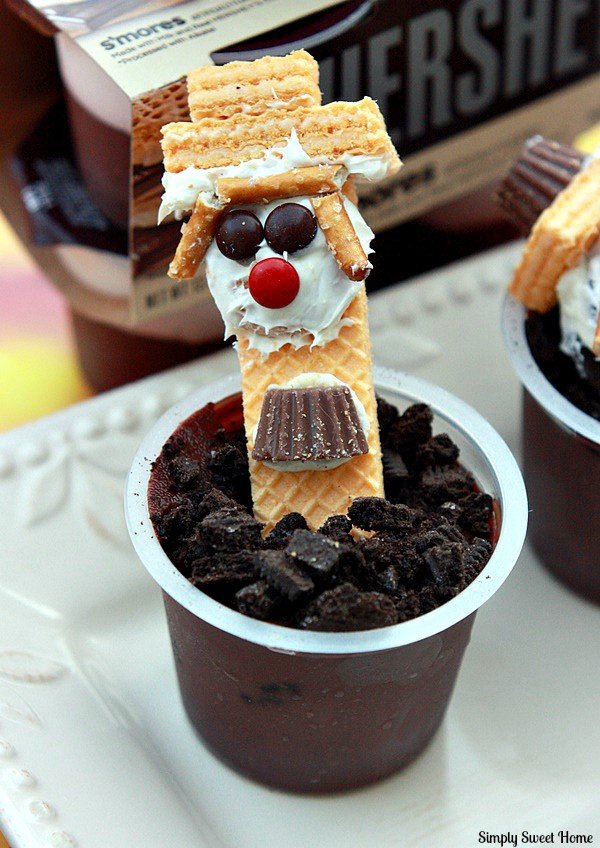
For our second scarecrow, we are going through mostly the same purposes. Attach a frosted mini vanilla wafer to a vanilla cream sandwich.
Then cut another vanilla cream wafer in half, and use frosting to adhere it to the top of the other cream wafer as shown. This is the brim of the scarecrow’s hat. After this, attach another 1/4 piece of a vanilla cream wafer on top to create the top of the scarecrow hat.
Then cut a mini peanut butter in half (from top to bottom) and adhere it to the center of the vanilla cream wafer. This will be a “button” or other “scarecrow clothing/decoration.”
Next place candy coated chocolates on top of your frosted vanilla wafer to create a cute face, and take a pretzel stick broken up in to 2 or 3 pieces and places this on the head to make hair. Stick inside your pudding cup and you’re done!
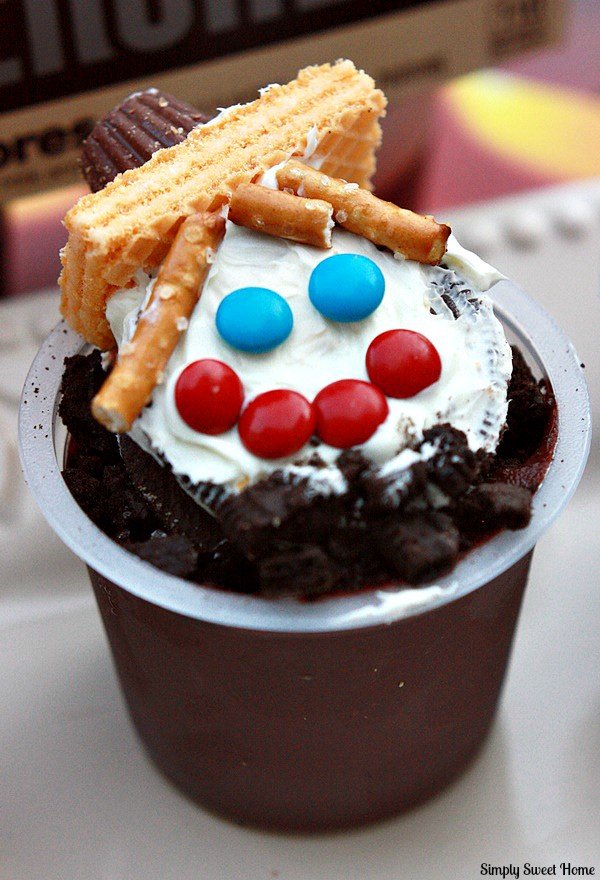
And finally we will make a Scarecrow Head. For this one, just take a regular sized cookie. (You could use any kind of cookie that will fit in the cups, but I used chocolate sandwich cookies.) Then cover the front of your cookie with frosting.
Cut a vanilla cream wafer in half and attach it to the top of your cookie, and then attach a mini peanut butter cup on top of this to make a heat.
Then break up one or two pretzel sticks in to a few pieces and arrange the pieces to make hair. And use candy coated chocolates to make a face.
Place on top of your pudding cut and that’s it!
Looking for more tutorials and recipe inspiration this fall? Take a look at this great site from Walmart and Kraft!




These look so cute!
I love this idea! What kid wouldn’t love these cute scarecrows?
Oh those are so adorable for Halloween!! I have to try these for our little one!
These are so cute and look delicious.
So cute! I saw these in grocery store yesterday. I lady was making them.
This is such a cute and easy idea. Perfect snack for my son’s class.
Cute and easy to do ideas. Lovely and yummy looking especially for kids.