Archives for 2011

Feature on MyReviewsNow.net and Kohl’s Giveaway

This is a Sponsored post written by me on behalf of MyReviewsNow.net. All opinions are 100% mine.
I love shopping online, but I rarely find something and just buy it immediately on the spot. I always have to research and put a lot of thought into a purchase before I actually click that check out button!
And apart from products like music, books, and clothing, I almost always read at least one review before deciding on a product to purchase. 
My Reviews Now (myreviewsnow.net) is a website where you can read reviews for all those products and services that you’ve heard of and have been curious about.  And then you can purchase them right on site after you read the review.
The site features a wide variety of products and services: everything from gourmet gifts like Shari’s Berries to computers and electronics, to household services and products and stores like Zale’s, Vitamin World, and Oakley.  You can also find great stuff for kids like popular video games, the Lego Store, and the Mattel store.
And right now myreviewsnow.net is giving away a $350 Kohl’s gift card.  To enter, all you have to do is like myreviewsnow.net on Facebook and tweet the following message: I love to #shopathome online!
For more information on this giveaway, please see the official rules.

Photobucket
Visit Sponsor's Site

Harvest Halloween Sponsor #1: Kelly’s Cottage Shoppe


As some of you may know, I’m participating in a Harvest Halloween Blog Hop. By the way, If you’d like to participate in the hop, you can still sign up over at Savey Spender.

For this event, I will be giving away a prize pack of items from 4 different sponsors, and each week leading up to the event I’ll be spotlighting one of these great sponsors.

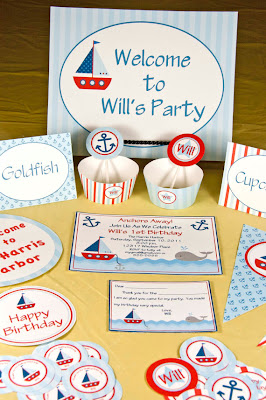
The first sponsor I have to introduce is Kelly’s Cottage Shoppe. This etsy shop offers adorable invitations and party supplies. Kelly has a variety of party themes available for boys and girls, and these can be used for birthdays, baby showers, and more!
All your party supplies will be customized to fit your party details and then delivered to you via email in PDF files. And you can order everything from banners and cupcake toppers to thank you cards, tags, and ice cream cone wrappers.

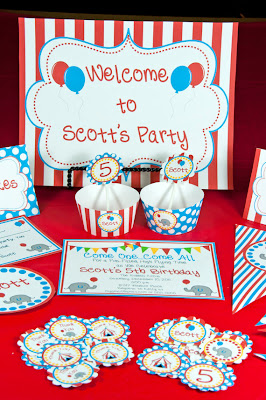
Since this feature is especially for a Halloween event, I wanted to start by sharing some of Kelly’s  fall and Halloween items. I just love her Fall Festival party pack (top picture).  It’s so cute and festive and perfect for Halloween or the whole fall season!

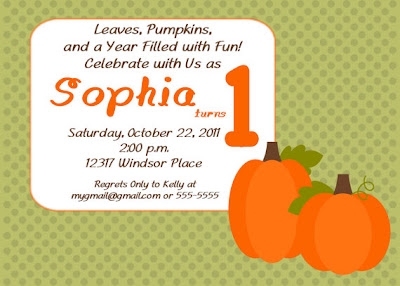
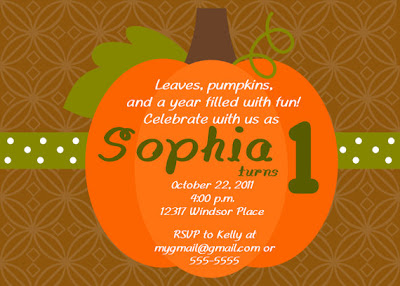
She also has some of the cutest invitations….so fun and whimsical! And I really love her fall invitation selections.  The designs are so simple and sweet!

Even though the giveaway is fall themed, I also wanted to share some of my other favorites from Kelly’s shop. I have to admit, they are all so adorable, it was very hard for me to choose, but here’s a few: 

Connect! Follow Kelly’s blog: Kelly’s Cottage Shoppe Designs and follow on Facebook.

Giveaway! For the Harvest Halloween Event, Kelly is offering a set of Halloween items (pictured above) which includes cupcake toppers, cupcake wrappers, and a banner.
How to Enter: The event and giveaway will be open for entries on October 14.

Photobucket

Disclosure: I was not paid or otherwise compensated for this post.

I’m linking up at Tidy Mom and these parties.

Pudding Cookies

One of the great things about hosting my linky party is that it gives me a chance to get recipes and ideas that I might not have otherwise found through regular blog surfing or hopping through links at other parties.  One blog that always shows up to the party with some standout eats and treats is Chef in Training. Back in July, they linked up these Pudding Cookies, which I made almost immediately.  And they were just scrumptious!

Recipe for Pudding Cookies:


Ingredients:
1 1/2 sticks butter (3/4 cup)
3/4 cup brown sugar
1/4 cup sugar
1 (3.4 oz) package instant vanilla pudding
1 tsp vanilla
2 eggs
1 tsp baking soda
2 1/4 cups flour
1-2 cups chocolate chips

Directions: Preheat oven to 350 F. Mix flour and baking soda together. Set aside.

In a large bowl, cream butter and sugars together. Add in pudding package and beat until well blended. Add eggs and vanilla. Add flour mixture slowly until well incorporated. Add chocolate chips or other add-in.

Roll into 1 inch balls and place on greased baking sheet. Bake at 350 F for 8-12 minutes.

Photobucket

I’m linking up at Tidy Mom and these parties.

Friday Favorites – Week 81

Photobucket

Hey everyone! Thanks for stopping by for Friday Favorites. I have to tell you that I’ve been so excited these last couple of weeks to see the fall and Halloween posts starting to come in! Keep the ideas coming!

Owl Cookies from The Domestic Sugar Bake Shop

Pumpkin Cinnamon Rolls from The Kitchen Cookie
Cherry Almond and Dark Chocolate Pie from The Traveling Spoon
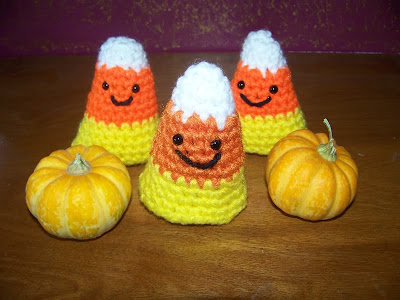
Crochet Candy Corn from A Heart Full of Love

This post is sponsored by Cutie Patootie Creations. Why settle for the same “cookie cutter” party invites, when you can have something custom created for you?  Cutie Patooties has unique invitations in a variety of fun styles and themes.  And they have all the matching decorations and supplies you need to get your party on! Check out Cutie Patootie Creations today, and get started planning your perfect party!

Photobucket

Stuff to Scrap Review


Having just started working with digital scrapbook kits over the summer, I was very excited when I got the opportunity to try out a kit from Stuff to Scrap.

Stuff To Scrap offers digital scrapbook papers, elements, premade templates, and kits, which can be used for a variety of projects. All products are delivered to you via computer download and they are in the highest quality and resolutions, all 300dpi. Papers are 12 inches x 12 inches and in .jpg format, elements are in .png format, and templates are in .png, .tiff, and .psd formats.

What I love about these kits is that you can use them in so many projects! A lot of people think the kits are just for digital scrapbooking and photo books. But you can actually use these in a number of digital and printable projects, including greeting cards, invitations, party supplies (banners, cupcake toppers, etc), gift tags, and basically anything else you can think of.

The kit I chose was the Berry Delight Kit:

This kit is one of Stuff to Scrap’s Mega Collaborations, and it contains a whopping 112 papers, 145 embellishments, and 2 sets of alphabet letters. Wow!  The main colors are a berry color (surprise) and a teal/green color.  The papers come in just about every pattern, style, and texture that you can imagine.
And the embellishments are amazing!  They include all kinds of berries, other fruits, ice cream, ribbons, bows, hearts, tags, and flowers!
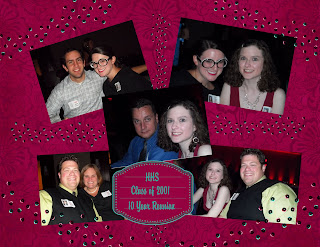
With the kit, I created this page, using some photos from my recent high school reunion.

And then I also created this graphic for my upcoming blogiversary:

Check out Stuff To Scrap and pick up some kits for your own projects!
Photobucket


Fall Letter Craft Tutorial

I love fall crafts and decor!  I made this shabby style fall craft the other day.  I guess you’d call it a wall hanging (even though I’ve hung it on the fridge).  But the concept behind my little fall letters could also be applied to banners, cards, place mats and more.


What You Need:
Black Felt 
Brown Paper or a paper sack
Faux Leaves
Sand paper (or scrapbook paper)
Black Marker or Alphabet Stickers for lettering
Hot Glue
Twine
Magnets (optional)
Directions:
1. Cut 4 squares of black felt.  Mine are 5 inches by 5 inches. 
2. Then cut 4 squares of brown paper. (I used a paper sack).  The size of the brown pieces will depend on how big your black pieces are and how big you want your black border to be.  For example, my brown squares are about a 1/4 of an inch (or so) smaller than the black squares.  But if I was using 10 inch black squares, I probably would make the brown squares about 9 inches.
3. Next crumple the brown squares to create the textured/wrinkled effect.  
4.  Use hot glue to affix the brown squares to the black felt squares.
5. Next position your leaves on top of the brown paper, and affix using hot glue.
6. Next cut out pieces of sand paper (or scrapbook paper) for your FALL letters.
7.  With a Sharpie draw a letter on each piece of paper and place them on top of the leaves using hot glue.  Or you can add stickers or chipboard letters if your prefer.

Directions and Methods for Display/Hanging
The next step depends on how you wish to use the letters.  Here are some options:
1. You could place your letters inside a frame.
2. Another option is to place the letters in a vertical or horizontal row and attach a piece of twine to the back of the letters using hot glue. (Or poke holes in the felt and weave the twine through to connect the letters). And then tie a piece of twine at the end(s) for hanging. (as in the very first picture)
3. As a third option you can attach magnets to the back of the letters for refrigerator hanging. (or you could even use tape).
4. Or you can do a combination of #2 and #3, which will allow you to hang this of the fridge (or somewhere else) in  a variety of ways.  (See examples below)

Photobucket

I’m linking up at Tidy Mom and these parties.

Z-Access 3D Display Frame Review and Giveaway

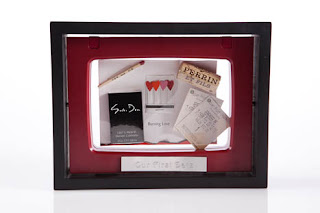
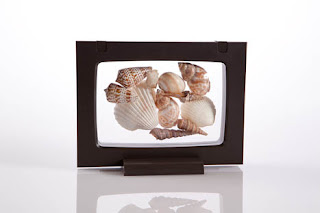
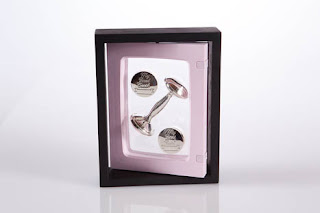
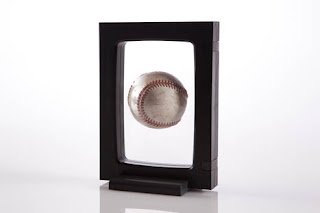
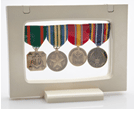
Today I’ve got a great new display frame to share with you. The Z-Access 3D Rotating Display Frame is the perfect way to showcase your favorites items.  You can creatively display family photos and keepsakes, sports memorabilia, awards, collectibles, and more!

“With the Z-Access Display Frame  showcased treasures can be seen and felt from a variety of angles, while staying safely protected from moisture, dust and fingerprints – an interactive display experience display cases made with rigid glass or acrylic can’t offer! What sets the Z-Access™ Display Frame apart from traditional frames, display cases and shadow boxes, is its clear flexible frame inserts which gently conform around objects placed between them. The puncture-resistant, dual inserts fit securely within the hinged frame enabling treasured objects of virtually any shape, to be suspended in full view. Don’t let those treasured life memories stay tucked away another day, proudly share them with your family and friends by prominently displaying them in the Z-Access Display Frame today!”

The frames come in 3 different types: The 6″x4″ 3D Stand Alone Frame, the 6″x4″ Slim Line 3D Rotating Frame, and the 6″x4″ Executive Rotating Frame in Frame.
Within the 6” x 4” frame size you can display items with volumes up to thirty-seven cubic inches (approximately items 5” x 3” x 2.5”), and the frame can hold items weighing up to three pounds.

Here’s a demonstration to show you how easy it is to place your favorite items inside your frame:

My Thoughts: As someone with a lot of collectibles and keepsake items, I love this frame! I normally put my keepsakes in my China cabinet, but with this frame I can now take select items and display them on my desk, a shelf, or any other area of the house for better viewing, and I don’t have to worry about them collecting dust.

I also love how quick and easy it is to place your items in the display frame.  It’s much easier than mounting your items in traditional shadow frames, which often requires using adhesives that can damage your collectibles. And the Z-Access frame you can remove your items from the frame at any time.  And it’s also more convenient and way less expensive than sending your items off to be professionally framed.

If you’re looking for a better way to display your memories and collectibles, you should definitely consider this frame!

Buy it! You can purchase all Z-Access Display Frames online at Displayit3D.com.

Connect:  Also, check out DispalyIt3D on Facebook and Twitter.

Win it! One Simply Sweet Home reader will win a Z-Access Display frame.

Mandatory Entry:  To enter, please use the Rafflecopter form below.


Photobucket

Buffalo Chicken Dip

With football season in full swing, this week I’ve decided to share one of our favorite dips for football snacking.  I first made this dip for the 2008 Super Bowl, and at that time I served it cold.  It wasn’t until the last couple of times I made it, that I decided to heat it in the microwave.  And I have to say that we enjoy it either way.  And you can also bake it in the oven if your prefer. So it’s a very versatile and tasty treat, and it’s also fast and convenient! Enjoy!

Recipe for Buffalo Chicken Dip:
Ingredients:
2 (8 oz) blocks of cream cheese
1 (10 oz) canned chicken breast
1/2 bottle Frank’s Hot Sauce (buffalo)
1 to 1 1/2 cups shredded cheddar cheese
Directions: In a Pyrex bowl or 8×8 casserole dish, combine cream cheese (softened) with hot sauce until well blended.  Take canned chicken and drain off the juice. Then use a fork to break up the chunks into shreds. (If you prefer, you may also use a cup of freshly cooked chicken, shredded.)  Fold chicken and 1/2 cup to 1 cup of shredded cheddar cheese into cream cheese mixture. After the dip is well blended, top with 1/2 cup of cheddar cheese.
At this point you can serve the dip cold if desired.  Or for hot dip, place in microwave for 3-5 minutes (or until heated throughout) OR bake at 350 for 20-25 minutes.

Serve with tortilla chips, crackers, or veggie sticks.  (Refrigerate left overs and reheat in microwave if needed.)

Photobucket

I’m linking up at Tidy Mom and these parties.

Friday Favorites – Week 80

Photobucket

Friday Favorites time! Before we get to the party, I have a couple of quick notes. First off, the My Memories Giveaway is still open and has a very small amount of entries. So please check it out and enter to win this $40 software package!
Also, this Friday I’m guesting posting at Meremade, as a contributor to their Back To School Month, and I’ll be sharing these Chocolate Peanut Butter Cereal Bars:

So please stop by Meremade to check out all the fun guest projects and to get this recipe!  Now on to this week’s features!
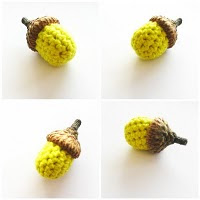
Crochet Acorns from Annemarie’s Breiblog
Fall Wreath from Days of Chalk and Chocolate
Felt Owls from The Iowa Farmer’s Wife

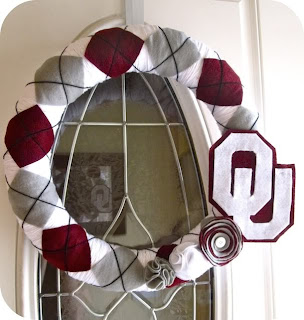
Oklahoma Wreath from Simply Living

This post is sponsored by Cutie Patootie Creations. Why settle for the same “cookie cutter” party invites, when you can have something custom created for you?  Cutie Patooties has unique invitations in a variety of fun styles and themes.  And they have all the matching decorations and supplies you need to get your party on! Check out Cutie Patootie Creations today, and get started planning your perfect party!

Thanks for stopping by for the party! I can’t wait to see your posts!

Photobucket

Fall Leaf Jar

At Christmas I just love jars filled with Christmas balls, so last year I took the idea and applied it to fall. 
It turned out really cute, and the best part of all is that I didn’t have to spend a dime. I already had the gold Christmas balls that I used.  And the leaves actually fell off of some fall garland that I had. Rather than throw them away, I figured why not use them for craft materials!

What You Need:
A Glass or Plastic Jar(s)
Christmas Balls in Gold or Fall Colors
Faux Fall Leaves
Or other fall-ish items (gourds, etc.)
Directions:  Just layer your balls and leaves inside your jar as desired.  I suggest starting with a few balls and then place your leaves in and around them as a filler.

Photobucket

I’m linking up at Tidy Mom and these parties.