Today we are sharing Christmas Crafts for the Holly Bloggy Christmas. You can link up your project with Nicholette and Vanessa at Craft Envy.
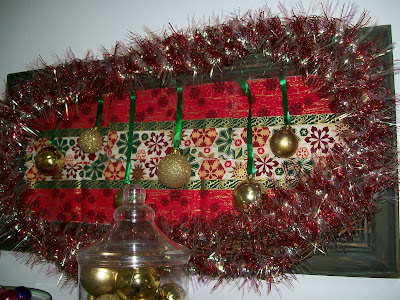
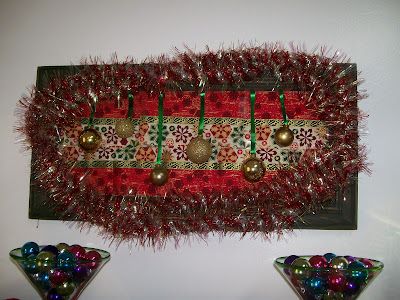
I think you’ll find my project very interesting. I had created this really cute Christmas display in my kitchen, but unfortunately it was set right in front of this apple sign, which as cute as it is, has nothing to do with Christmas. I didn’t really want to take it down, and I didn’t have anything I could replace it with either. So I got to thinking of ways that I could cover it up temporarily during the Christmas season. (After all, how can I share my cute Christmas display with my bloggy friends if there’s a picture behind it that doesn’t even match. Haha!)
So after going through a few ideas in my head, I came up with this idea that resulted in the piece of art that you see here. In my tutorial, you’ll see how I created this temporary piece of art with my favorite office supply (tape), but I’ll also give you some instructions to help you create a more permanent (and I would also say, a bit more conventional) piece of Christmas art!
What You Need:
Wall Art, Sign, or Picture Frame
Fabric or scrapbook paper
Ribbon
Christmas Balls
Garland
Scissors
Glue, tape, and/or hot glue
Wire & wire cutters (optional)
Step 1 – Find a piece of art to cover. This may be something that’s already in your house, which you will cover temporarily. Or you can find something to cover permanently. A picture frame or old piece of art that you don’t want would be great. And you can always find something cheap to use from the thrift store. It doesn’t matter what it looks like because you are going to cover it anyway.
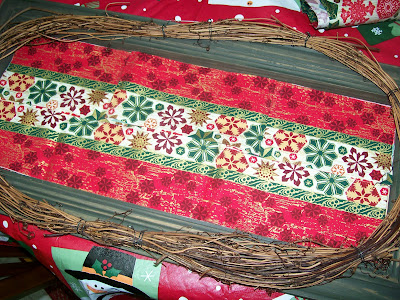
Step 2 – Measure your fabric or scrapbook paper to fit the center of your frame or piece of art. Then attach it to the piece of art. Use mod podge or glue stick to create a permanent piece of art or use tape to create something temporary.
Step 3 – Next add your garland. For my particular piece, I put the garland around the brown vine on my sign. To attach it to the vine, it used little pieces of wire and tied it around the garland and the vine. But more than likely you’re piece will not have this vine. So your best option would be to use hot glue to bond the garland to the frame itself. (But if you’re like me and don’t want to permanently alter your piece of art, I’d suggest skipping this)
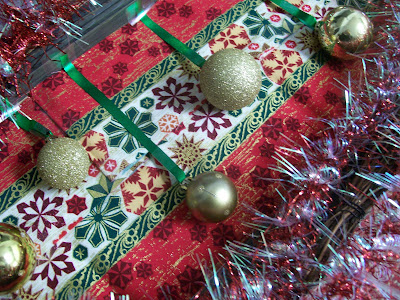
Step 4 – Cut out some ribbon. This will be used to hang the balls on your piece of art. You’ll need to cut them in varying lengths. You’ll want some of the balls to hang near the middle, while some will be higher, and others will be lower. Use your piece of art to get a good idea of what sizes you need.
Step 5 – Now loop the ribbons through the balls. To attach them you can either tie a small knot or you can use hot glue or tape to affix the ribbon to itself once it is looped through.
Step 6 – Attach the balls to your piece of art. Again for my temporary piece, I simply used tape to attach the ribbon to the frame. And I was able to place it in such a way that you can’t even tell that it’s taped. But if you want something permanent, you should attach the ribbons with hot glue.
Now you should have a fun piece of Christmas wall art that you can use year after year (or just for this year)!
I’m also linking up to these weekly parties.


That looks great! Good job!
What would you do with a $75 gift card? I have a giveaway on my blog right now for just that!
Come on over and enter!
Hello Jerri,
Thanks for stopping by.I love you DIY decorations.Hand made things are always special!
Super cute!! Way to use what ya got!! Great job!
Merry Chrisrmas and Happy New Year 2011.
Best Wishes and Happiness.
follow you from blog hop.
Nan.
http://beonefineday.blogspot.com/2010/12/follow-me-monday-dec-202010.html
You are so clever! Thanks so much for joining our Home for the Holidays link party! Merry Christmas!
Jerri,
Thank you so much for sharing your creativity and talent on "A Little Birdie Told Me…" Tuesday at Rook No. 17!
Friends who link-up to tomorrow’s party will have a chance to win a $25 gift certificate to Hodgson Mill, so please feel free to stop by and join in the fun & inspiration!
Warmest wishes,
Jenn